.png)
How to submit an Expense
💡Assigning an expense to the correct job keeps your job costings accurate. This article covers how to create and submit an expense in Loop Logics.
Steps:
Start a New Expense
-
From the job, select Expenses from the left-hand menu, then select New Expense.
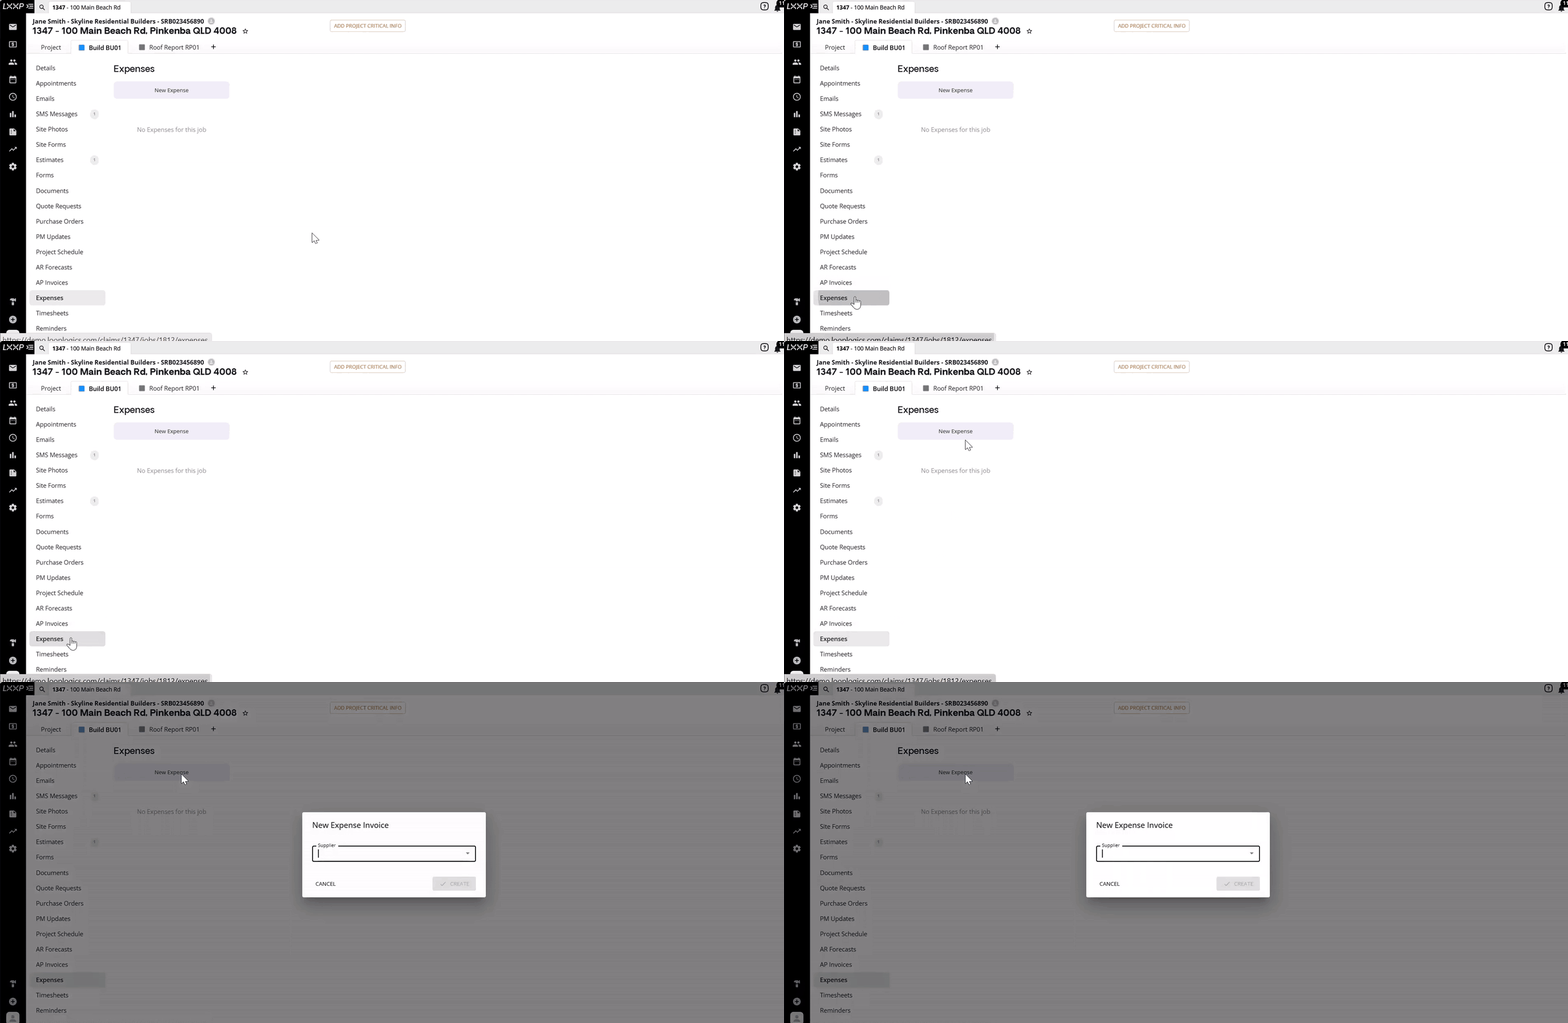
- In the New Expense Invoice window, select the supplier from the drop-down, then select Create.

Enter the Expense Details
-
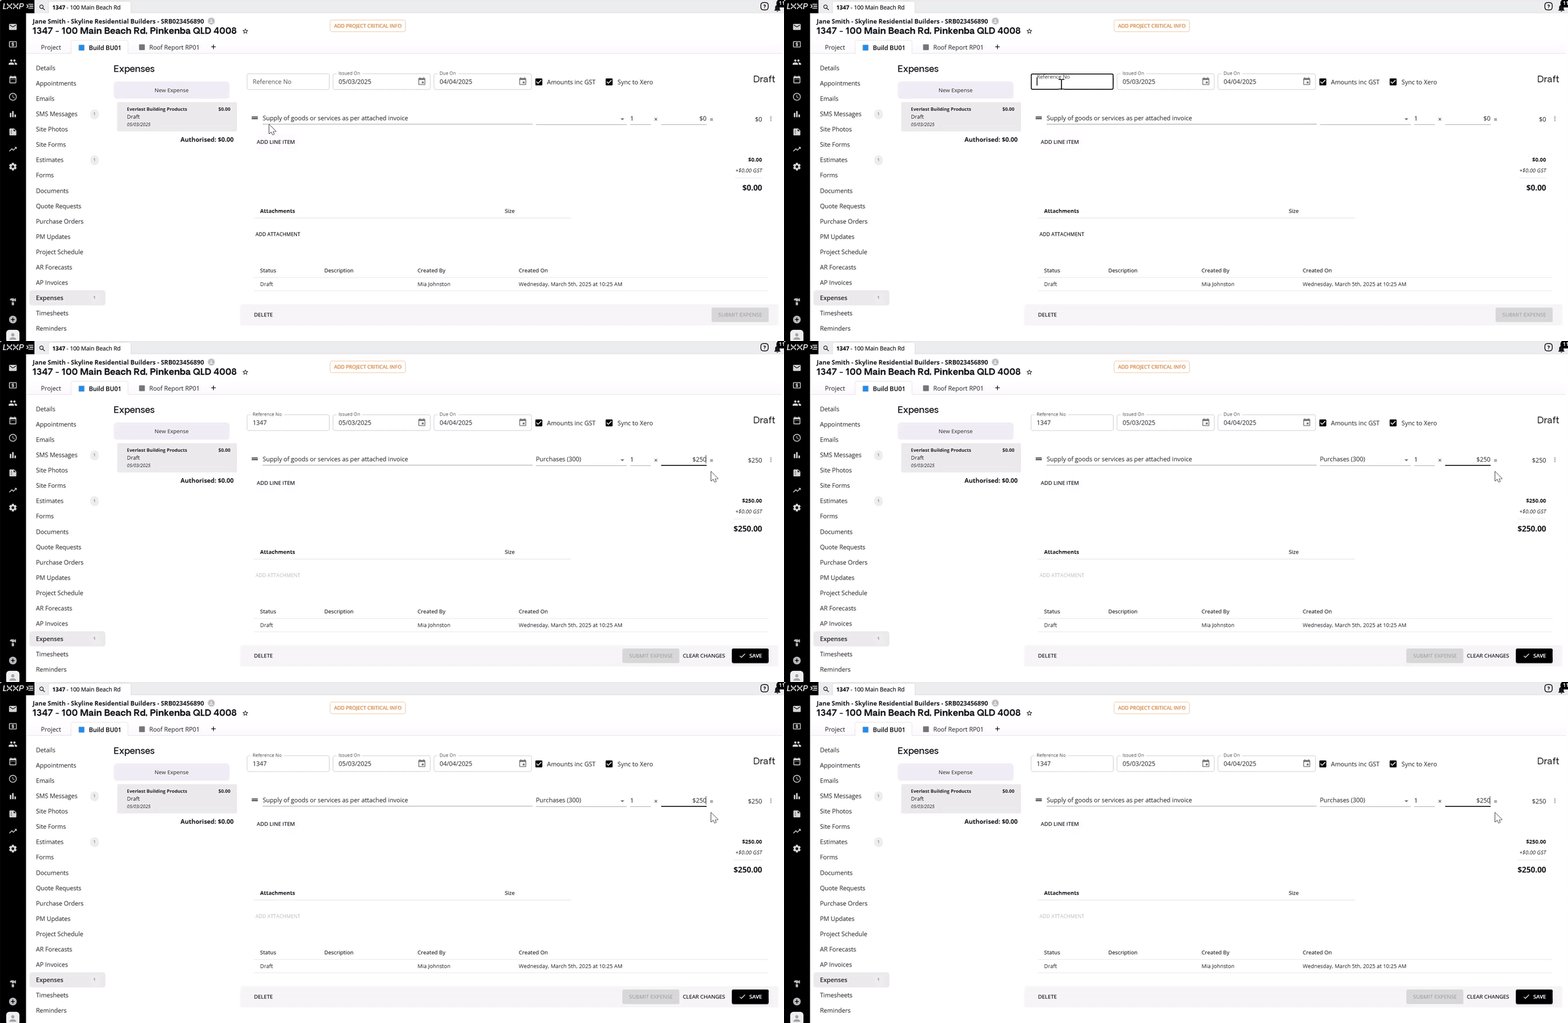
On the draft expense screen, enter a Reference No, Issued On date, and Due On date.
-
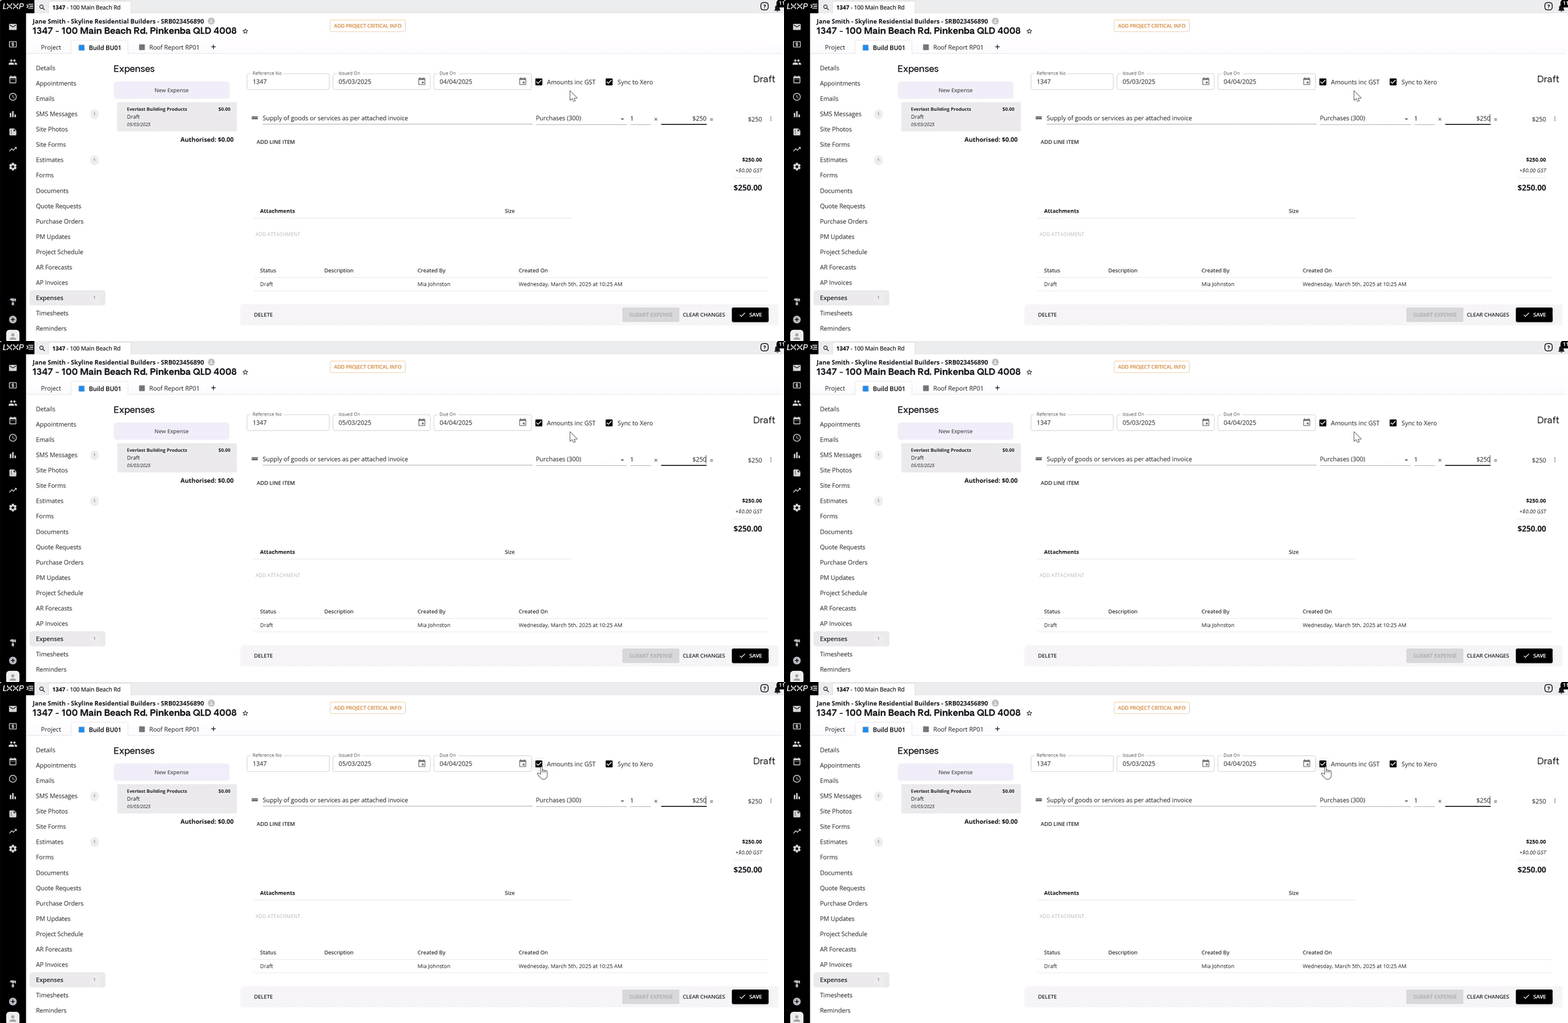
Amounts inc GST is ticked by default, so line item amounts already include GST. Untick this box if you don't want GST included.
-
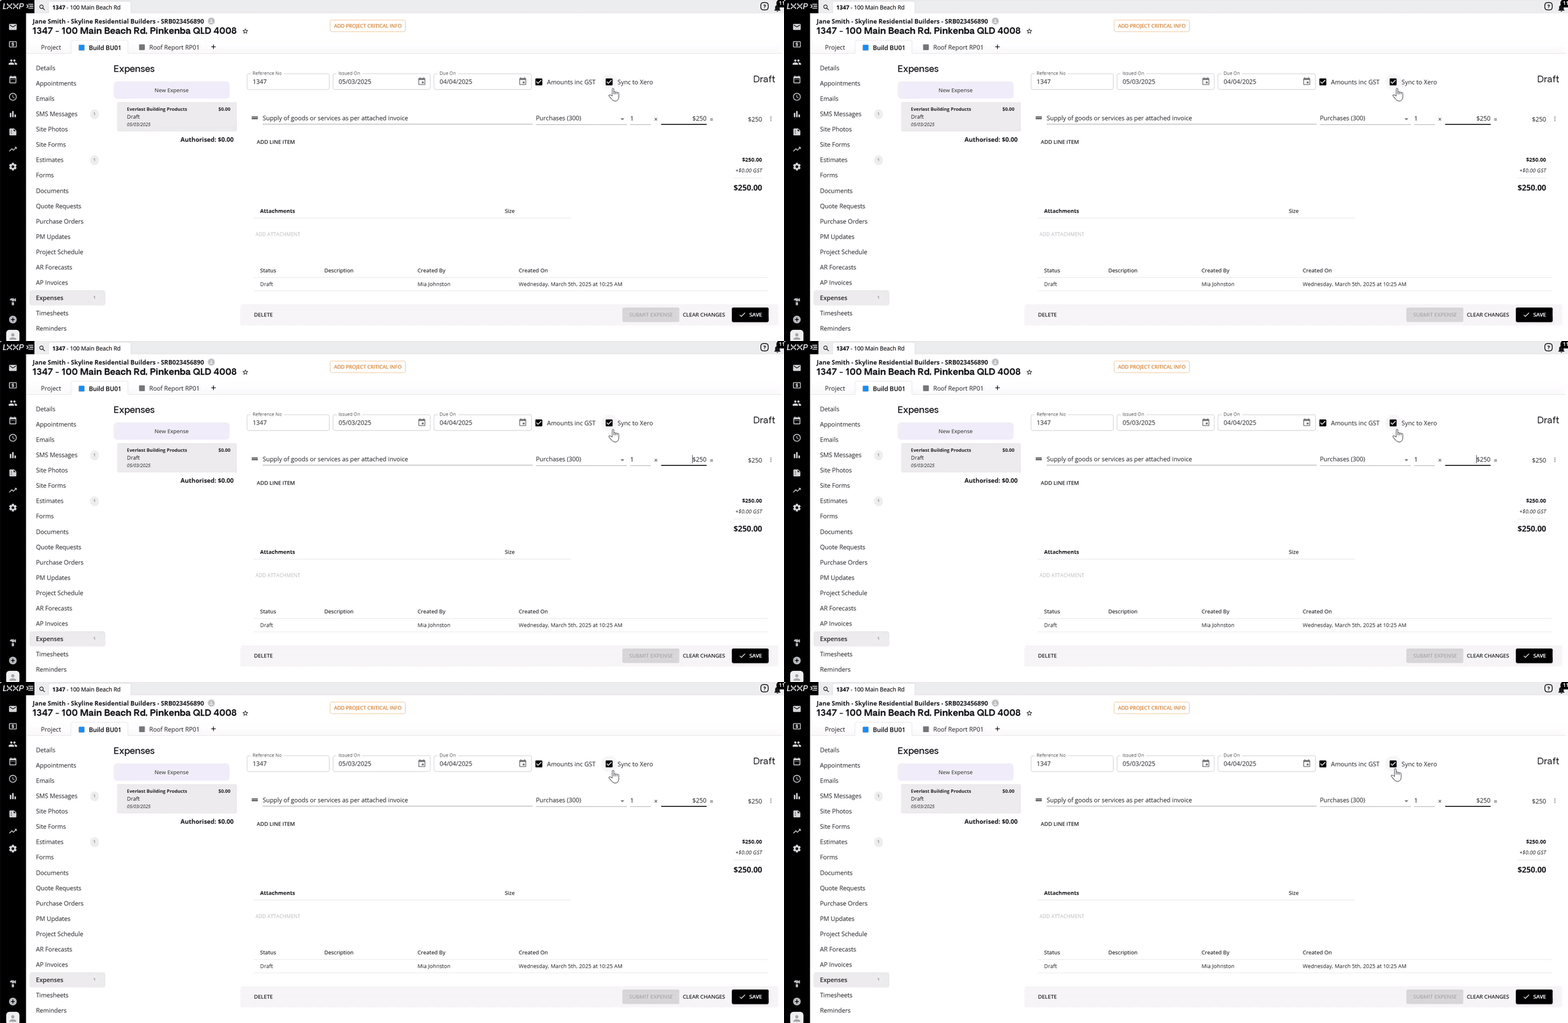
Sync to Xero is also ticked by default, so the expense will automatically sync to your linked financial software once submitted. Untick this box if you don't want this to happen.
- Enter the line item details: description, account, quantity, and price. Select Add Line Item if you need to add more than one.

- Select Save.

Attach a receipt and submit
-
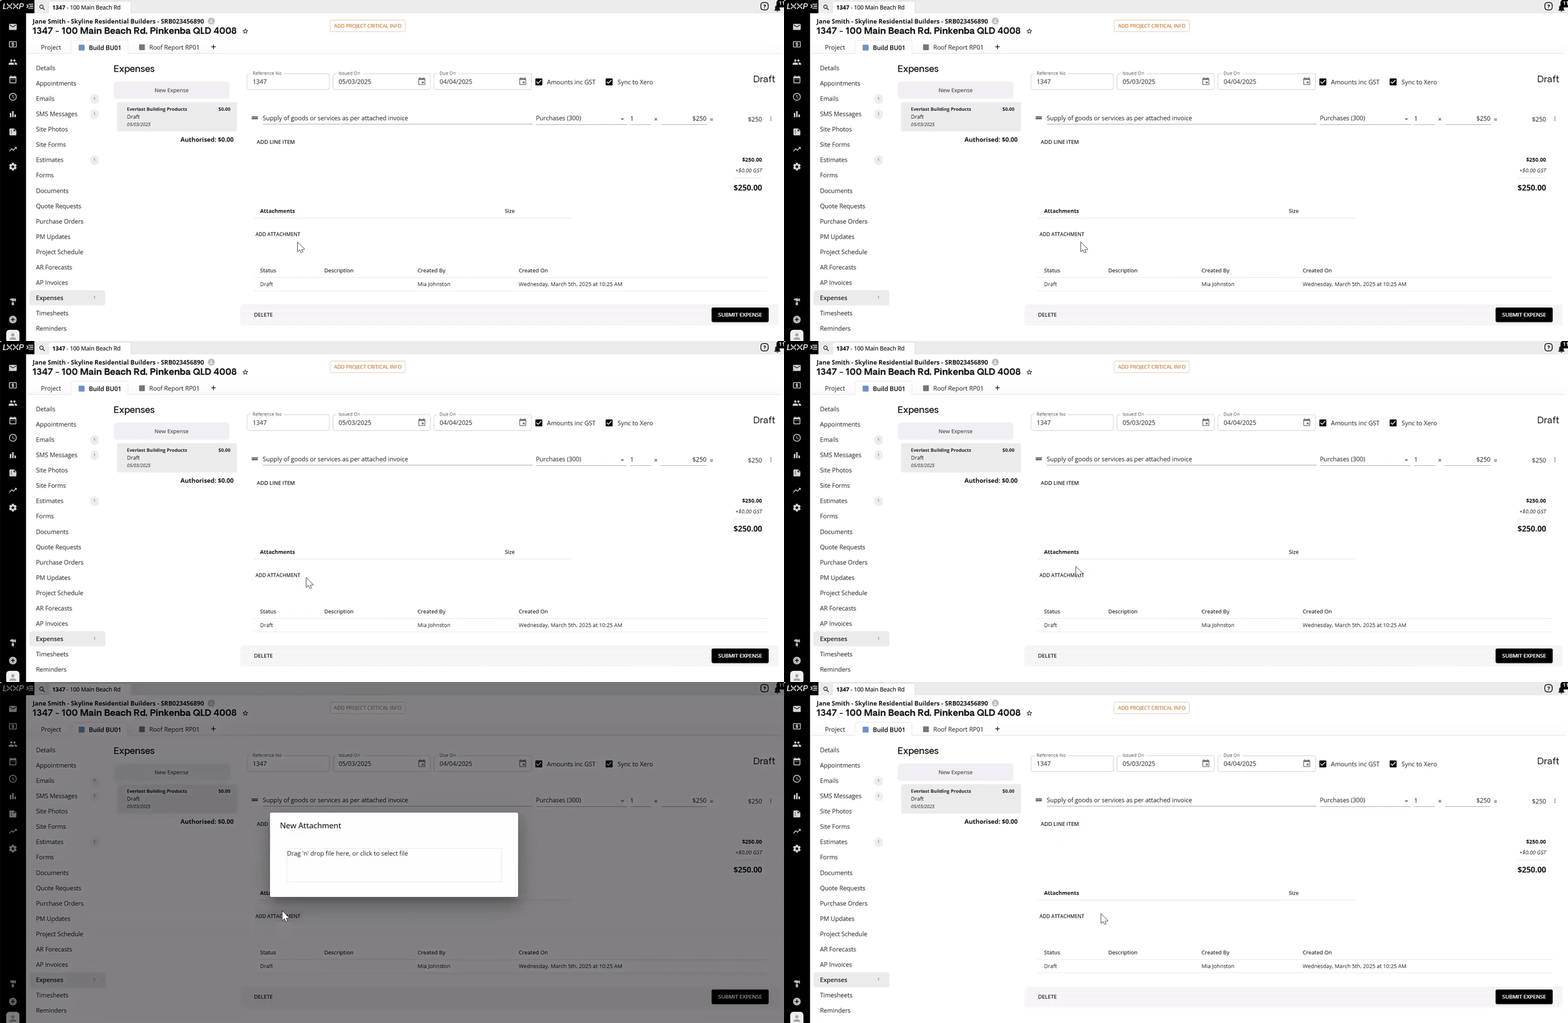
If you need to attach a tax receipt or other document, select Add Attachment, then drag and drop the file or click to select it.
-
Once you've entered everything, select Submit Expense.
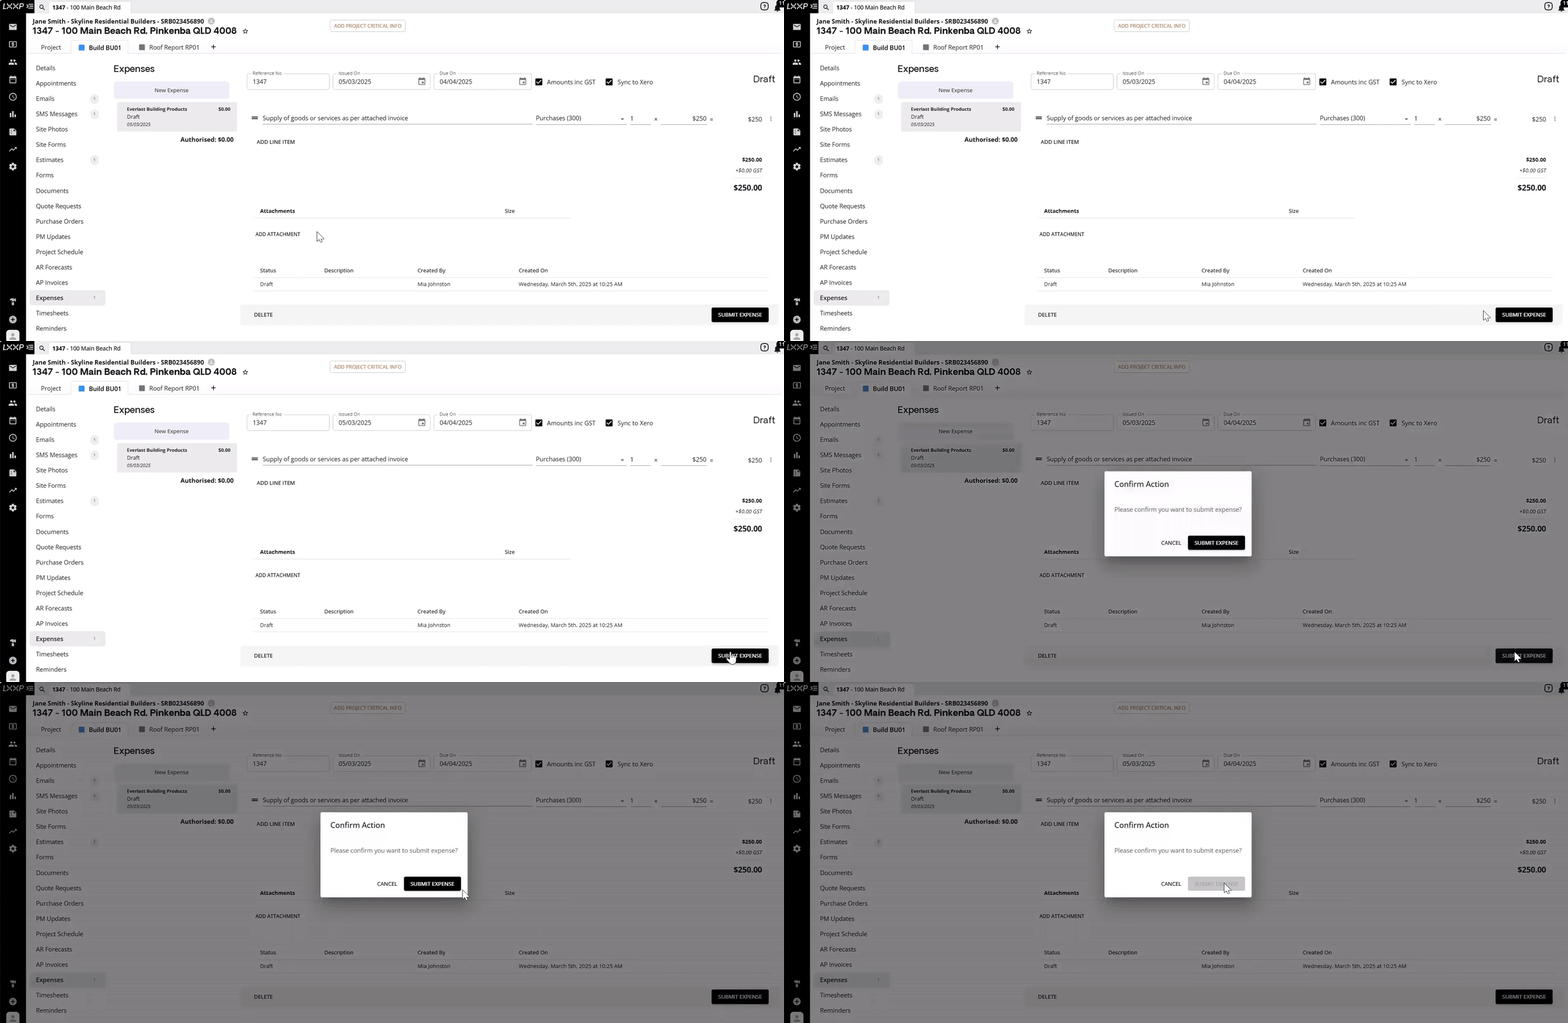
- The expense's status updates to Submitted, and it's now awaiting authorisation.

FAQ
What does the "Amounts inc GST" checkbox do? It's ticked by default, meaning the line item amounts you enter already include GST. Untick it if you'd rather enter amounts exclusive of GST.
What does the "Sync to Xero" checkbox do? It's ticked by default. Once the expense is submitted, it will automatically sync to your linked financial software (such as Xero). Untick it if you don't want this expense to sync.
Do I need to attach a receipt before submitting an expense? Attaching a tax receipt or other document is optional, (but recommended) use Add Attachment to add it before selecting Submit Expense.
❓Need Help
If you have questions or need assistance, use the chat box in the bottom-right corner to contact the Loop Logics support team or email support@looplogics.com