.png)
How to Create a Project
👉A project in Loop Logics is the record for a job address, it holds the client and customer details, site information, and the default job that starts the job's workflow moving.
Setting this up correctly from the start matters: the division, workflow, and role allocation you choose here determine how the job progresses through Loop and who's responsible for each stage.
Steps:
Start a new project
- At the bottom left of your screen, select the + icon.
- Choose the project type: Import Project, Residential Project, Commercial Project, or Private Works.

Enter the client, insurer, or ELA details
- Under Client / Insurer / ELA, select the Instructing Client and enter the Reference.
- If applicable, select the External Loss Adjuster and enter an Additional Reference.

Complete the project details
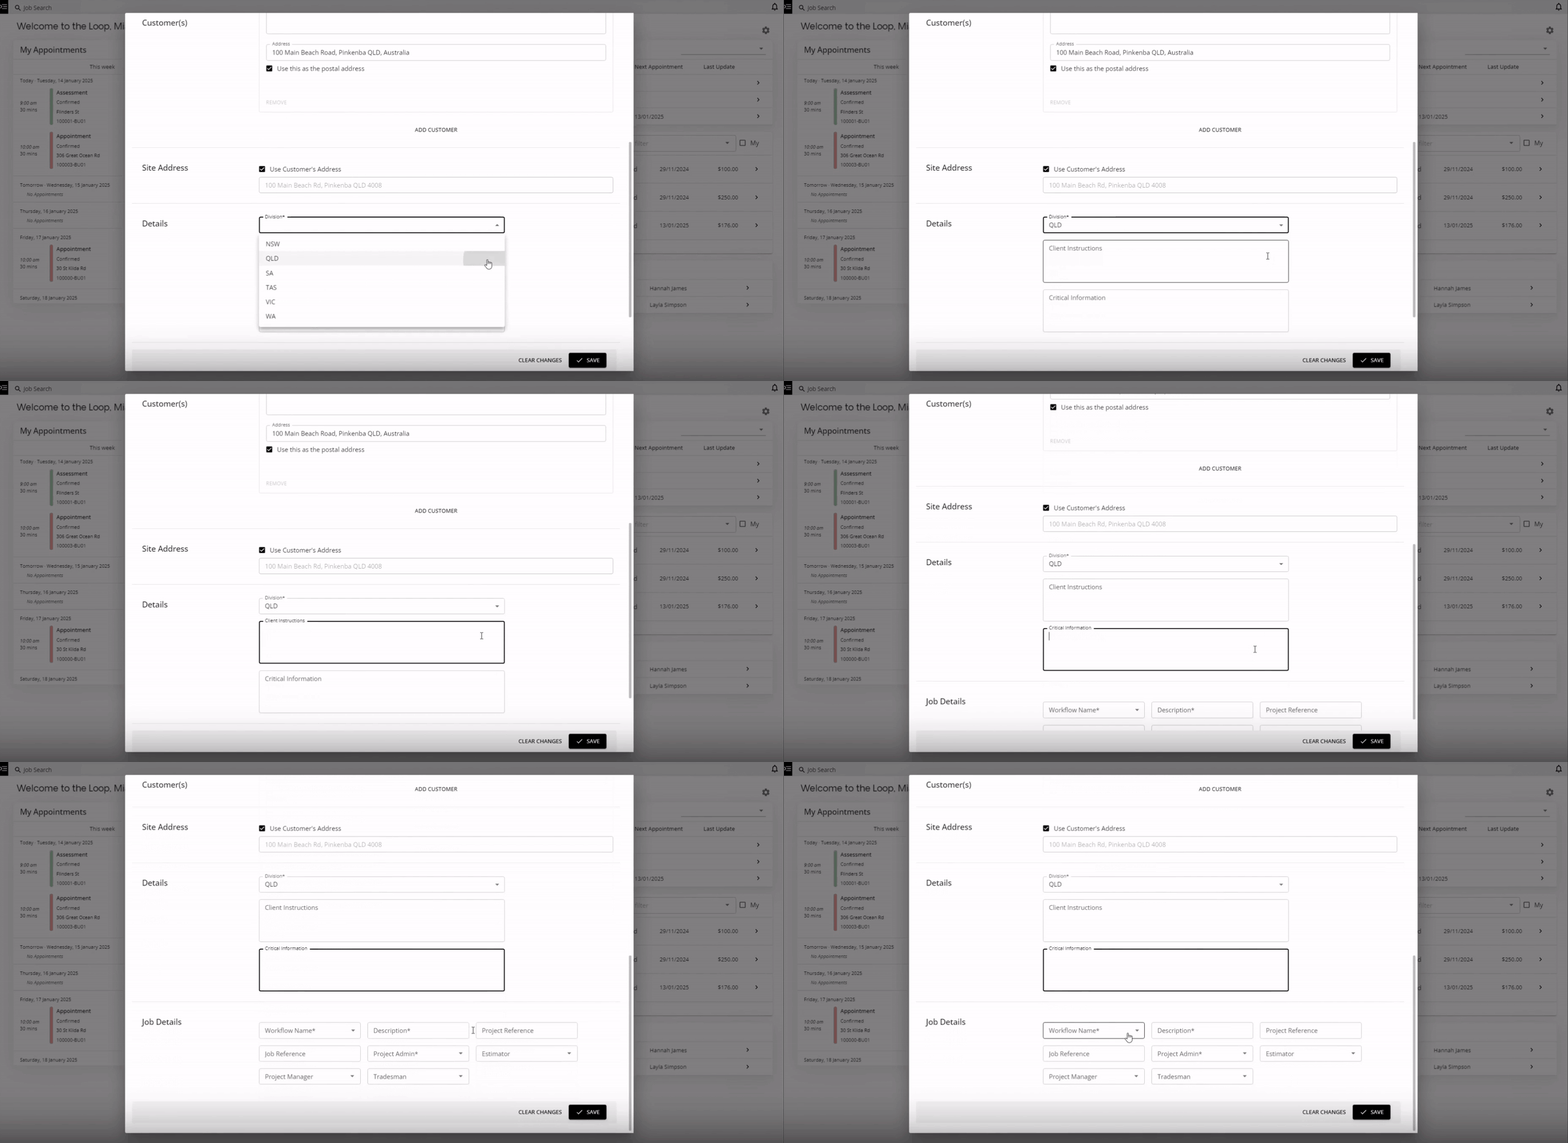
- Select the Division. Divisions are typically set up by state or by business division (for example, building or restoration) and are configured at an admin level.

- Choose Metro, Regional, or Rural.
-
Select a Specific Client if one applies, then the Peril and, if relevant, the Catastrophe this project relates to.
- Enter the Excess amount, and use Collect Excess if it needs to be collected on this job.
- Enter the Loss Date.
- Add any Client Instructions or Critical Information the team needs to be aware of.
Set up the default job
- Under Default Job, select the correct Workflow Name. For example, Assessment & Repair, Desktop Build, Makesafe, Restoration, or Specialist Report.

- Enter a Description and, if you have one, a Job Reference.

- Assign the relevant team members: Case Manager, Estimator, and Project Manager. This step matters the workflow and role allocation determine how the job moves through Loop and who's responsible for each stage.

Add the customer details
- Under Customer(s), enter the customer's title, first name, and last name.

- Choose the preferred contact method and enter the mobile, home, or work number, plus an email address. Add any notes if required.

- If the mobile number, name, or email matches a customer, company, or individual already in the platform, Loop will show a possible match — select it rather than re-entering the details.
- Enter the customer's address. This is used as the postal address by default; untick Use this as the postal address if a different postal address is needed.

- If there's a different contact on site, select Add Site Contact and enter their details.
Confirm the site address
- Under Site Address, Loop carries across the customer's address automatically. If the site address is different, tick Override Address and enter it.
- Once the address is set, Loop displays the map location so you can confirm it — you can also select Driving Directions from here.

Set reporting options and save
- Under Reporting Options, select Escape of Liquid or Flood Claim if either applies to this job.
- Review all the details you've entered, then select Save to create the project.

💡Once saved, Loop Logics opens the new project screen with the job tab for your default workflow already created, ready for you to start working.
FAQ
What's the difference between the project types (Residential, Commercial, Private Works, Import Project)? Residential and Commercial reflect the type of property the job relates to, Private Works covers jobs outside the standard insurer-instructed flow, and Import Project is used to bring in a job from a PDF rather than entering it manually.
Who sets up the divisions available in the Division dropdown? Divisions, typically by state or by business division such as building and restoration are configured at an admin level, so speak to your Loop administrator if you need a new one added.
What happens if I enter a customer's details and they already exist in Loop? Loop will show a possible match screen based on the mobile number, name, or email you've entered select the existing match instead of creating a duplicate record.
Can the site address be different from the customer's address? Yes, Loop Logics uses the customer address for the site address by default, but you can tick Override Address under Site Address and enter a different one if the job site isn't the customer's address.
What happens to the Default Job workflow and team I selected after I save? Loop Logics creates the first job tab on the project using that workflow, with the Case Manager, Estimator, and Project Manager you assigned already attached, you can add further job types to the same project afterwards if needed.
❓ Need Help?
If you have questions or need assistance, use the chat box in the bottom-right corner to contact the Loop Logics support team or email support@looplogics.com