
Module 1: Supervisor - Creating a Purchase Order from an Estimate
💡This article covers how to raise a purchase order from the authorised estimate on a job and send it to a subcontractor. It keeps the work you engage subcontractors for tied to the scope you've already authorised.
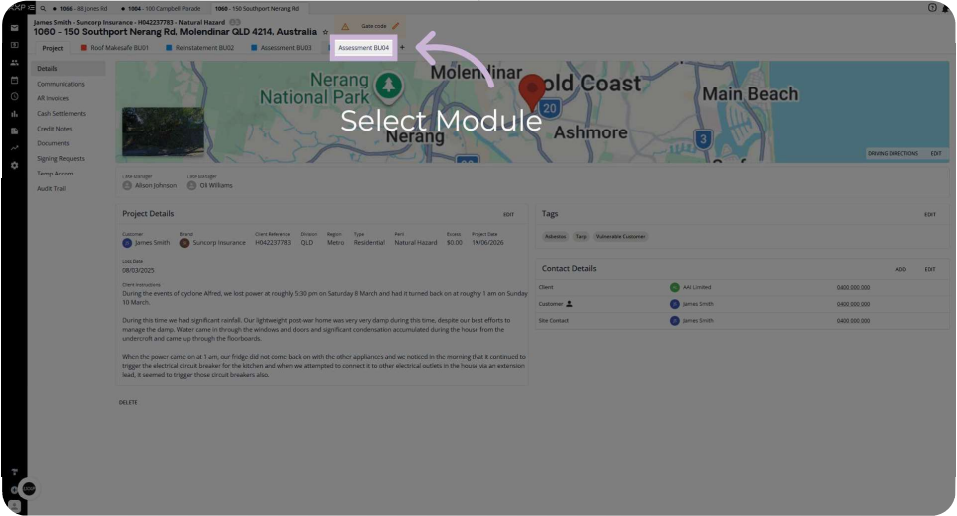
Step 1: Open the Job Module
From the job, click the Module tab to open the relevant job.
Details:
- The job opens on its Details view, with the map, Project Details, Tags and Contact Details shown
- The job's sections are listed in the left-hand menu
Step 2: Open Purchase Orders
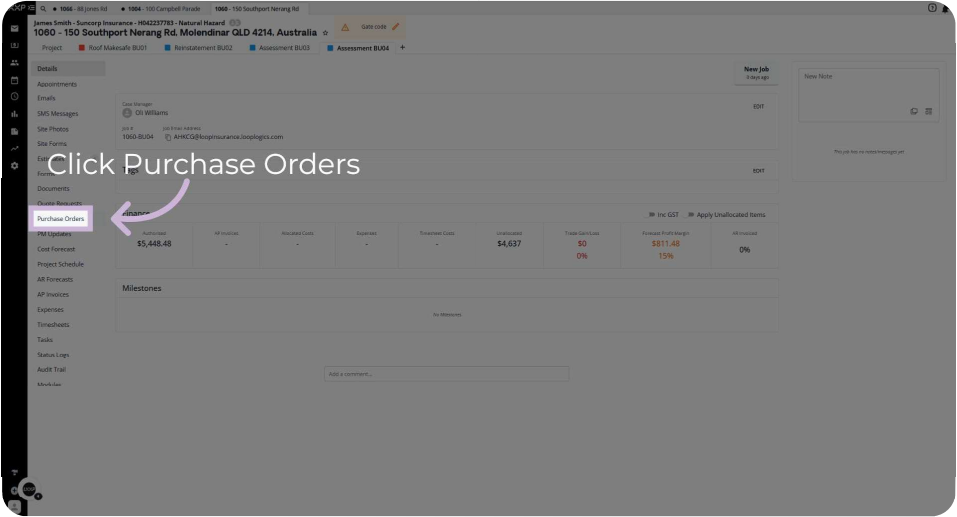
Click Purchase Orders in the left-hand menu to open the purchase orders area for the job.
Details:
- The Purchase Orders section lists any orders already raised for the job
- A new job with no orders yet shows an empty list
Step 3: Start a New Purchase Order
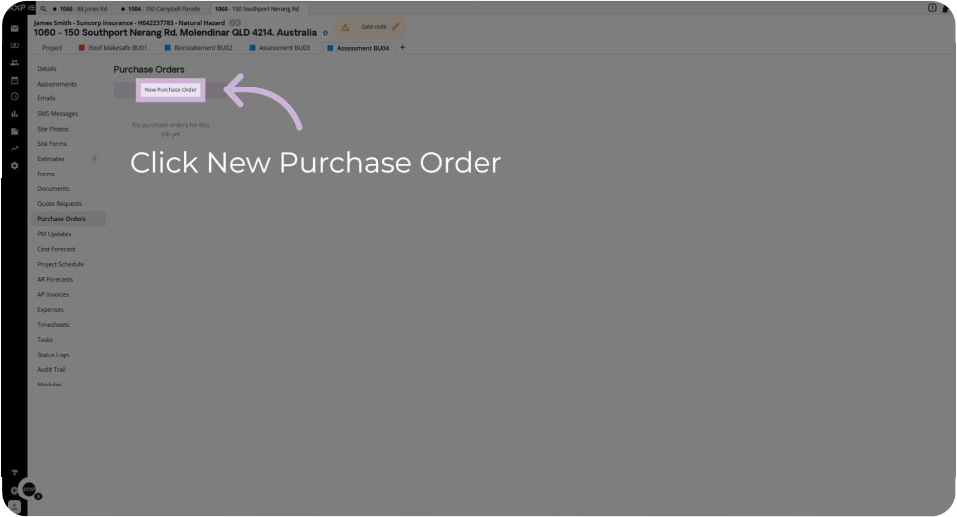
Click New Purchase Order to start a new order.
Details:
- The button sits at the top of the Purchase Orders section
- A choice of how to build the order appears, including From Scope
Step 4: Choose From Scope
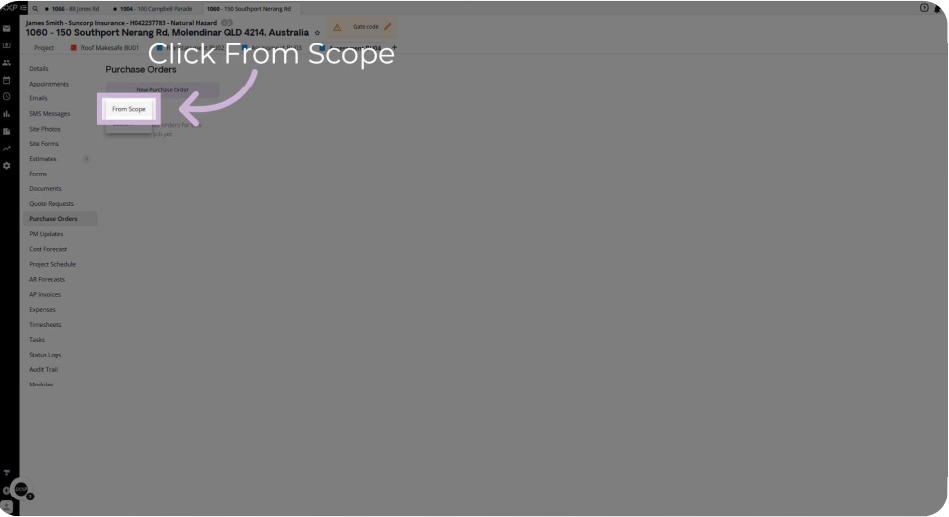
Click From Scope to pick items from the authorised estimate on the job.
Details:
- Only items from the authorised estimate are available to choose from
- Authorise the estimate first if the items you need are missing
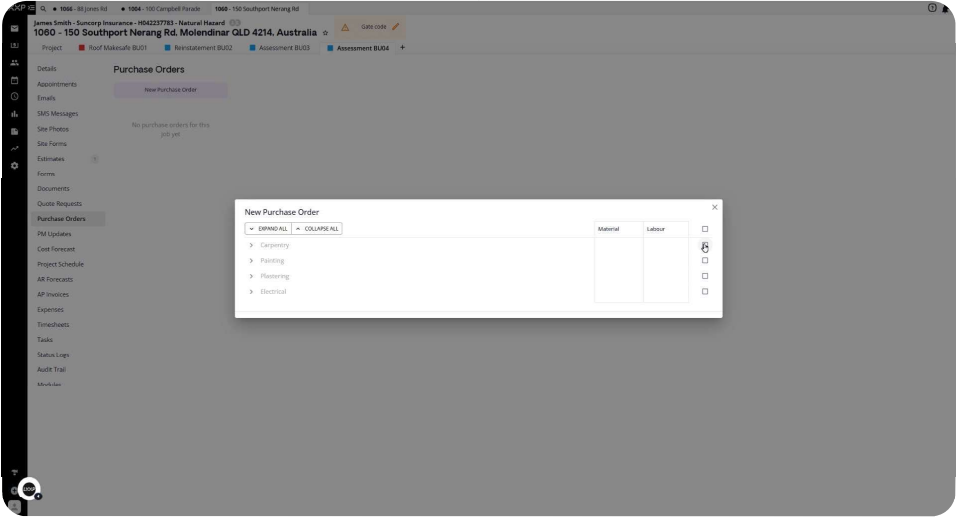
Step 5: Select the Scope Items
In the New Purchase Order window, select the scope items required for this order.
Details:
- Scope items are grouped under headings, with Material and Labour columns beside them
- Select only the items this subcontractor is being engaged for
Step 6: Confirm the Purchase Order Amounts
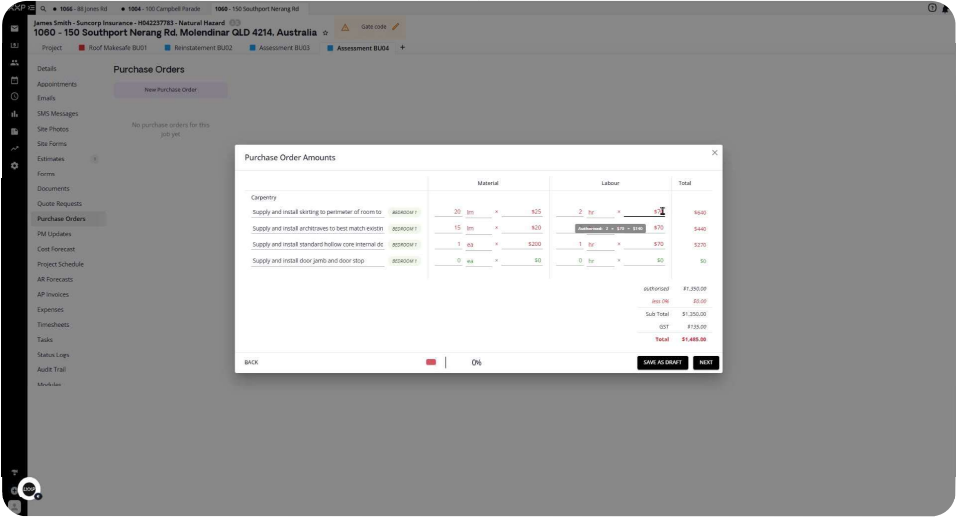
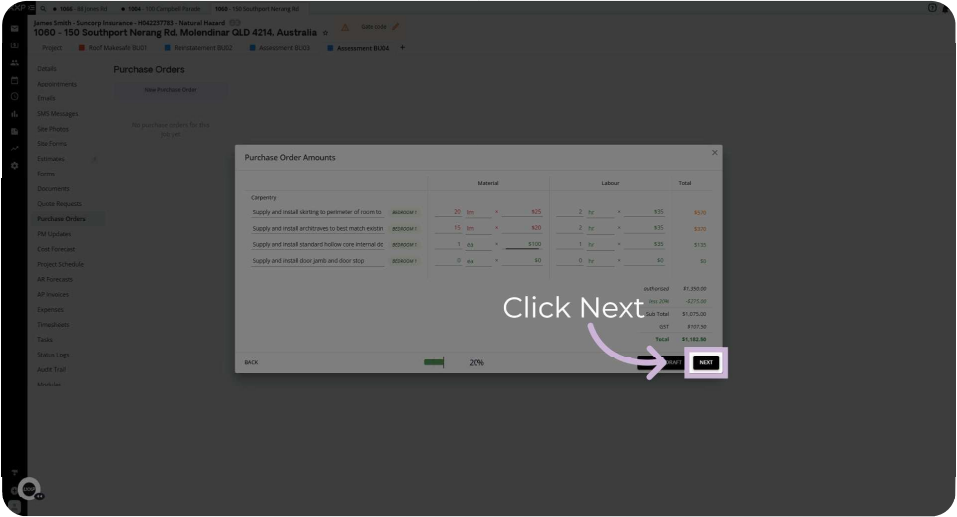
Review the Purchase Order Amounts screen, entering the cost amount for each selected item, then click Next.
Details:
- Each line item shows its Material and Labour amounts, with a running Total
- A summary at the bottom right shows the order totals, including GST
- A discount slider sits at the bottom left of the window
- Click Save as Draft instead of Next if you want to come back to this purchase order later
Step 7: Choose the Document Type
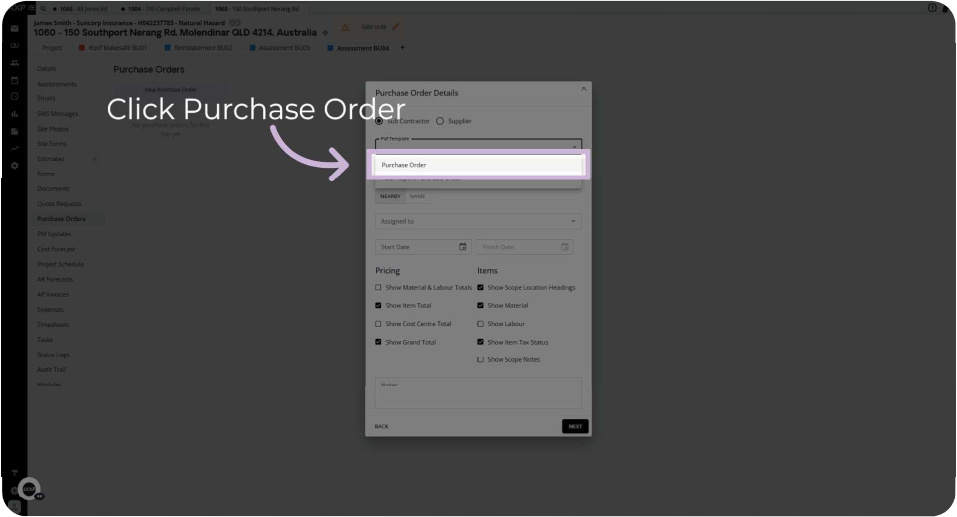
In Purchase Order Details, open the document type menu and select Purchase Order.
Details:
- The top of the window has a Sub Contractor or Supplier option
- The menu sets the type of document Loop creates
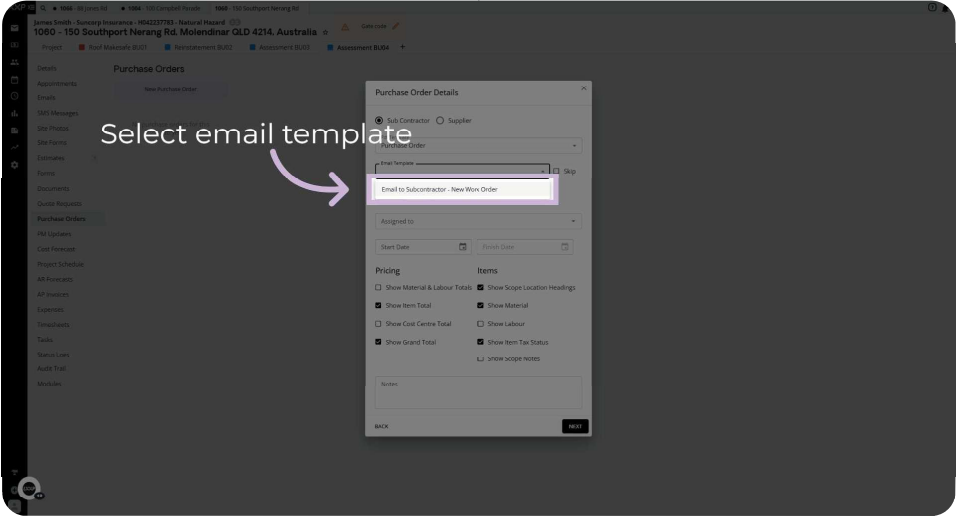
Step 8: Choose the Email Template
Open the email template menu and select Email to Subcontractor - New Work Order.
Details:
- This is the email the subcontractor receives with the order
- The same menu lists the other available templates
Step 9: Assign the Subcontractor
Click Assigned to and select the subcontractor responsible for the work.
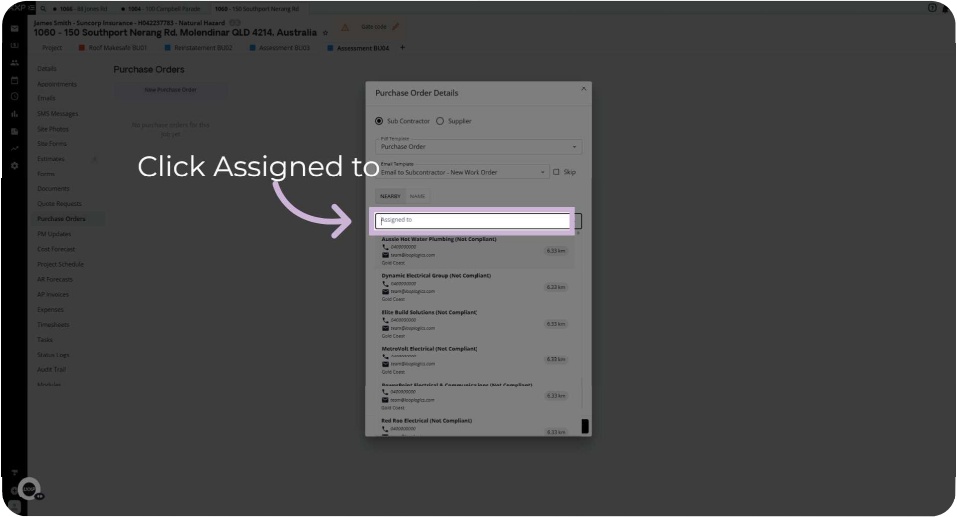
Details:
- A search box and a scrolling list of subcontractors appear, each with contact details
- The subcontractor's email address fills in automatically
Step 10: Schedule the Work
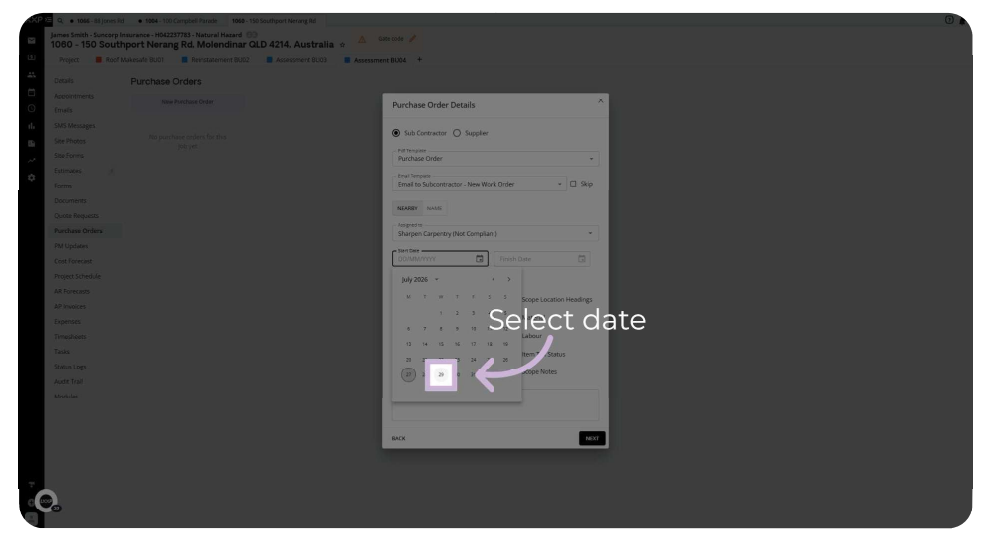
Click the calendar icon beside the date field, then click the day you want to schedule.
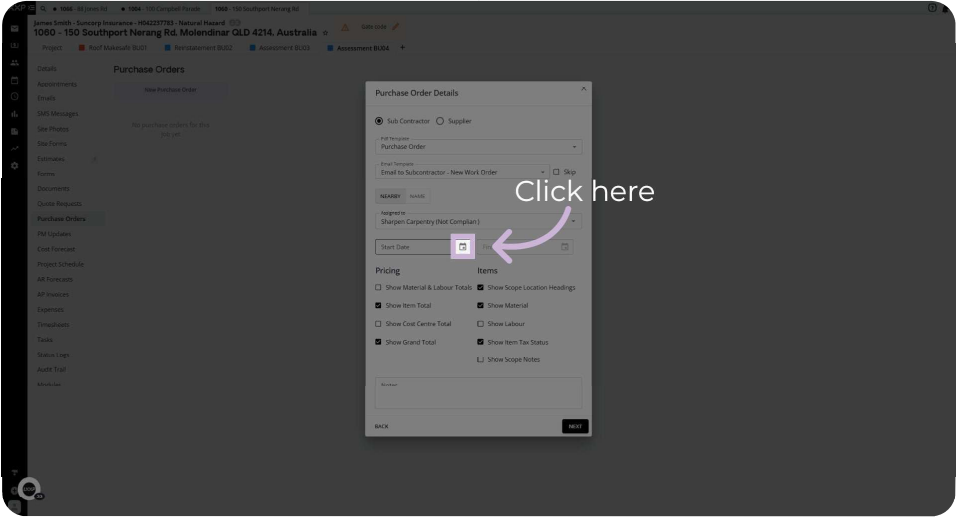
Details:
- The date picker opens as a calendar, with the chosen day highlighted
- Pricing and Items checkboxes below the dates control what shows on the order
- Click Next when you're happy with the details
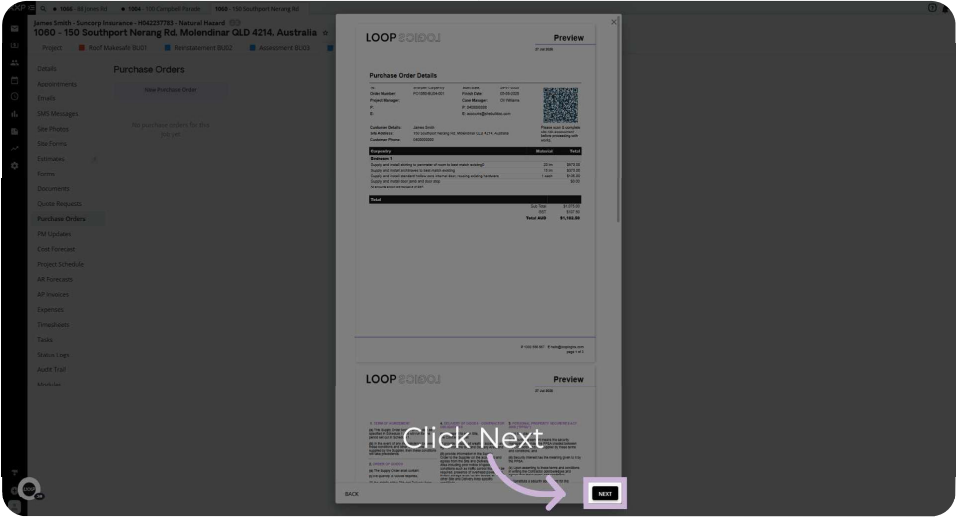
Step 11: Preview the Purchase Order
Check the preview, then click Next.
Details:
- The preview is a Loop-branded document, with the order details, a QR code and the line items
- Scroll down to see further pages of the document
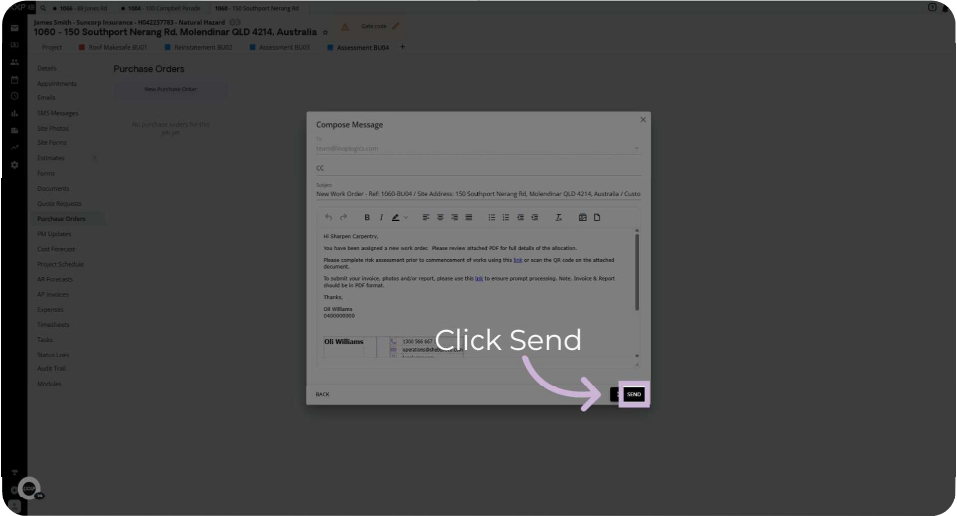
Step 12: Send the Purchase Order
In the Compose Message window, check the email, then click Send.
Details:
- The email is pre-written from the template you chose, with your signature at the bottom
- The subcontractor's email address fills in automatically
- The editing toolbar above the message lets you adjust the wording if needed
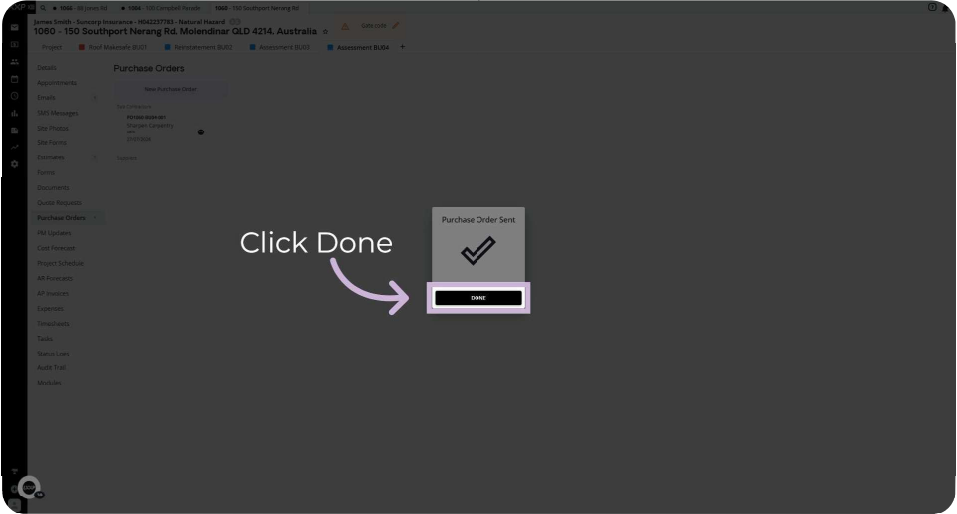
Step 13: Finish
Click Done to close the confirmation.
Details:
- A tick and the Purchase Order Sent message confirm the order has gone
- The purchase order is saved in the Documents folder on the job
Summary
Key Purchase Order Steps:
Starting the Purchase Order:
- From the job, open Purchase Orders and click New Purchase Order
- Click From Scope to choose items from the authorised estimate
Setting It Up:
- Select the scope items and enter the cost amounts, then click Next
- Choose Purchase Order as the document type
- Choose Email to Subcontractor - New Work Order as the email template
- Assign the subcontractor and pick the scheduled day
Sending It:
- Check the preview, then click Next
- Check the email, click Send, then click Done
Key Points to Remember:
- Authorise the estimate first so the scope items appear under From Scope
- Click Save as Draft if you need to finish the order later
- Find the sent order in the Documents folder on the job
👇Recap
- You've learned how to raise a purchase order from the authorised estimate
- You've set the amounts, document type, email template and subcontractor
- You've previewed and sent the order, and know where it's saved
🙅♂️Common mistakes to avoid: Starting a purchase order before the estimate is authorised, so the scope items you need aren't listed under From Scope.
🏆What good looks like: A sent purchase order built from authorised scope items, assigned to the right subcontractor and saved in the job's Documents folder.
FAQ
Why can't I see my scope items under From Scope? The guide says From Scope lists items from the authorised estimate, so authorise the estimate first.
Where is the purchase order saved once it's sent? In the Documents folder on the job.
Do I need to type the subcontractor's email address? No, the email address fills in automatically once you assign the subcontractor.
Can I leave a purchase order and finish it later? The Purchase Order Amounts screen has a Save as Draft button next to Next. This recording didn't show how to reopen a draft.
❓ Need Help?
If you have questions or need assistance, use the chat box in the bottom-right corner to contact the Loop Logics support team or email support@looplogics.com
👉 Continue your learning, next step is to move onto Module 2 - Supervisor - Creating a Purchase Order from an Estimate to continue.