.png)
How to use the Calendar Tool
💡The Calendar is Loop Logics scheduling tool, giving you a full-day view of every user's appointments in one place. From here you can filter appointments by division, position, type, and status, block users out from being scheduled, and book appointments directly onto the calendar using the Dispatcher.
Steps:
Open the Calendar
Click the calendar icon on the left-hand side menu to open the Company Calendar. This shows a full-day view for all users.

Understand appointment status colours
Appointment statuses are shown in four colours so you can see at a glance where each appointment is at:
Yellow — Tentative
Green - Confirmed
Blue - Completed
Red - Declined or Cancelled

Filter the calendar
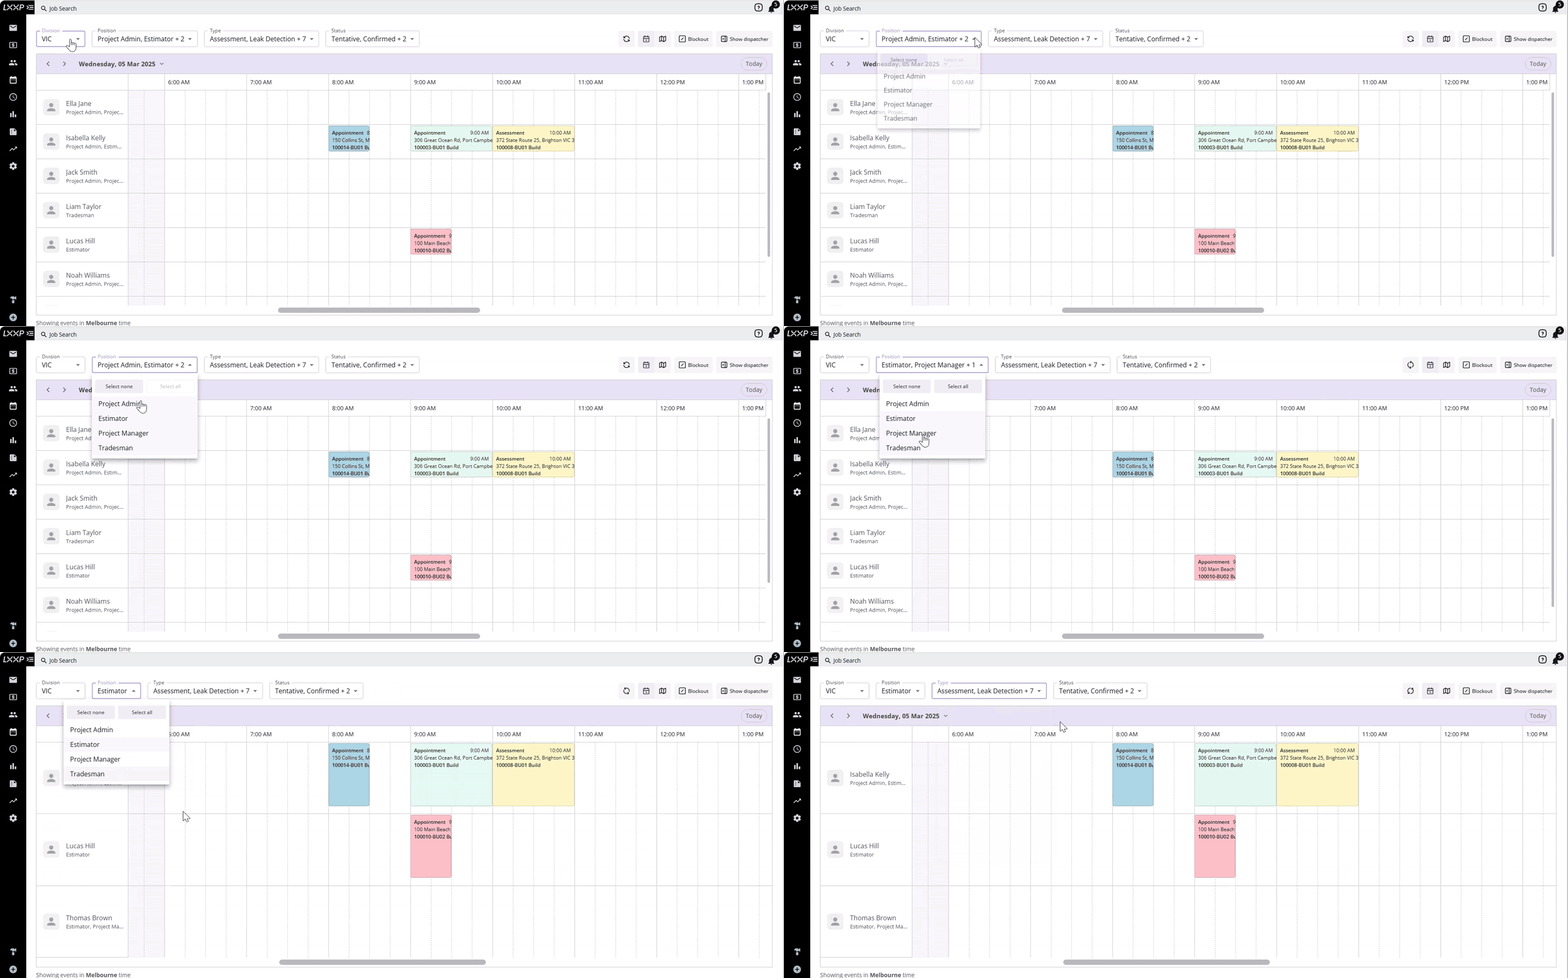
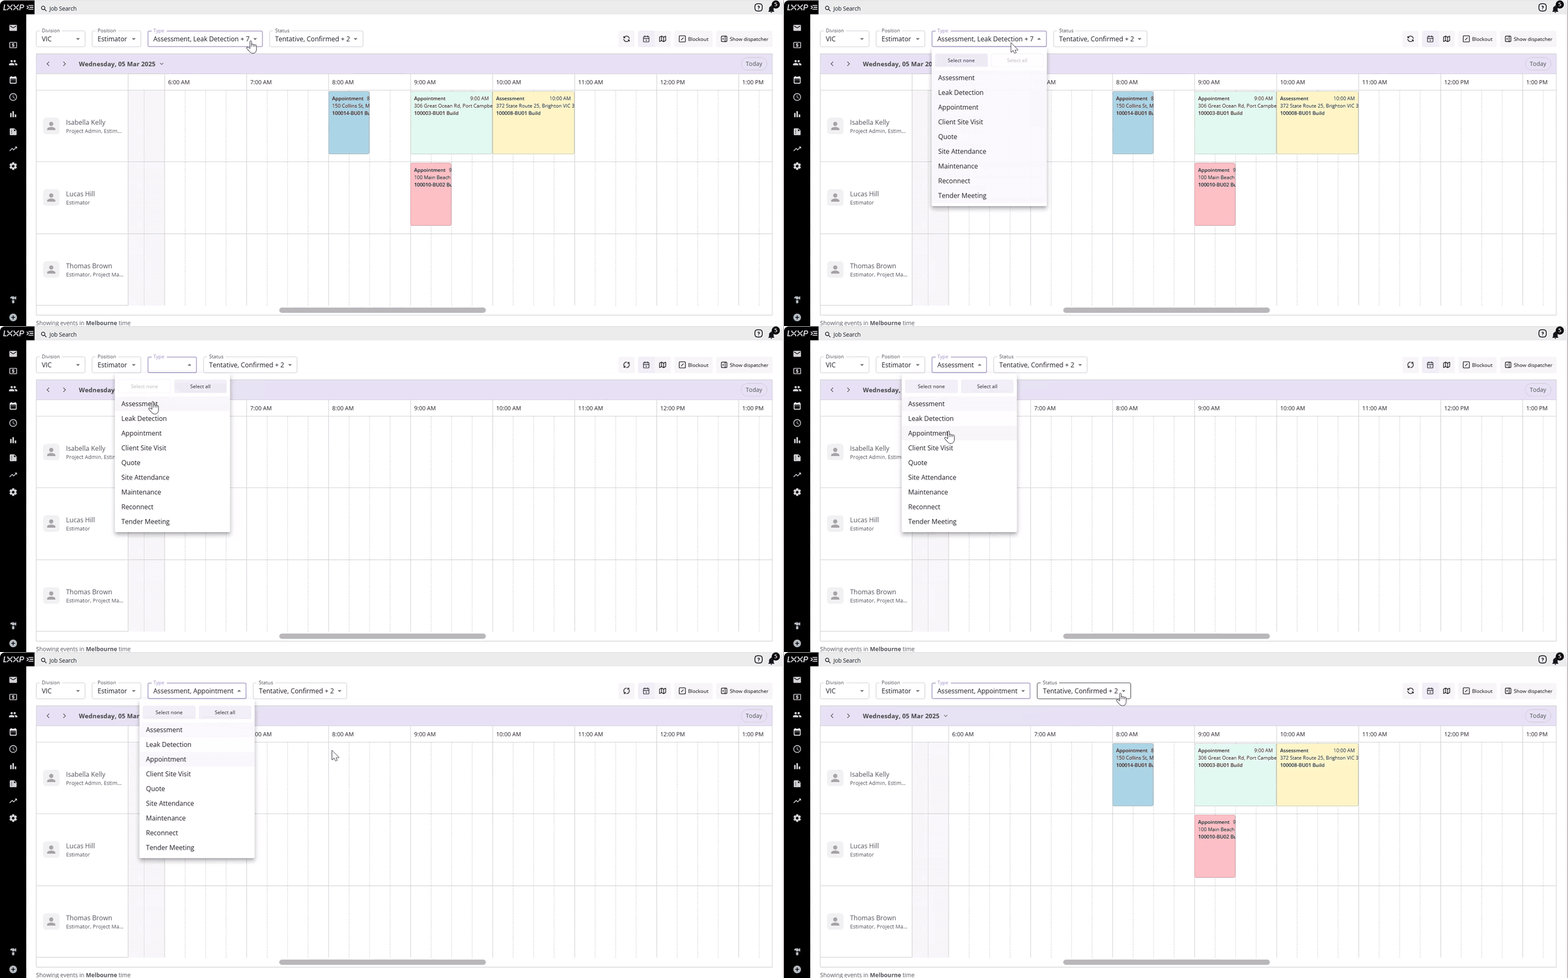
Use the filters at the top of the calendar to narrow down what's shown:
- Division — filter by state (NSW, QLD, SA, TAS, VIC, WA).

-
Position — filter by role, such as Estimator.
-
Type — filter by appointment type, such as Assessment or Appointment.
-
Status — filter by Tentative, Confirmed, Completed, Declined, or Cancelled.
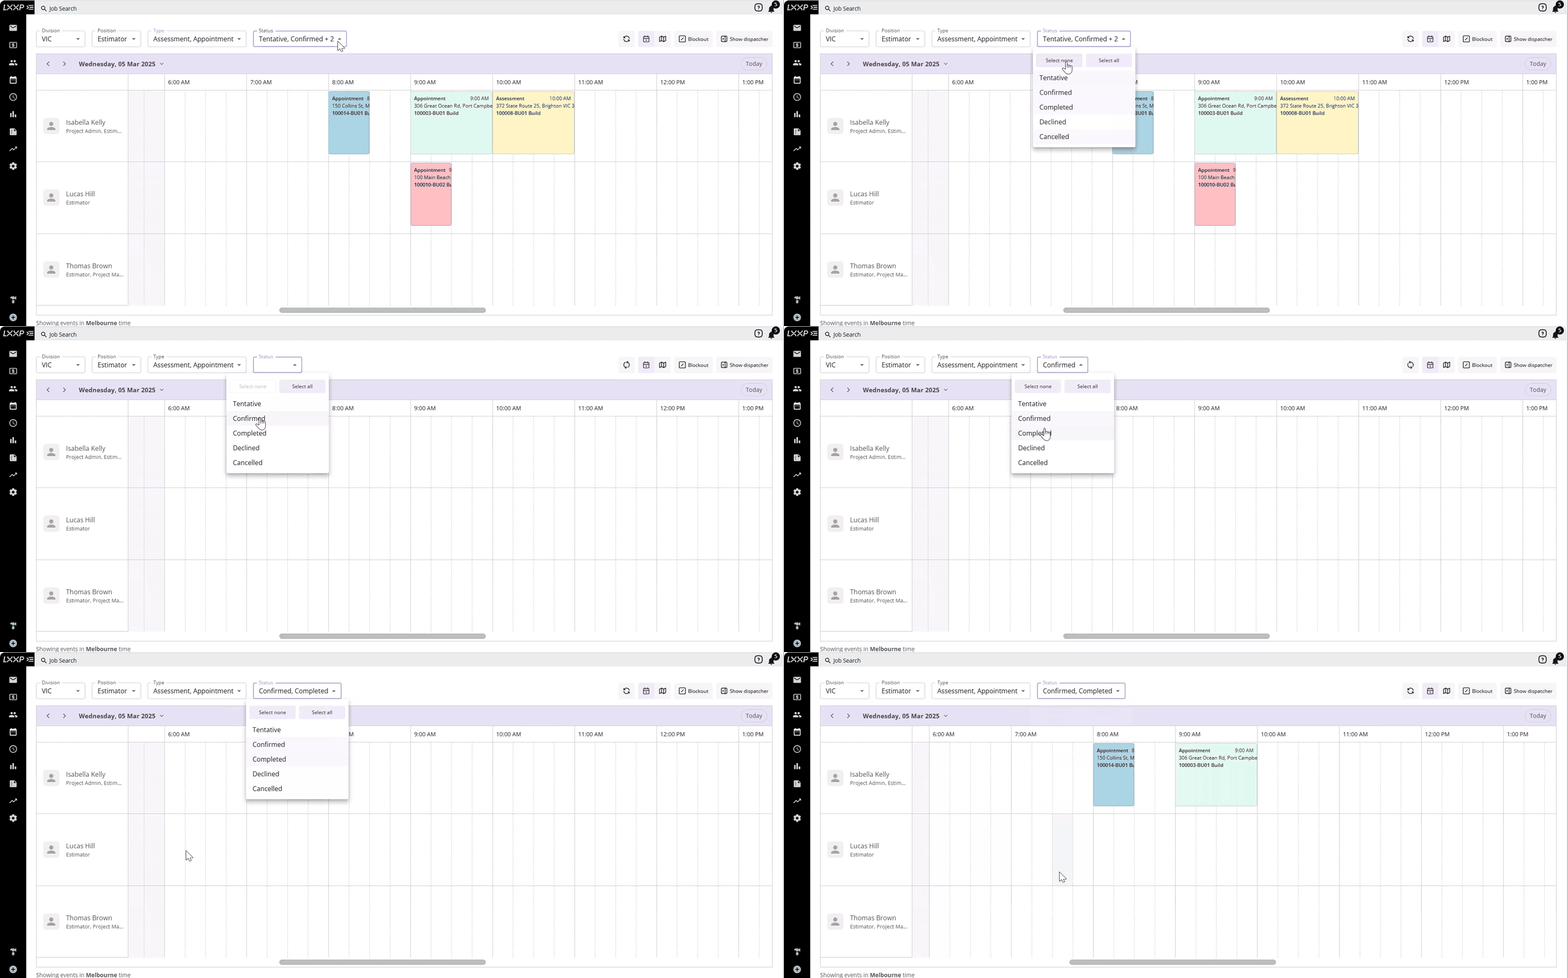
💡These filters can be combined. For example, selecting a division, then a position such as Estimator, then a type such as Assessment or Appointment, then a status such as Confirmed and Completed — to show only the appointments relevant to what you're looking for on a given day.
Navigate between dates
Move through the calendar using the arrows on the left-hand side of the date bar, or click the date itself to open a dropdown and select a specific day.

Create a blockout
Blockouts make a user unavailable for appointments during specific times or days — useful if someone is on annual leave, or an estimator is taking a day off, for example.
To create a blockout:
- Select Blockout in the top right corner of the page.

- Choose the user you want to assign the blockout to.

- Choose a specific date and time, or tick All day.

- Enter a reason for the blockout.

- Select Create.

Once created, the blockout appears as a shaded band across that user's row on the calendar.
- To edit or remove a blockout, click anywhere on it to open its details box. From there, select the bin icon to delete it, or select Edit to make changes.

Book appointments using the Dispatcher
-
You can also book appointments directly on the calendar using the Dispatcher. Select Show dispatcher in the top right corner, next to the Blockout button.
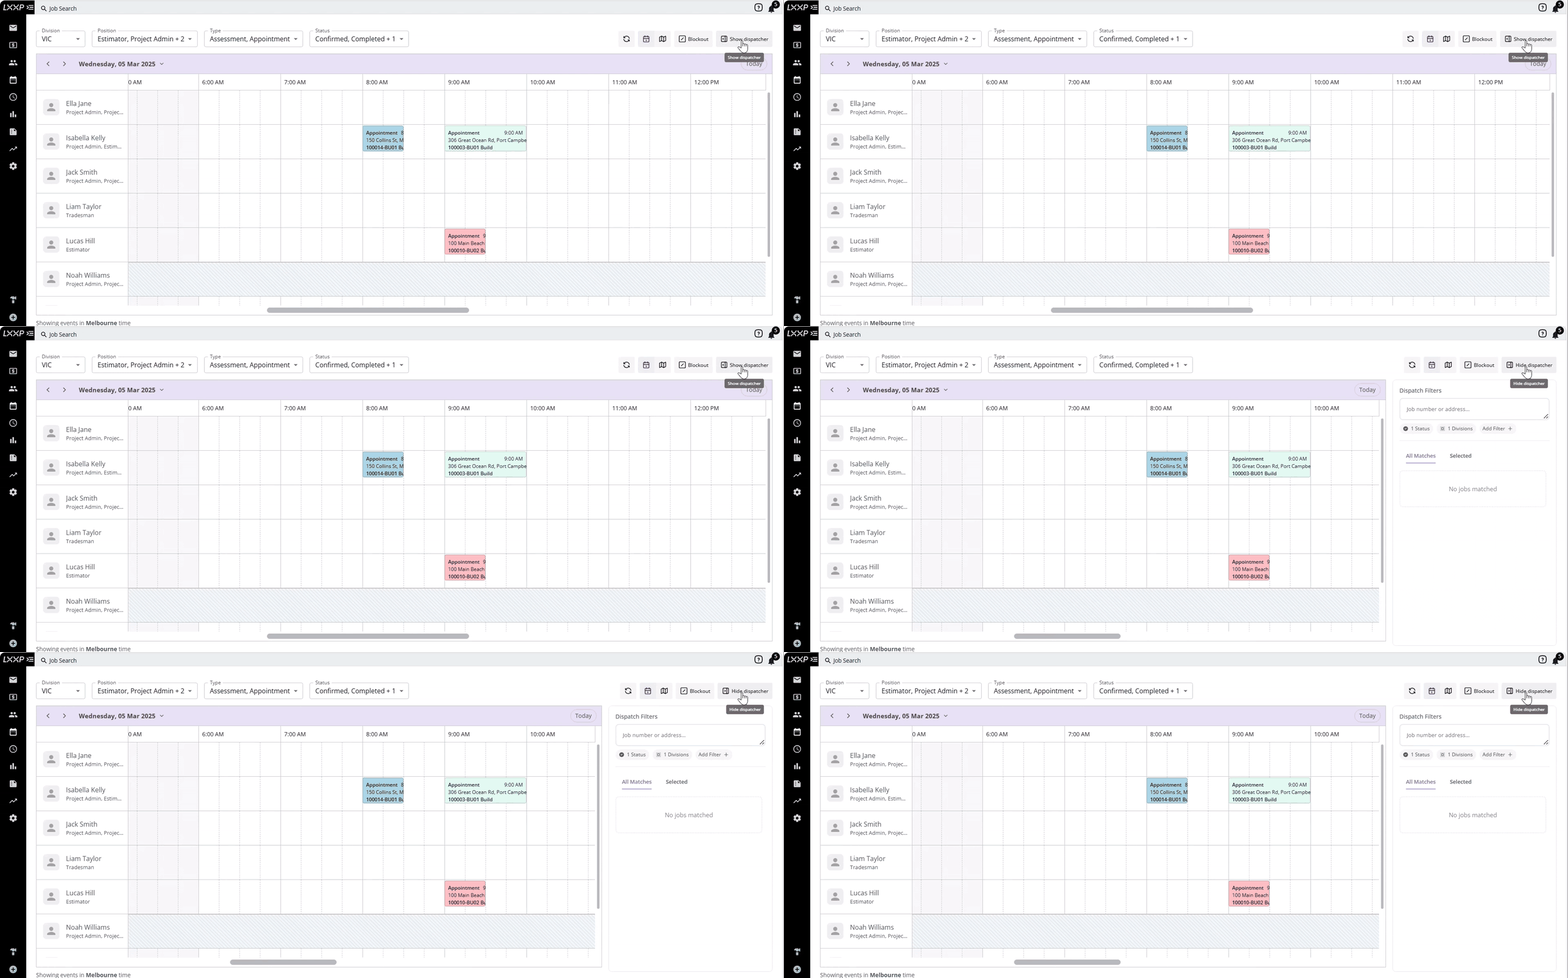
- The Dispatcher panel lets you free-type a job number or address to search, or filter jobs by status, division, postcode, region, workflow name, or state.

- To book an appointment, click on a job in the Dispatcher list, hold it down, and drag it onto the time slot you want on the calendar. Once dropped, it's entered as a tentative appointment.

View and edit appointment details
- To view more detail on an appointment, either hover over it for a quick view of the time and address, or click on it to open its full details box.

-
The two icons at the top of the details box are shortcuts: one opens the appointment page directly, the other opens the job directly.
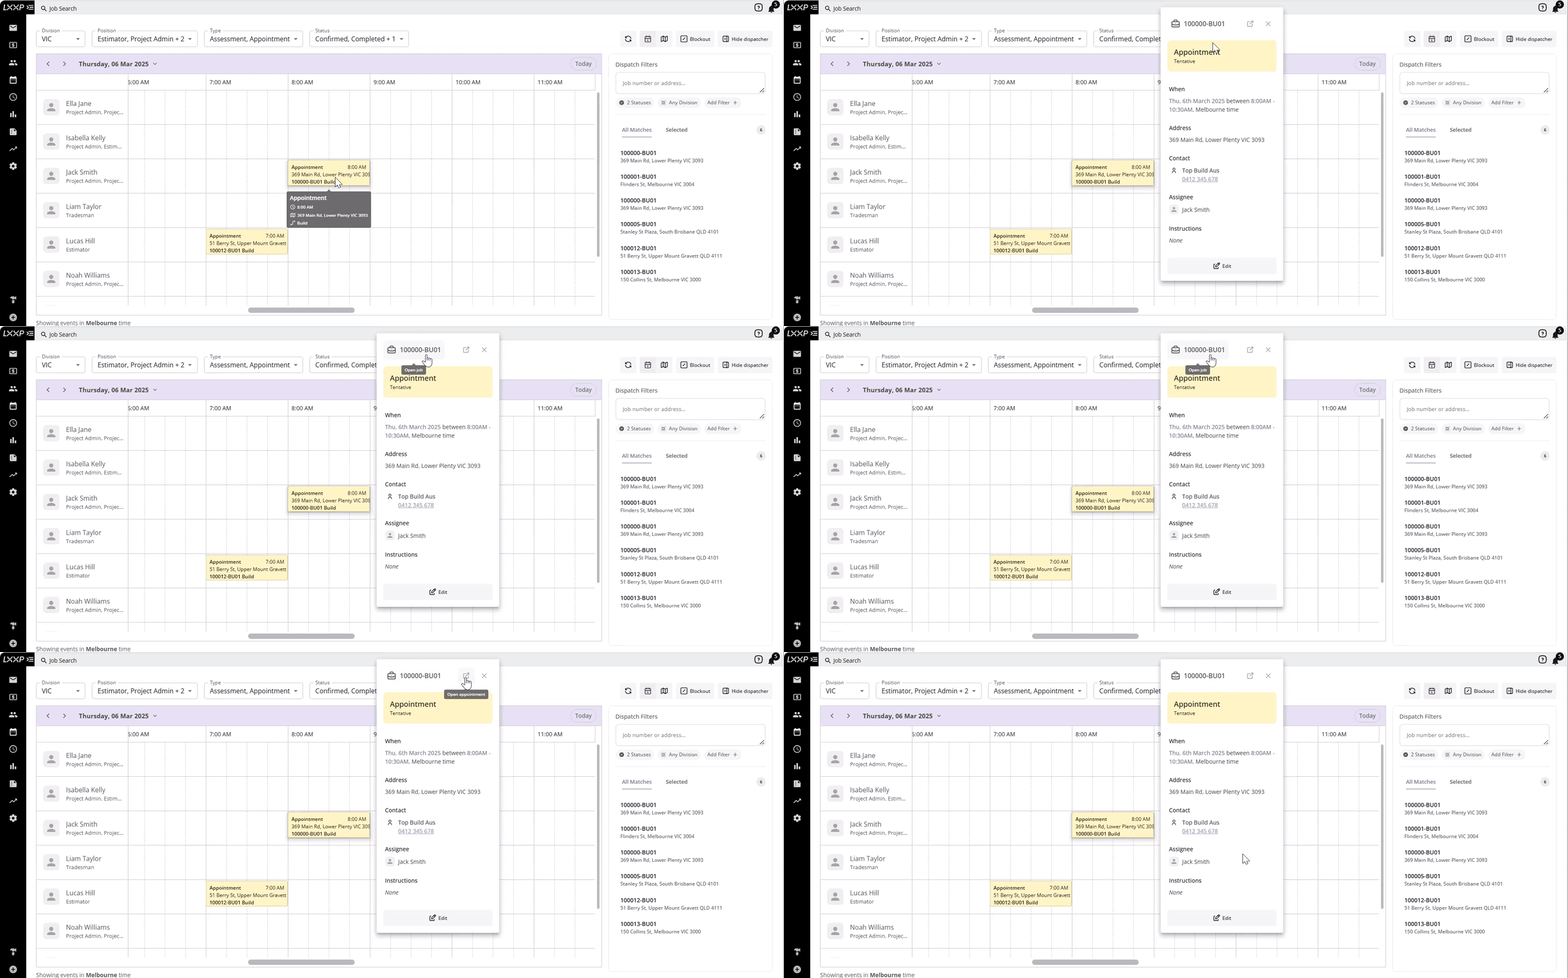
- To edit an appointment, you can make changes within the job, or simply select Edit at the bottom of the details box to update the type, status, start time, duration, buffer time, time zone, assignees, or instructions.

FAQ
Why can't I see a particular appointment on the calendar? Check your Division, Position, Type, and Status filters. The calendar only shows appointments matching your current filter selection.
What's the difference between a blockout and a cancelled appointment? A blockout makes a user unavailable for scheduling during a set period (for example, while on leave). A cancelled appointment is one that was scheduled and then called off, it still shows on the calendar in red.
How do I quickly book an appointment without opening the job first? Use the Dispatcher: open it from the calendar, find the job, then drag it onto the time slot you want. It will be created as a tentative appointment that you can confirm later.
❓ Need Help
If you have questions or need assistance, use the chat box in the bottom-right corner to contact the Loop Logics support team or email support@looplogics.com