.png)
How to use AR Forecasting
💡AR Forecasting gives your organisation greater visibility into end-of-month invoicing. It lets project managers plan out their expected invoicing at the start of each month, helps you monitor cash flow, and keeps project managers accountable for their workbooks. From a management perspective, it also offers insight into project progress and overall financial health.
Steps:
Open AR Forecasting
- Select Forecasts from the left-hand menu.

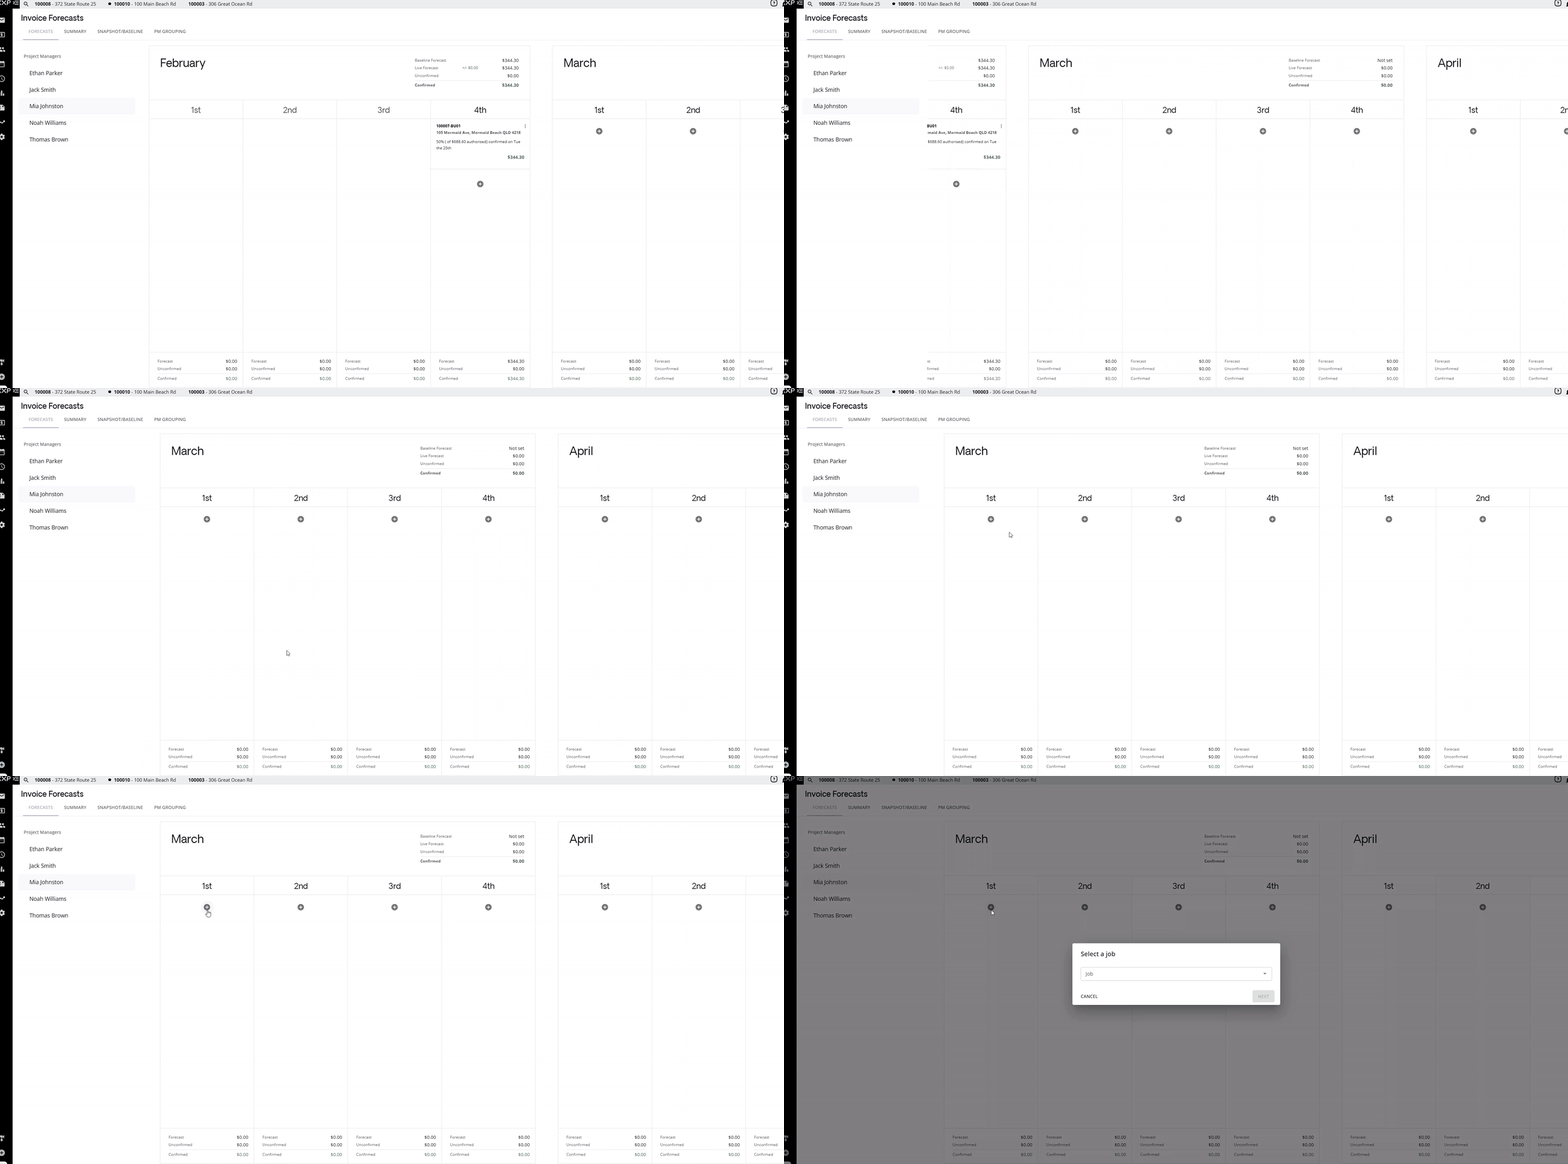
- Your own forecast opens automatically under your name. If you have the necessary access, you can also select any other project manager from the Project Managers list to review or enter forecasting on their behalf.

Create a Forecast Entry
-
On the forecast calendar, find the week you want to forecast for and select the + icon.
-
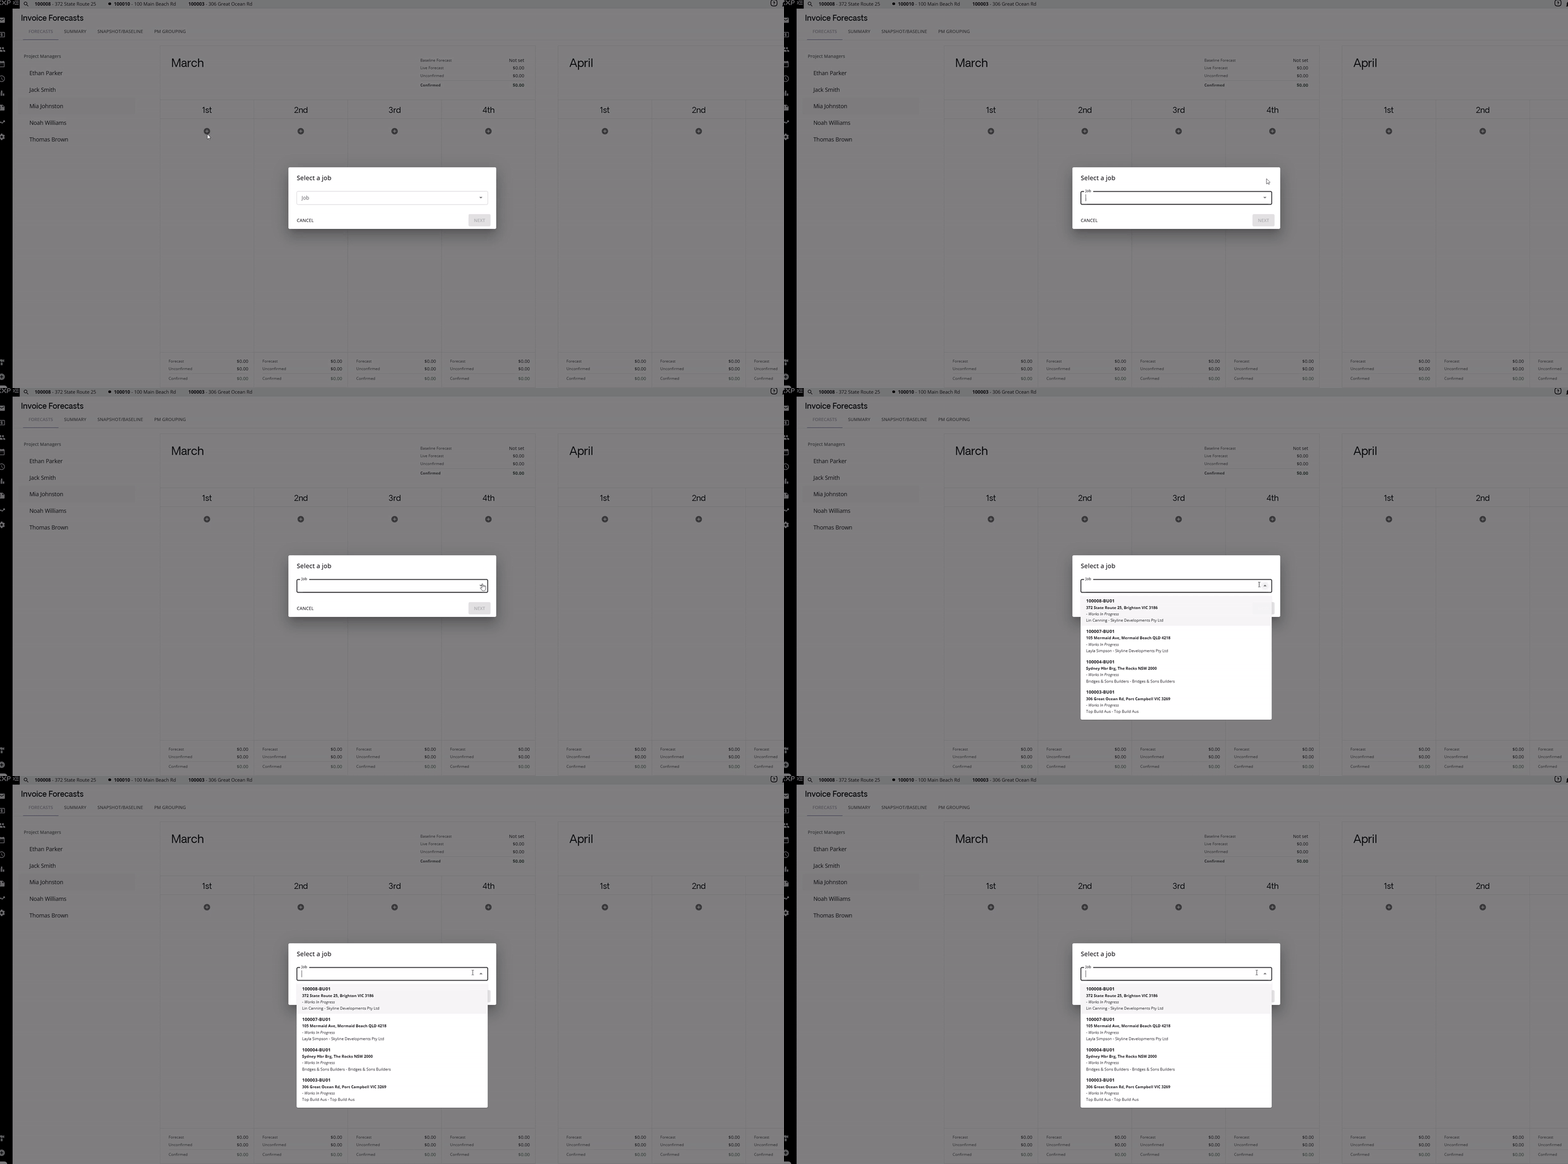
Choose the relevant job from the Job drop-down: this lists all active jobs under your name that are currently works-in-progress (or equivalent), then select Next.
-
Enter your AR forecast. You can set it as a Final Forecast, or as a progress forecast by cost or percentage.
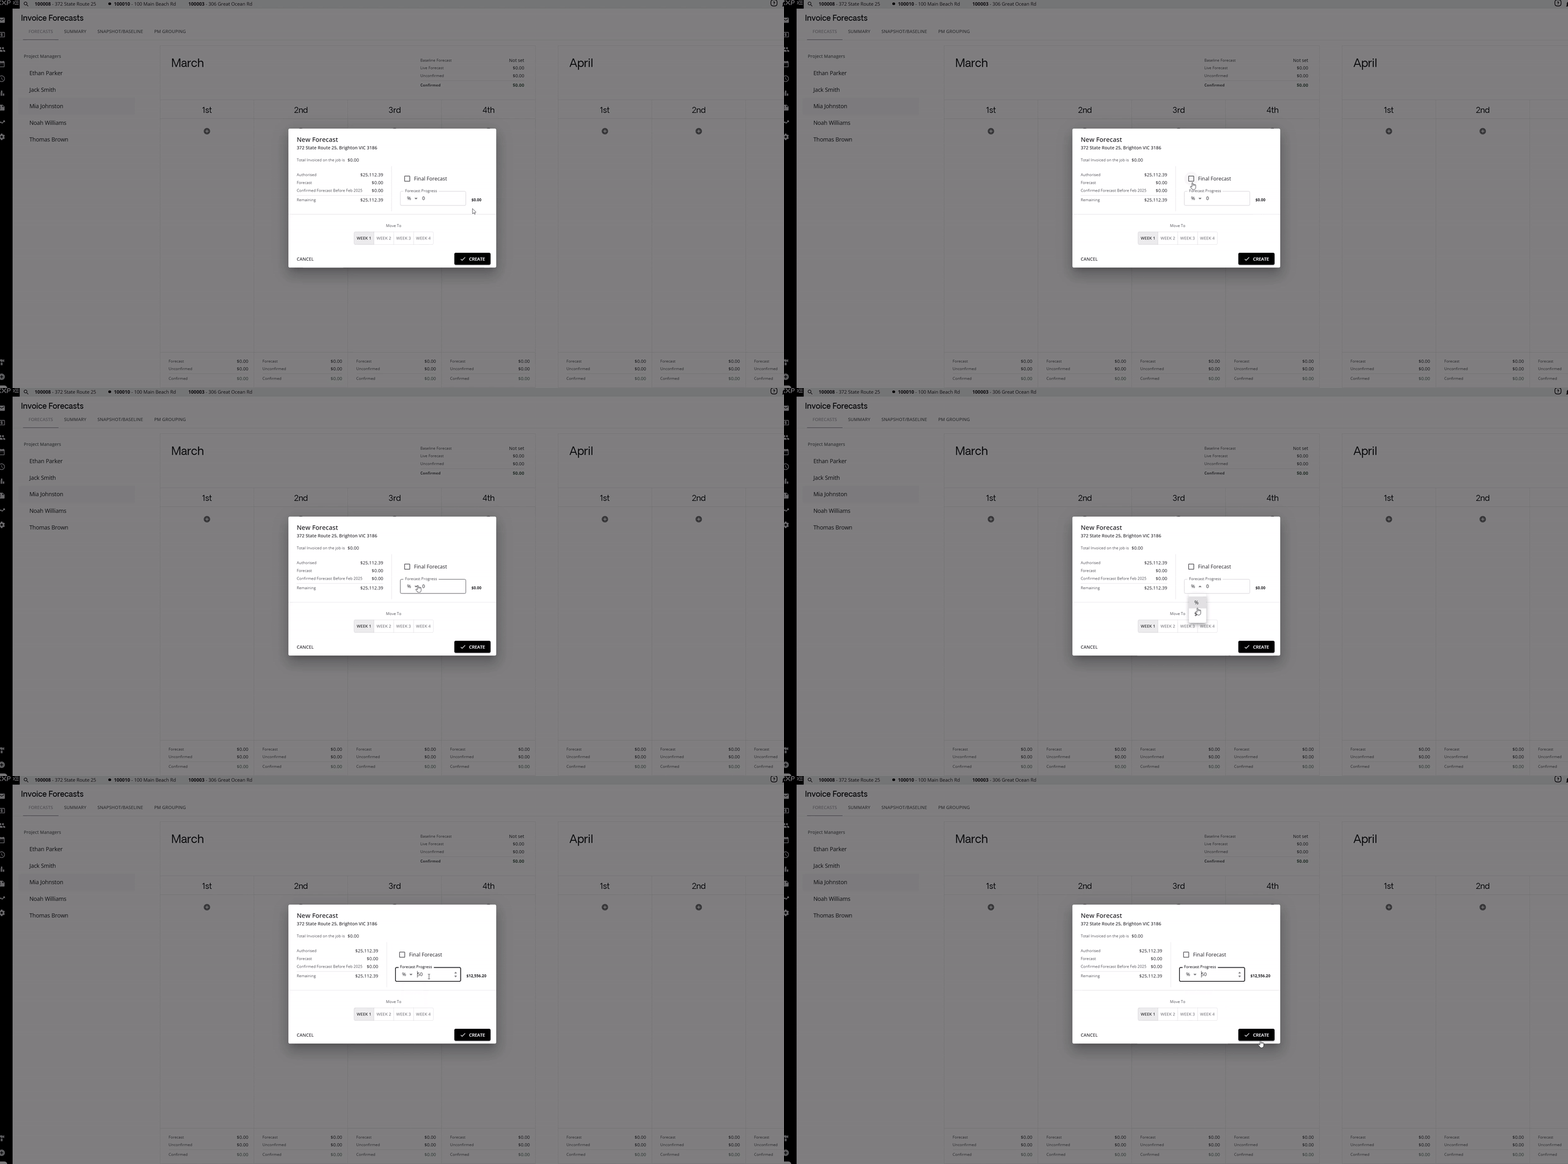
- Use Move To to place the entry in the correct week of the month.
-
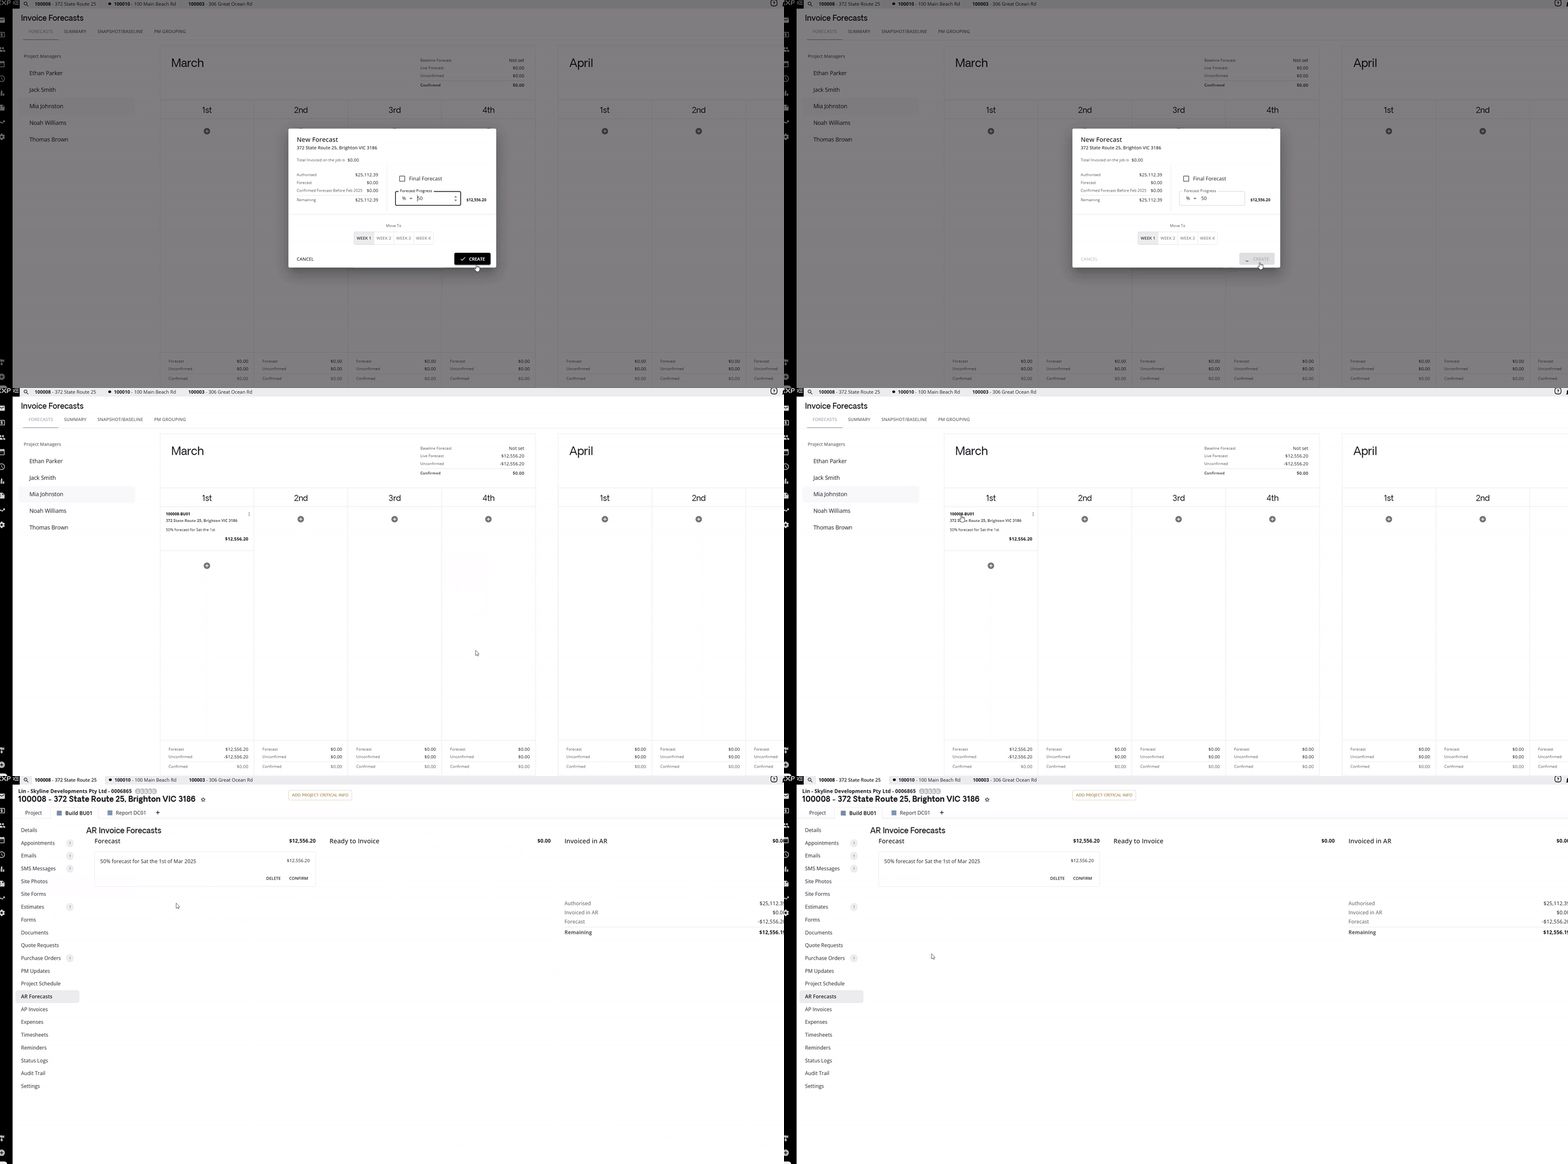
Select Create. The forecast will now appear under AR Forecasts on the relevant job.
Confirm or manage a forecast entry
- On the forecast calendar, or from the job's own AR Forecasts tab, select the three dots on a forecast entry to Edit, Confirm, or Delete it (if you have access).

- When confirming, you can attach supporting documents before selecting Confirm.

- Once an invoice has been confirmed, it's displayed in green on the forecast calendar.

Review the Summary
-
Select the Summary tab for an overview of each project manager's invoicing to date, including baseline forecast, live forecast, lost/gain, uninvoiced amounts after end of month, average job cost, and number of jobs.
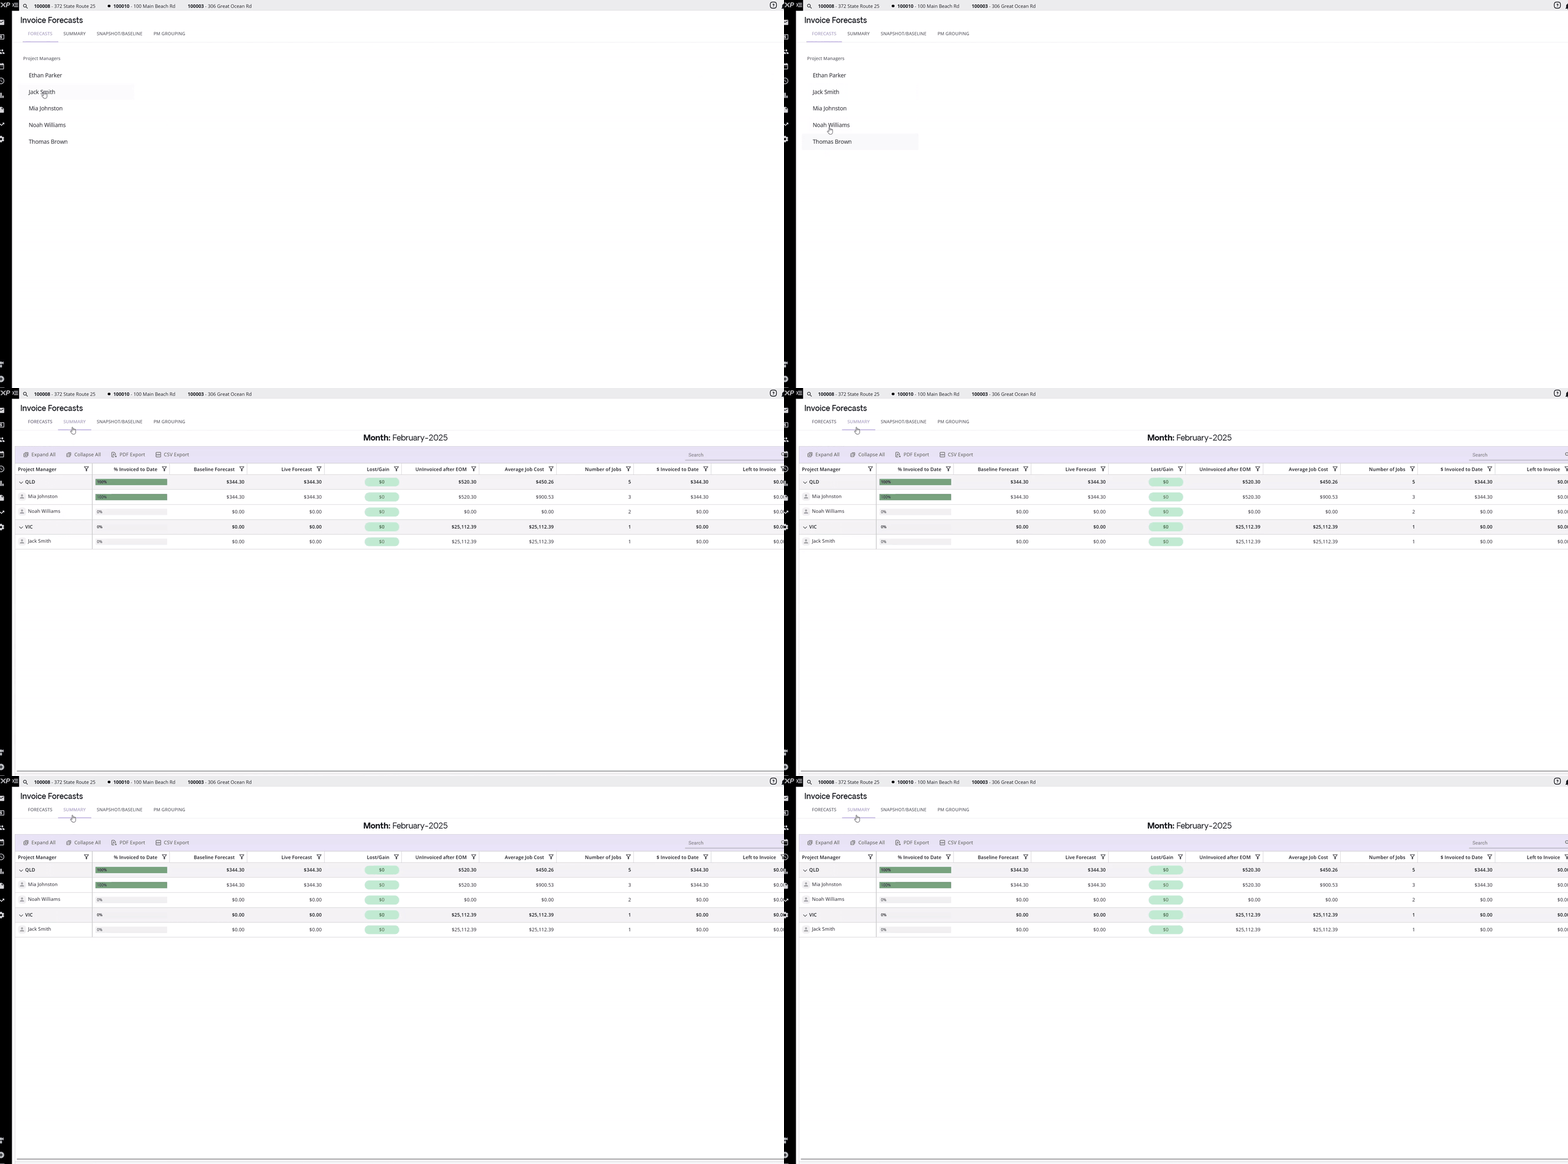
- Use Expand All / Collapse All to control how much detail is shown, or export the summary as a PDF or CSV.
Create a snapshot/baseline
- Once a project manager completes their forecast for the month, this becomes their baseline forecast.
- If you have the necessary access, select Create Baseline on the Snapshot/Baseline tab to lock in the AR forecast for that month. This gives you a clear reference point for tracking progress — without a snapshot, there's no starting point to compare against.
Set up PM grouping
-
Select the PM Grouping tab to organise project managers into groups that reflect your organisation's structure (for example, by state or team).
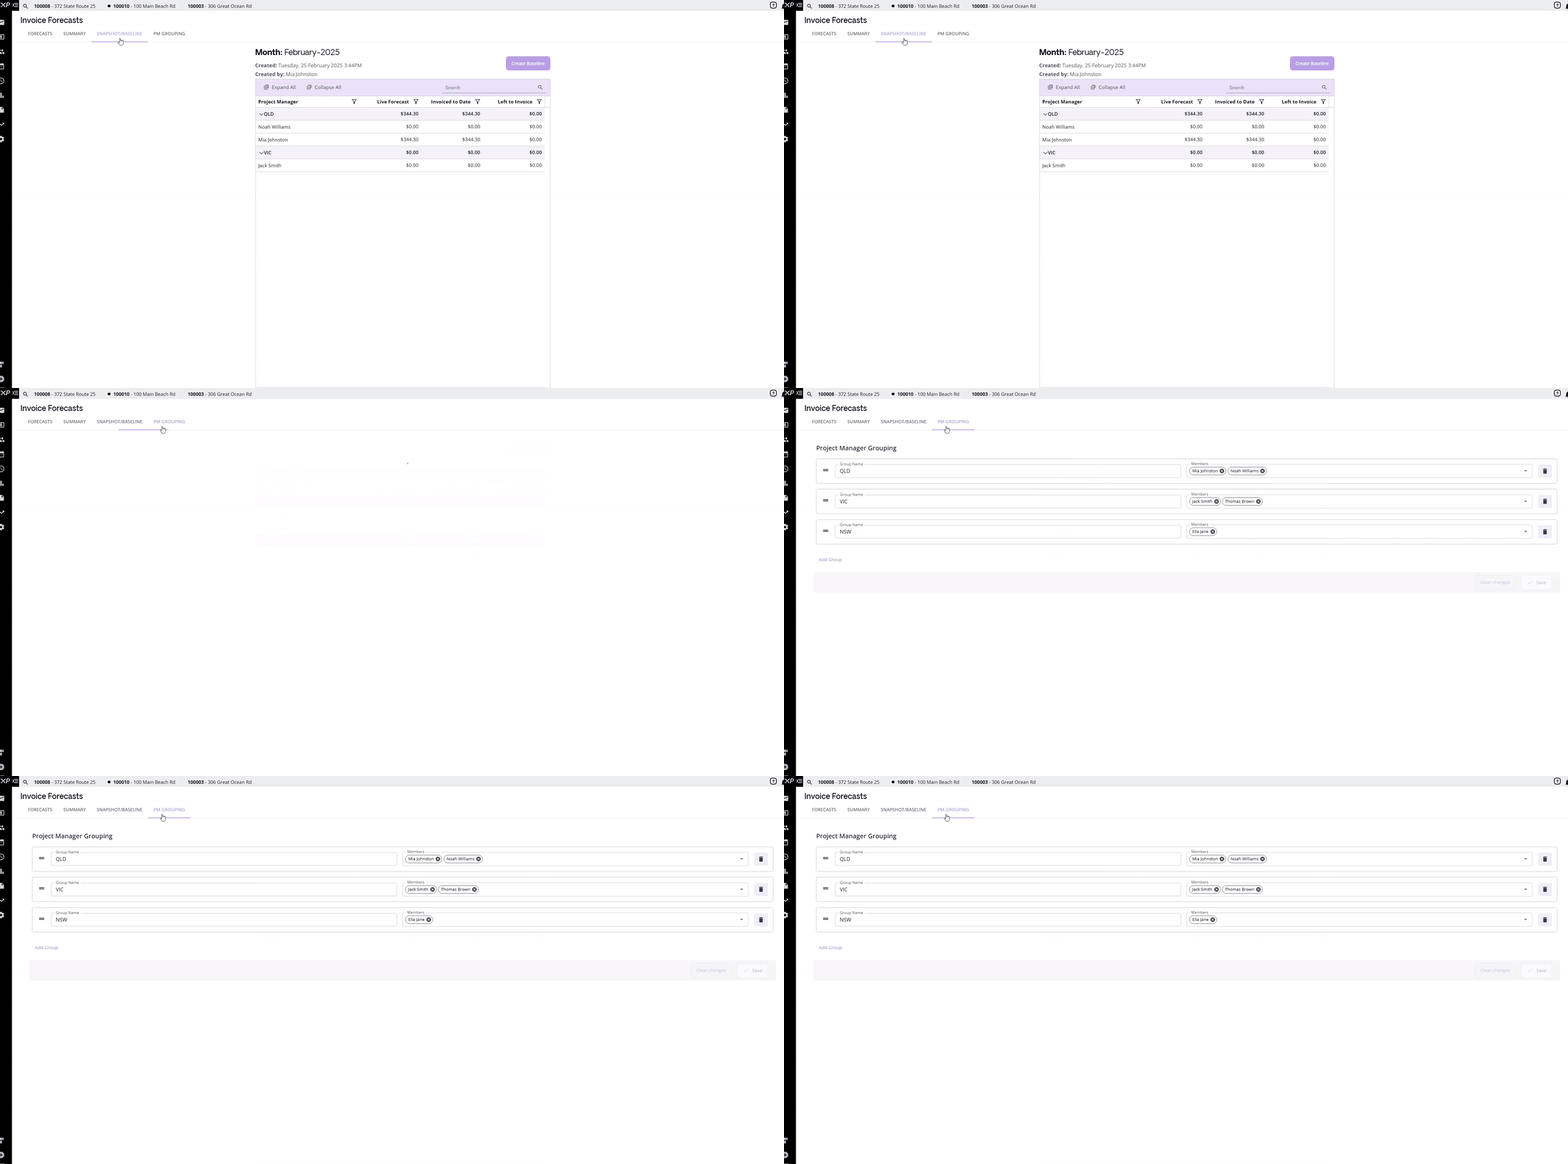
-
Select Add Group to create a new group, then name it and add members from the Members drop-down.
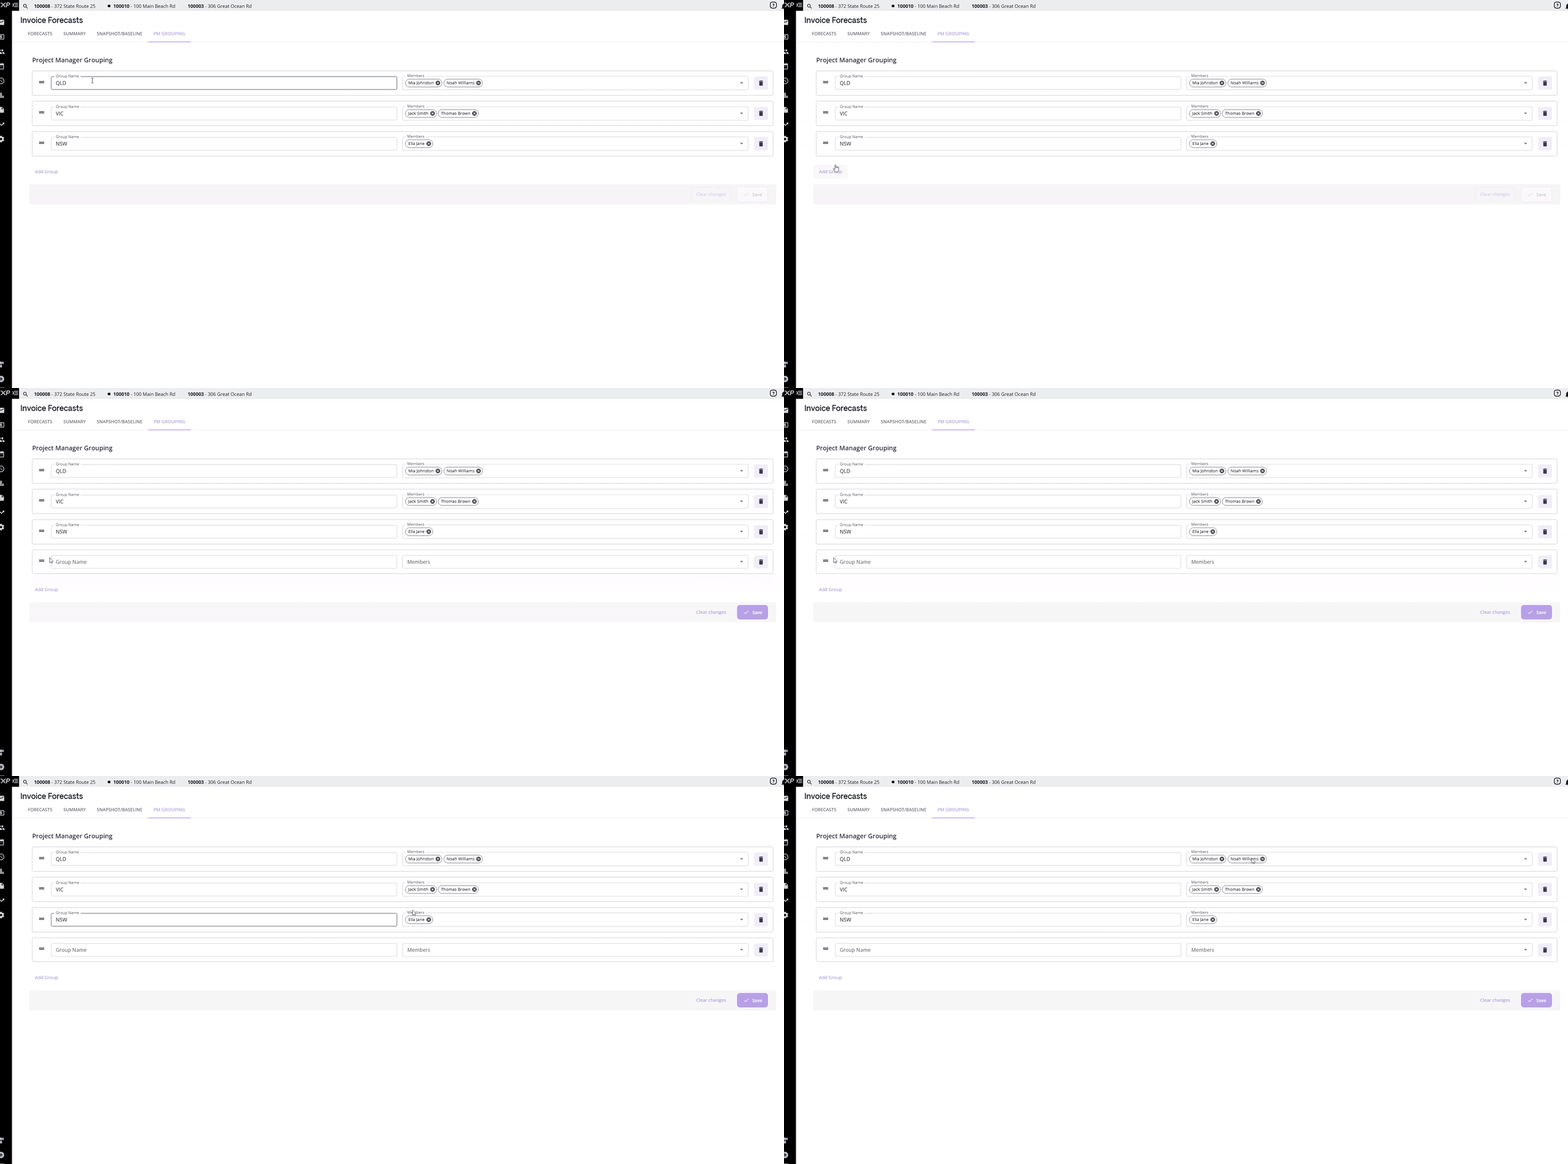
- Edit a group's name or members at any time, and select Save once you're done.

FAQ
Who can see AR forecasts for other project managers? Your own forecast appears automatically. Reviewing or entering forecasts on behalf of other project managers depends on your access level.
Can I forecast by percentage or by a dollar amount? Yes, when creating a forecast entry, you can choose to enter it as a percentage or cost, and mark it as a Final Forecast if it's the last one expected for that job.
How do I know if a forecast has been confirmed? Confirmed invoices are displayed in green on the forecast calendar.
What's the difference between a snapshot/baseline and a live forecast? The baseline locks in a project manager's forecast for the month as a fixed reference point. The live forecast continues to reflect any changes made after that point, so you can track how actuals compare to the original plan.
Can I change how project managers are grouped? Yes, PM Grouping is fully configurable. You can rename groups, add new ones, and move members between groups at any time from the PM Grouping tab.
❓ Need Help
If you have questions or need assistance, use the chat box in the bottom-right corner to contact the Loop Logics support team or email support@looplogics.com