
Module 2: Finance - Managing Excess
💡This article covers how to collect the excess on a claim and raise an excess invoice for it. Recording the excess on the job and invoicing it from the AR Invoices screen keeps the amount you collect accurate and synced to your accounting software.
Stage 1: Record the Excess on the Job
Step 1: Choose How the Excess Is Collected
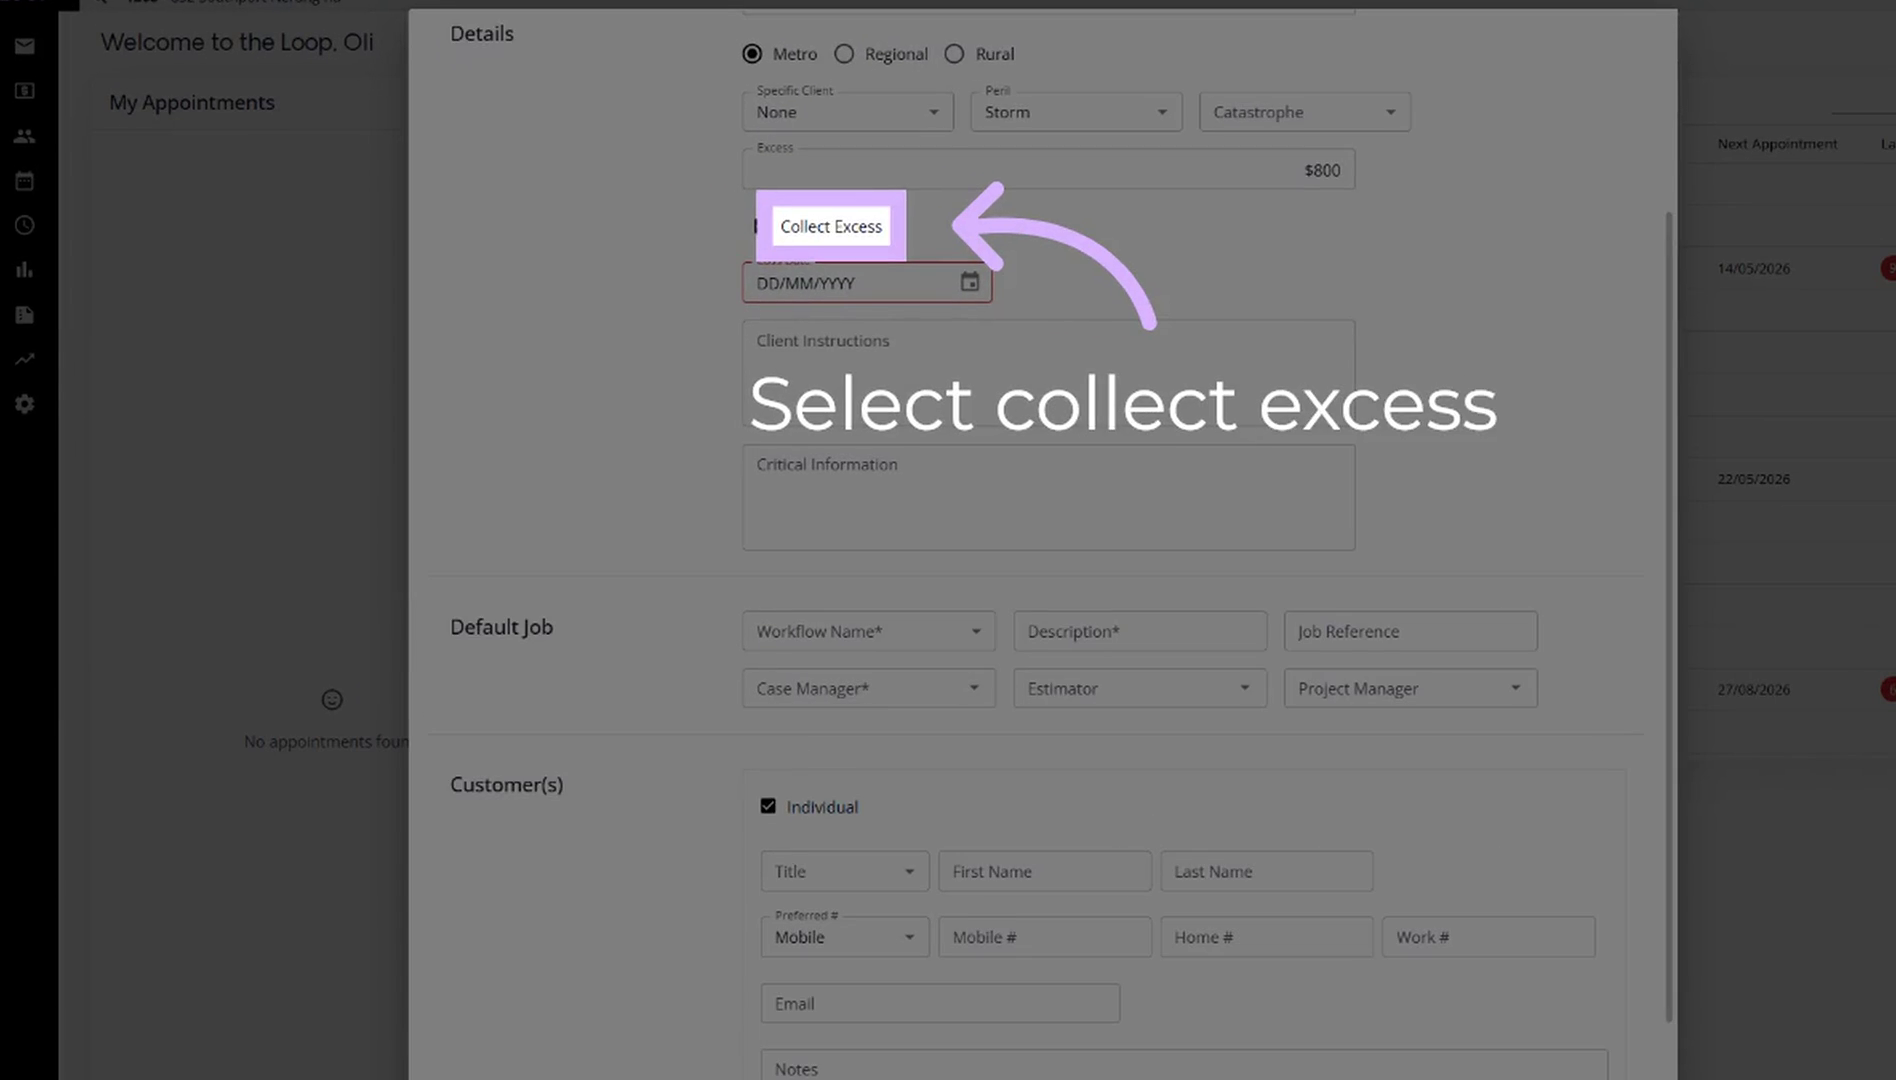
When the job is registered, find the Excess field in the Details section and tick the Collect Excess box.
Details:
- The Excess field and the Collect Excess box sit together in the claim details, below the peril and catastrophe fields.
- Ticking Collect Excess sets the method for collecting the excess on this claim.
Step 2: Update the Excess Amount
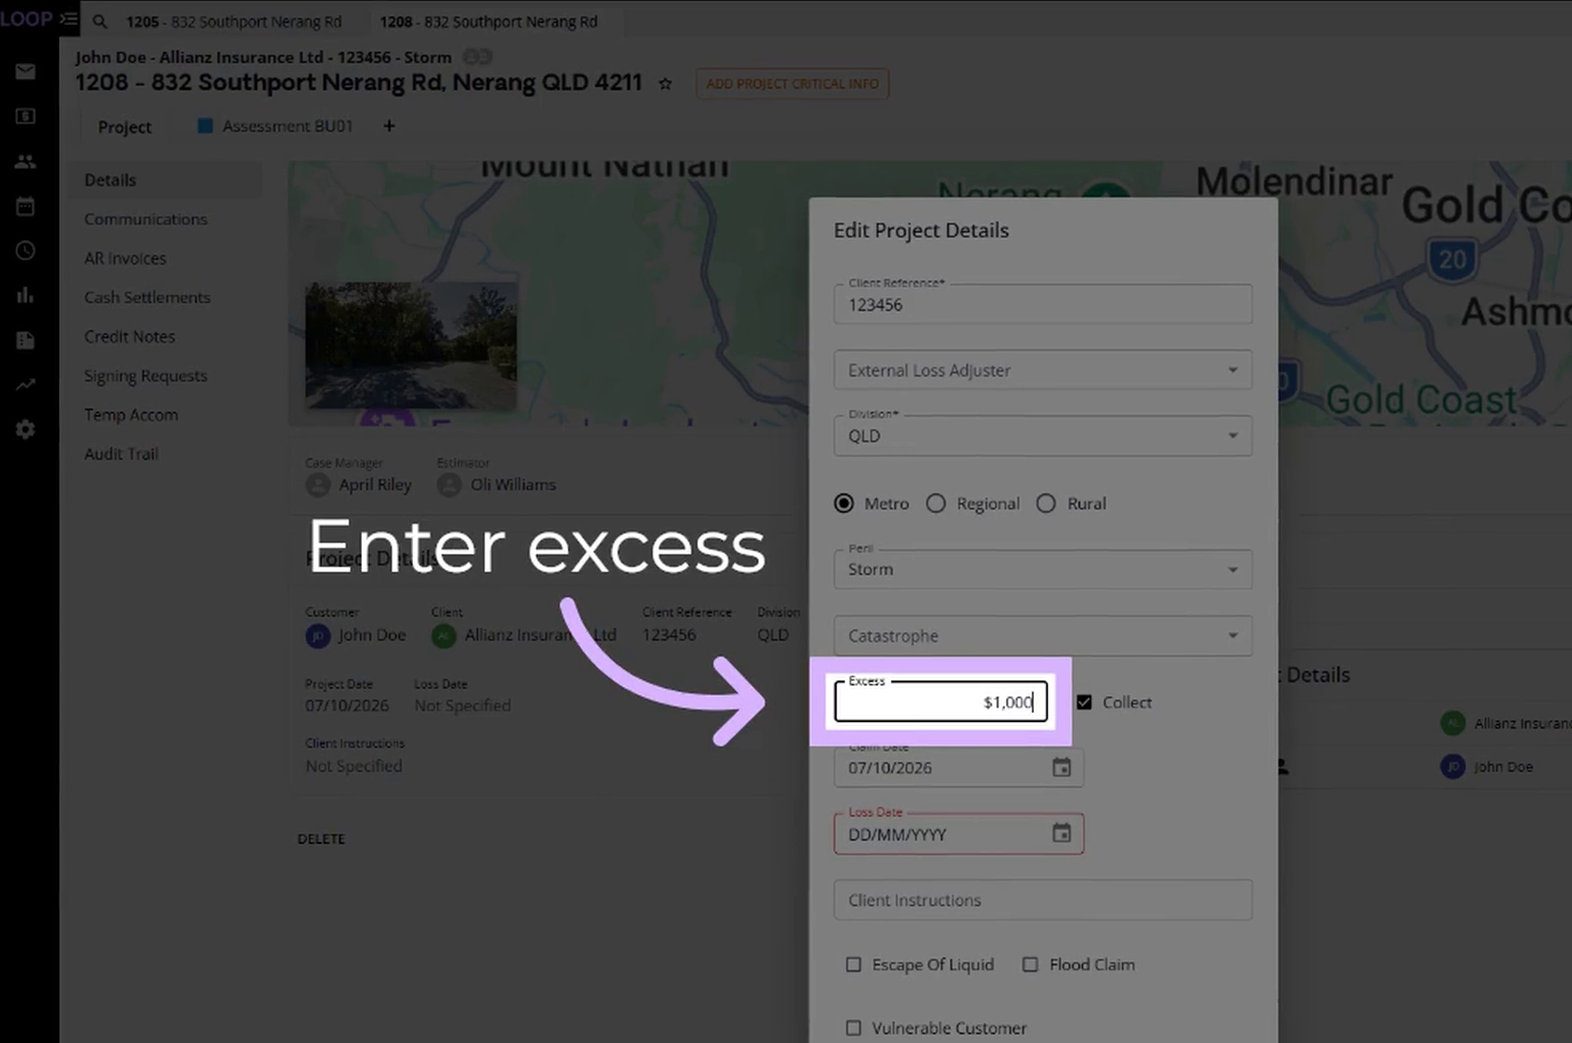
To change the excess after the job is registered, open Edit Project Details from the project Details screen. Click the Excess field and enter the new value.
Details:
- The Collect tick sits beside the Excess field.
- The new amount is the one that carries onto the invoice in Stage 2.
Stage 2: Invoice the Excess
Step 3: Open AR Invoices
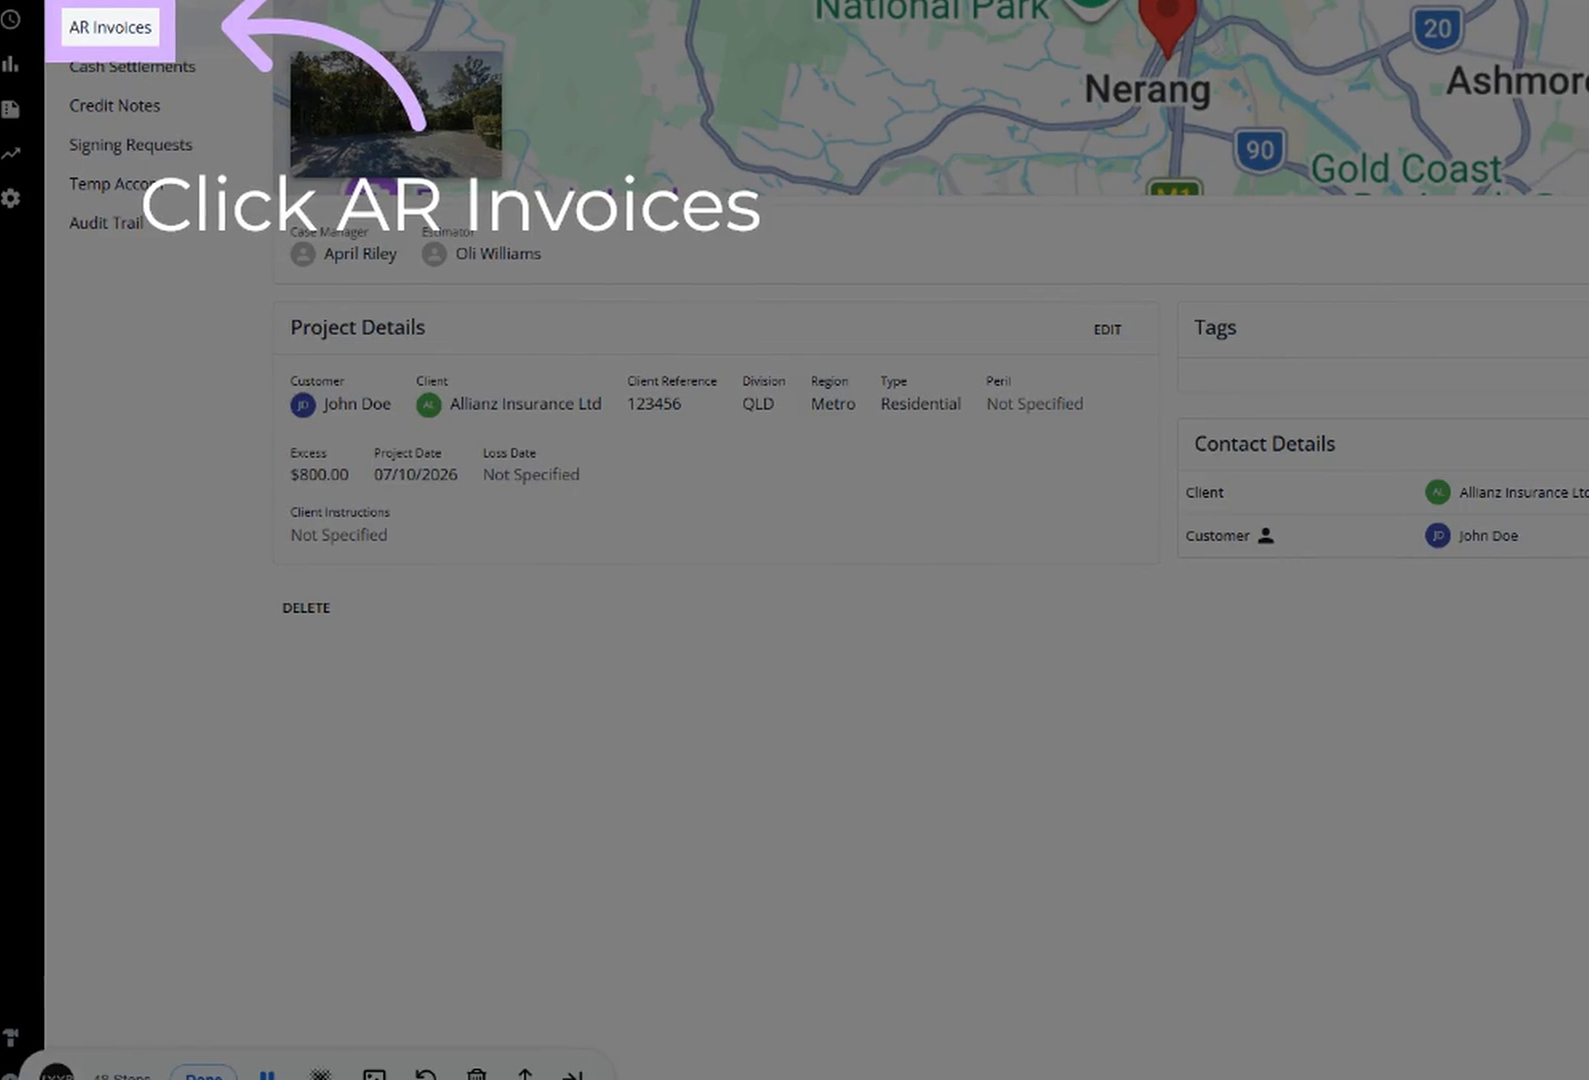
When you're ready to raise the invoice for payment, stay in the project screen and click AR Invoices in the sidebar.
Details:
- AR Invoices sits in the project sidebar, beneath Details and Communications.
Step 4: Start a New AR Invoice
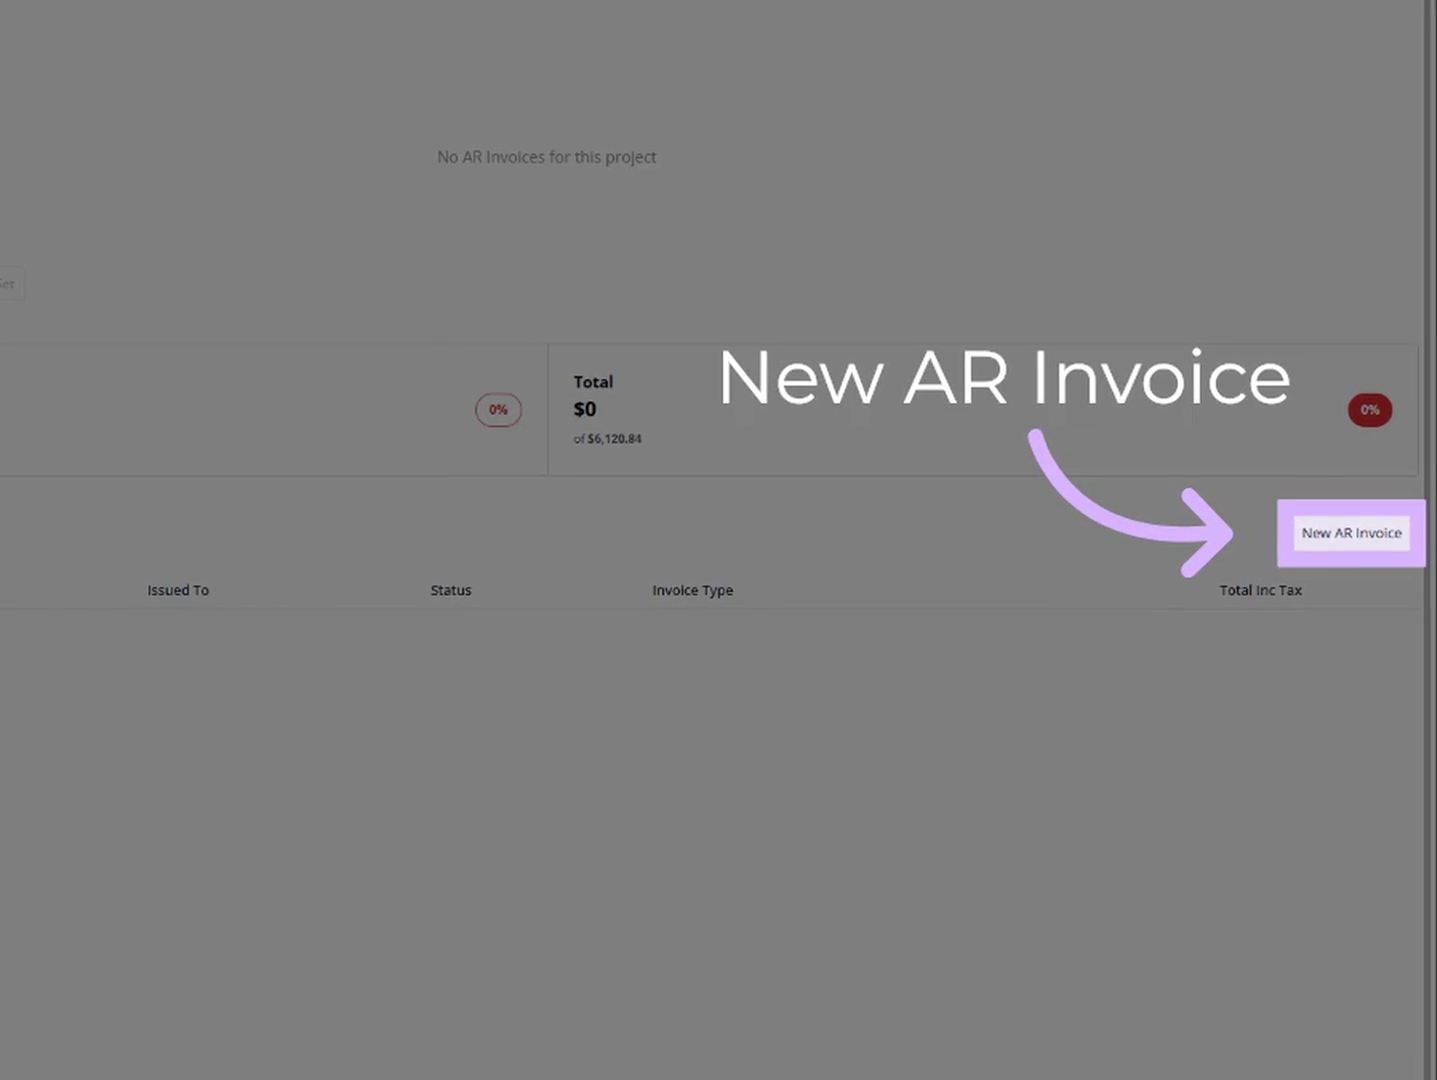
Click New AR Invoice, then choose the invoice option from the dropdown.
Details:
- If the job has no invoices yet, the screen shows No AR invoices for this project.
- The guide describes this dropdown choice as selecting excess. The recording opens the New Invoice From Authorised Scope(s) screen, which is where the excess is applied.
Step 5: Set the Invoice Details and Template
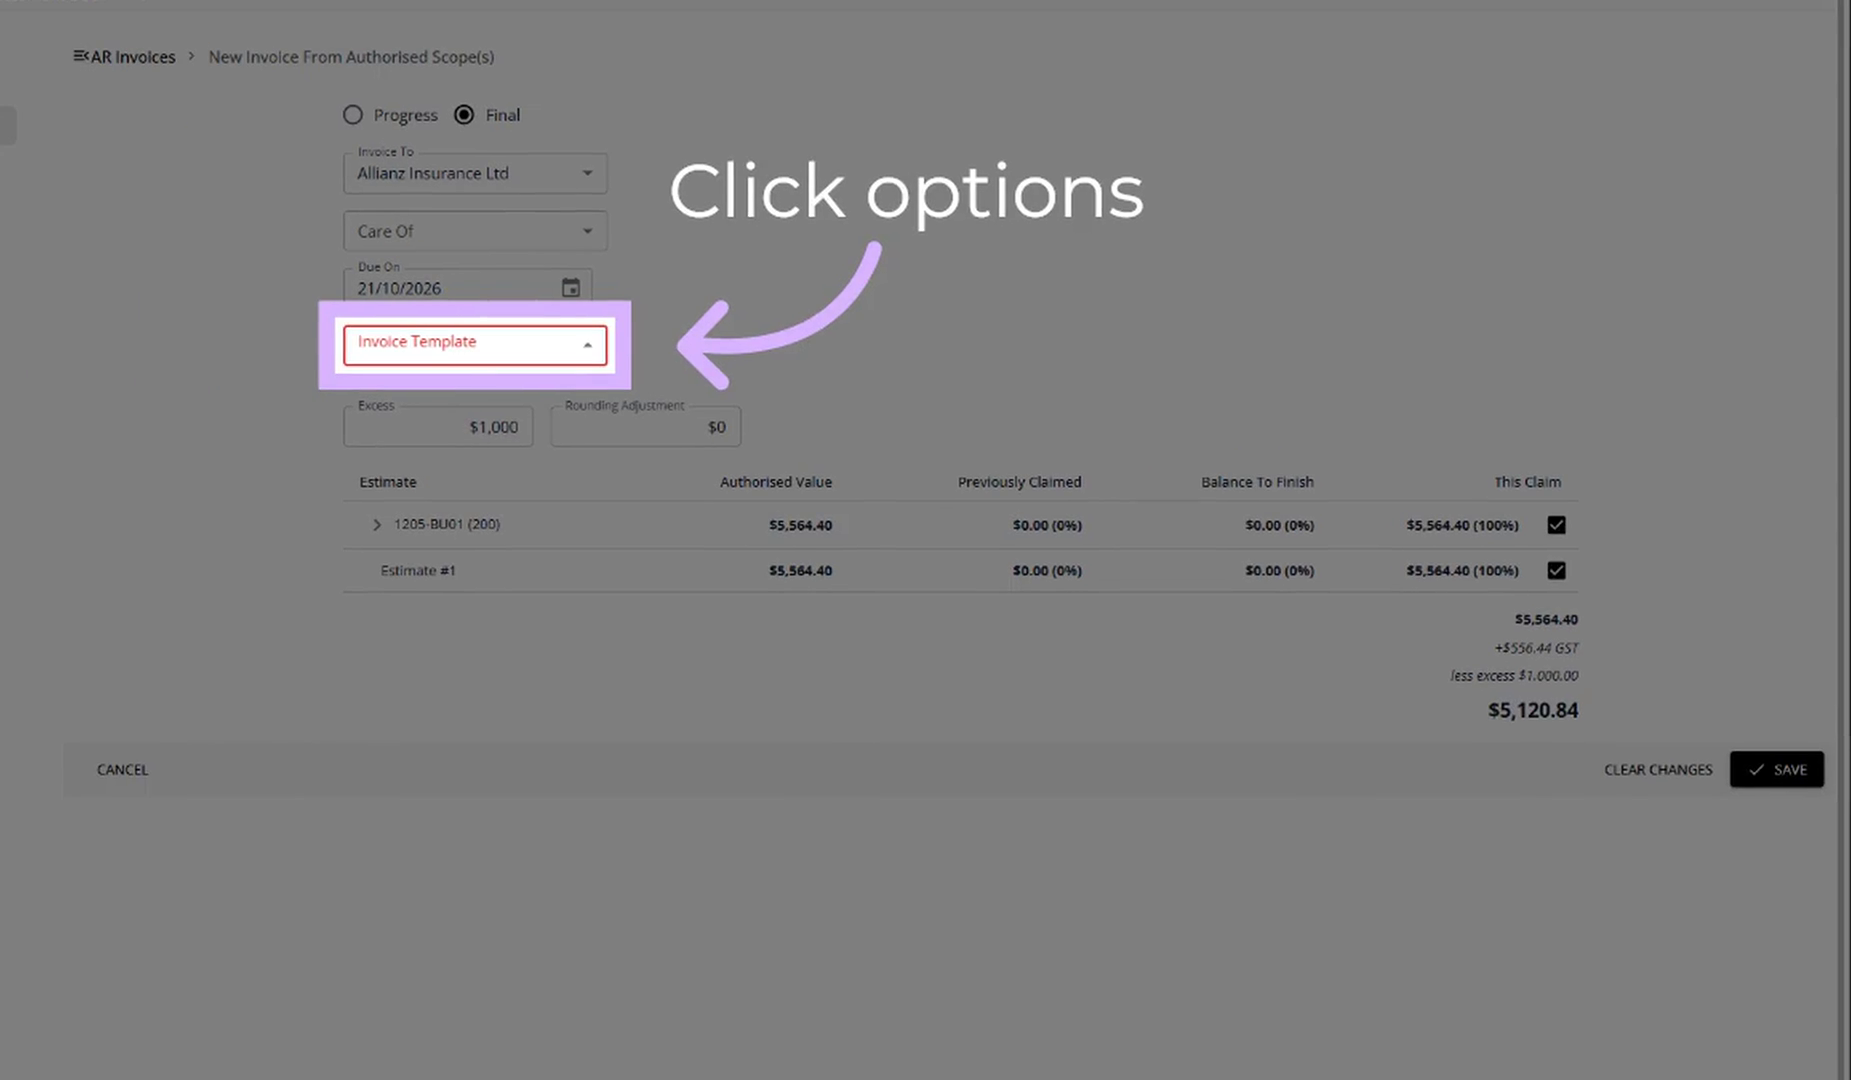
On the New Invoice From Authorised Scope(s) screen, check the invoice details, then click the Invoice Template dropdown and choose the template.
Details:
- Choose Progress or Final. The recording uses Final.
- Invoice To shows the client, and Care Of and Due On sit beneath it.
- The Invoice Template dropdown holds the templates for the invoice. The recording uses Tax Invoice 2025.
- The Excess field shows the job's excess, beside a Rounding Adjustment field.
Step 6: Review and Select the Excess Amount
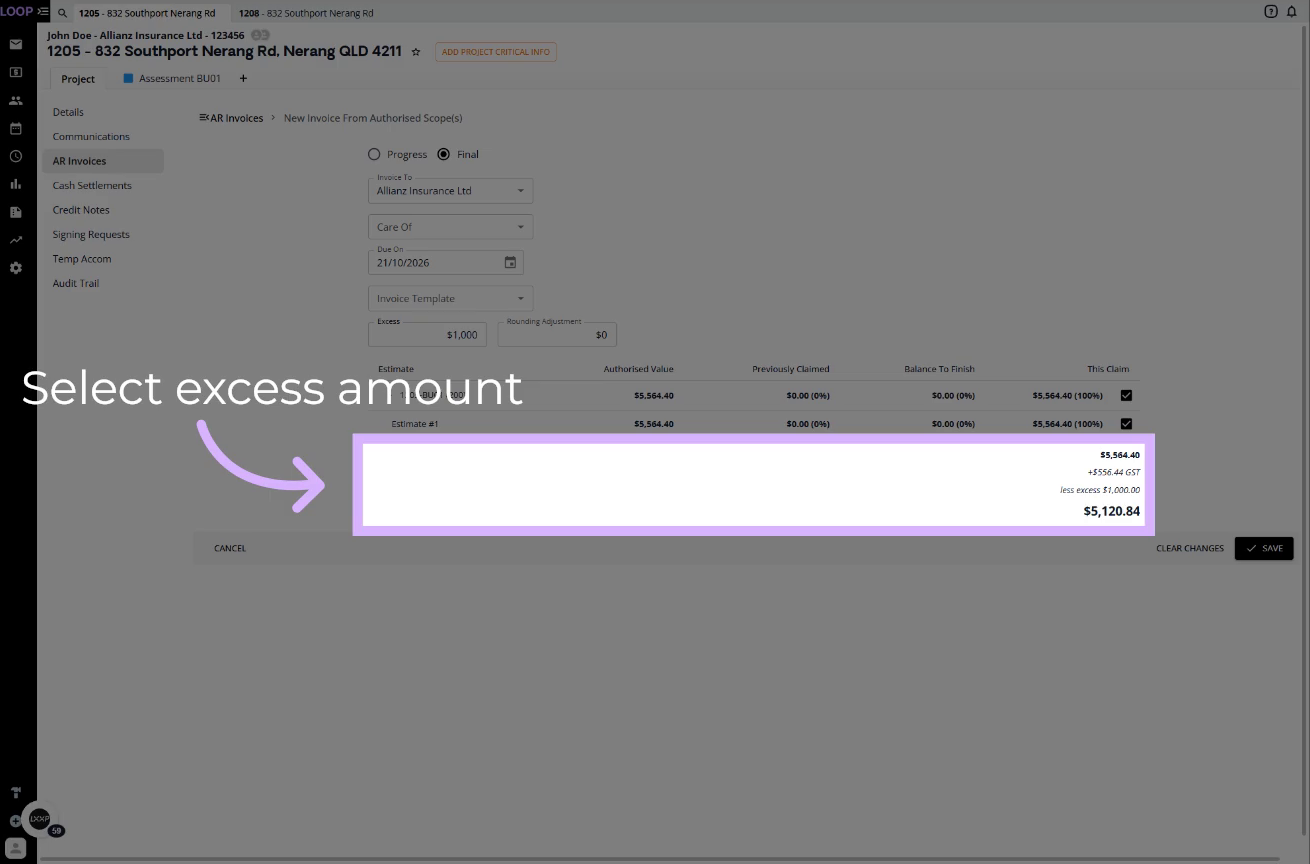
Review the estimate lines and the totals at the bottom of the invoice, and check the excess amount.
Details:
- The estimate table shows Authorised Value, Previously Claimed, Balance To Finish and This Claim, with a tick beside each line.
- Below the table, the totals show the amount, the GST, a less excess line and the final total.
- In the recording the excess is deducted, so the invoice total is lower than the claim total by the excess amount.
Step 7: Save the Tax Invoice
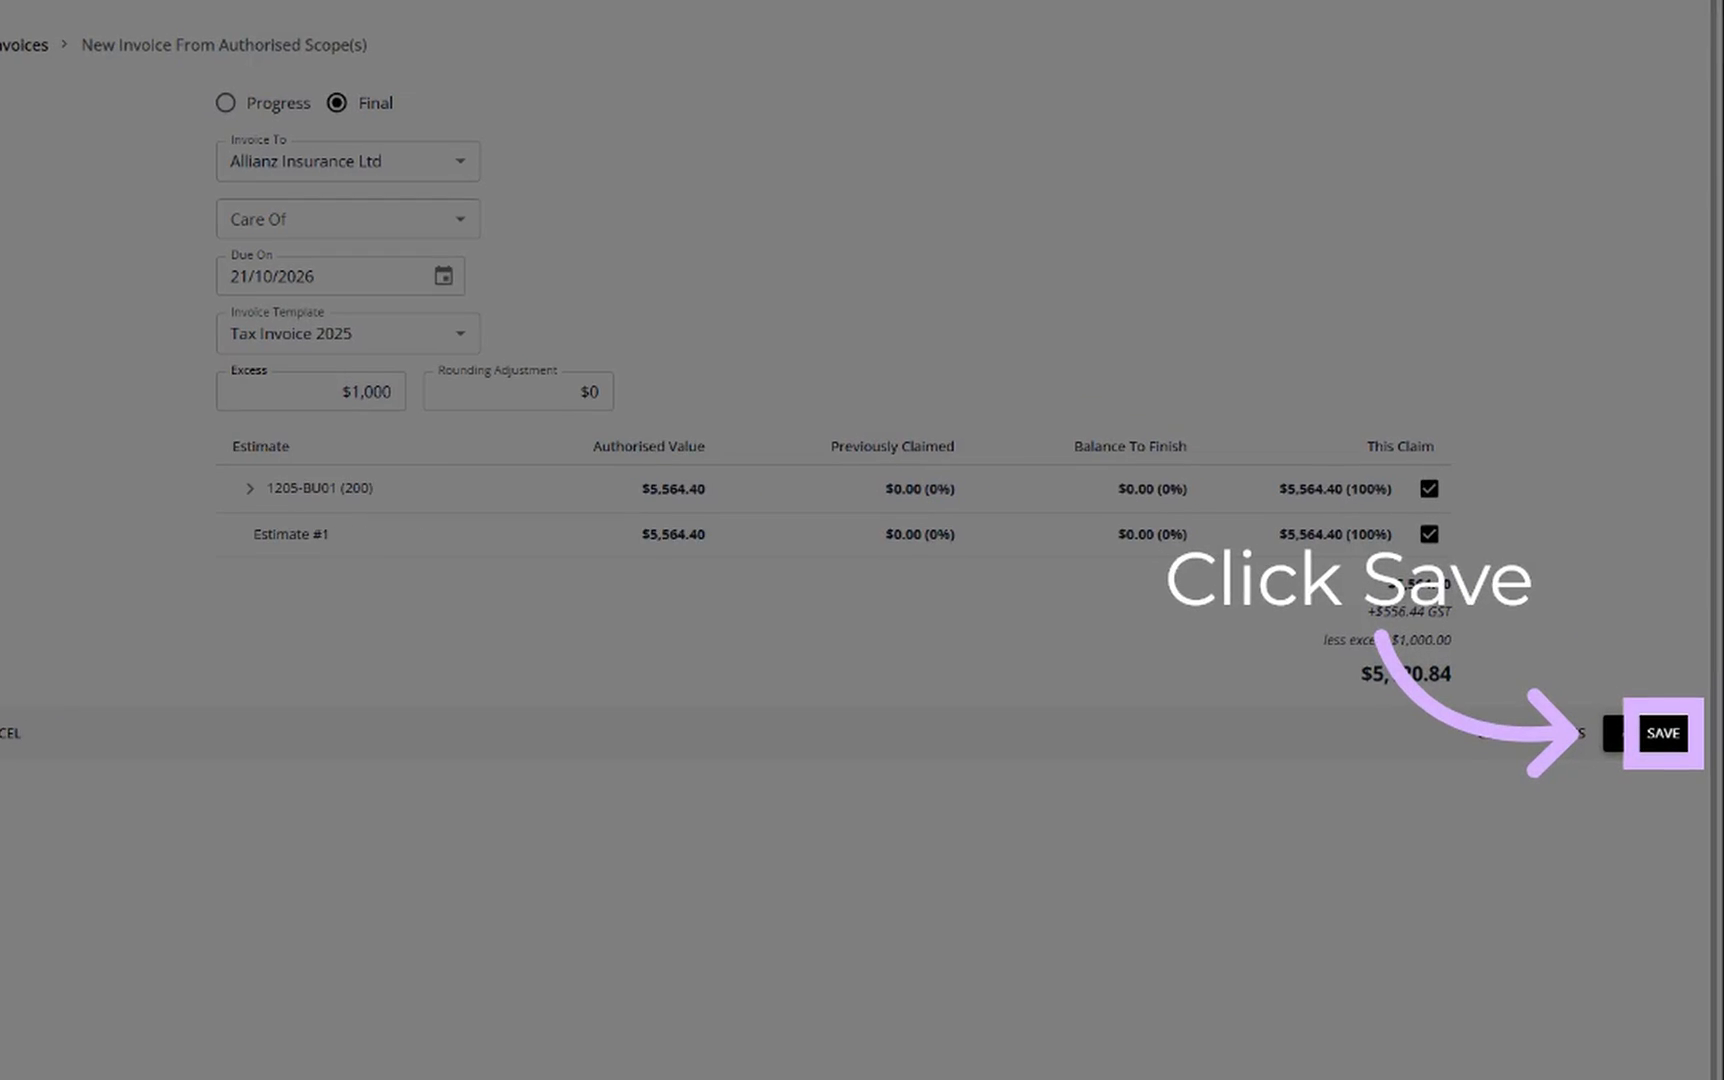
Click Save to finalise the tax invoice.
Step 8: Sync to Your Accounting Software
Sync the saved invoice to your accounting software.
Details:
- The guide ends with this step. The recording does not show the Sync screen, which works the same way as in the Accounts Payable and Receivable Guide.
Summary
Key Managing Excess Steps:
Stage 1, Recording the Excess:
- Tick Collect Excess in the Details section when the job is registered
- Open Edit Project Details to update the Excess field when it changes
Stage 2, Invoicing the Excess:
- Click AR Invoices in the project sidebar, then New AR Invoice
- Choose Progress or Final, check the client and the Invoice Template
- Check the Excess field and the totals, including the less excess line
- Click Save, then sync to your accounting software
Key Points to Remember:
- Excess is recorded on the job first, then applied when you invoice from AR Invoices
- Check the less excess line before you save
👇Recap
- You've learned how to set a job to collect excess and update the excess amount.
- You've started an AR invoice, chosen the template and checked the excess on the totals.
- You've saved the tax invoice and know to sync it to your accounting software.
🙅♂️Common mistakes to avoid: Raising the invoice before the excess amount on the job is up to date, or saving without checking the less excess line in the totals.
🥇What good looks like: The correct excess recorded on the job, one tax invoice saved with the excess applied, and the invoice synced to your accounting software.
FAQ
Where do I record the excess? In the Excess field in the claim details when the job is registered, with Collect Excess ticked.
Can I change the excess amount later? Yes. Open Edit Project Details and enter the new value in the Excess field.
Where do I raise the excess invoice? From AR Invoices in the project sidebar, using New AR Invoice.
How do I know the excess has been applied? The totals at the bottom of the invoice show a less excess line before the final total.
❓ Need Help?
If you have questions or need assistance, use the chat box in the bottom-right corner to contact the Loop Logics support team or email support@looplogics.com
👉👏Congratulations! You have reached the final Module in our Role Based Training - Finance Continue your learning with other Role Based Training Modules here.