
Module 7: Supervisor - PM Updates
💡This article covers how to submit a PM Update on a job, including the progress details, the start and completion dates and any delays. PM Updates keep everyone on the job informed and give you a simple copy and paste for insurer portals, so keep them clear, accurate and professional because everyone can see them.
Step 1: Open the Job Module
From the project, click the job module tab you want to update.
Details:
- The job opens inside the project, with the job left menu down the side
- The job module tabs sit next to the Project tab, for example Assessment BU01
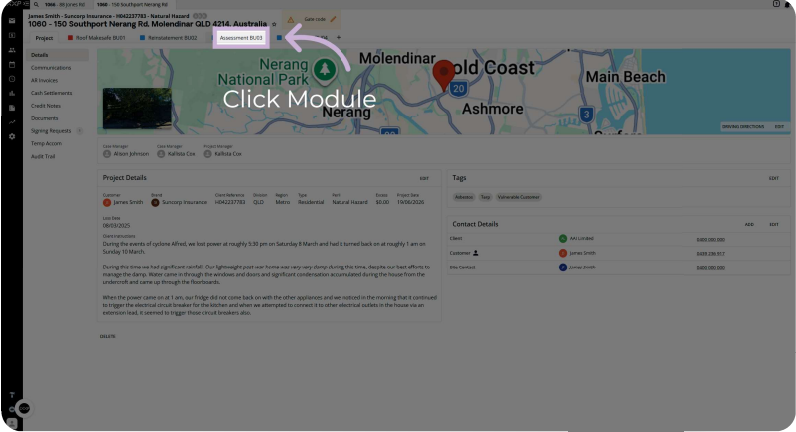
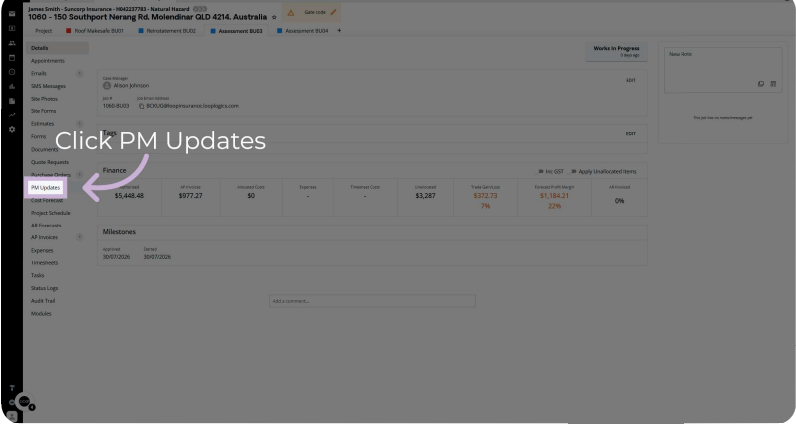
Step 2: Open PM Updates
Click PM Updates in the left menu of the module.
Details:
- PM Updates sits in the left menu below Purchase Orders
- The PM Updates screen opens with the update box at the top
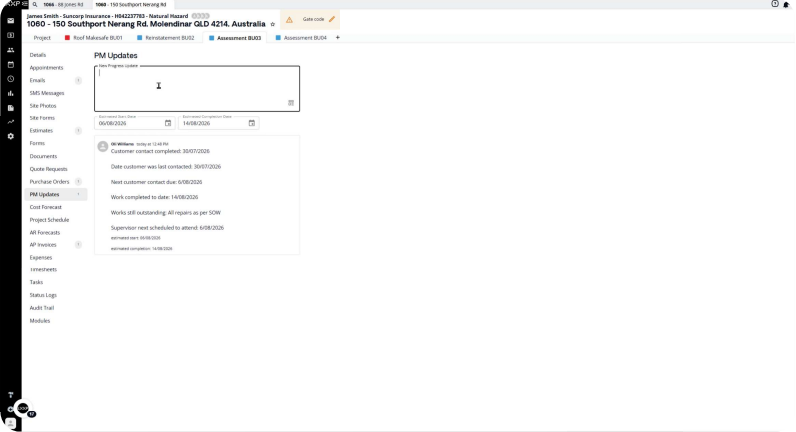
- Any updates already submitted on the job show below the box
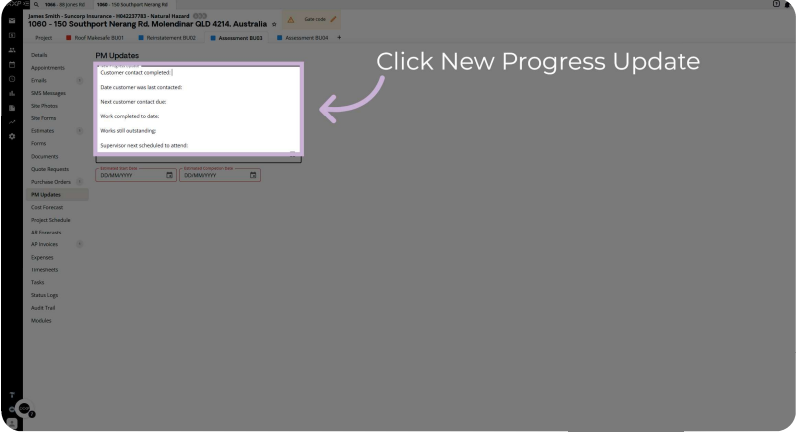
Step 3: Start a Progress Update
Click in the update box to start a new progress update.
Details:
- The box opens ready for typing, with prompt lines for the information to include
- The prompts read Customer contact completed, Date customer was last contacted, Next customer contact due, Work completed to date, Work still outstanding and Supervisor next scheduled to attend
- Two date fields sit below the box, with a calendar icon on each
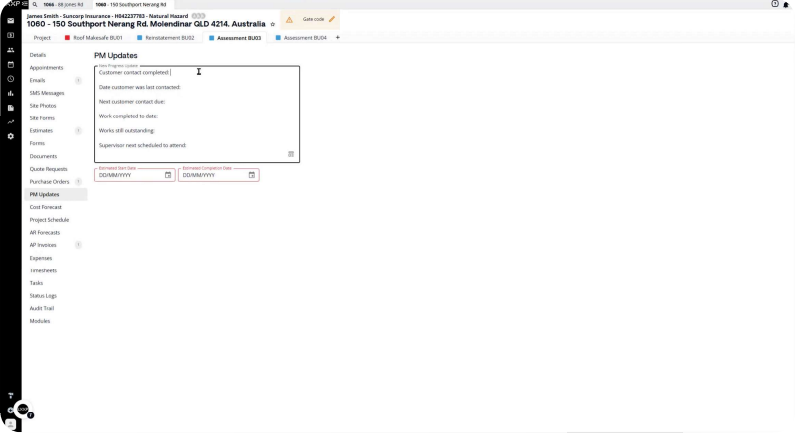
Step 4: Enter the Update
Type your progress update, filling in each prompt line, or use a template if one is available.
Details:
- Include the customer contact completion date, last contact date and next contact due
- Include the work completed to date, the outstanding work and the supervisor's next scheduled attendance
- Templates show at the bottom right of the box when they are available for your setup
- Keep the wording clear, accurate and professional, as everyone on the job can see it
Step 5: Set the Start Date
Click the calendar icon next to the Start Date field and select the day.
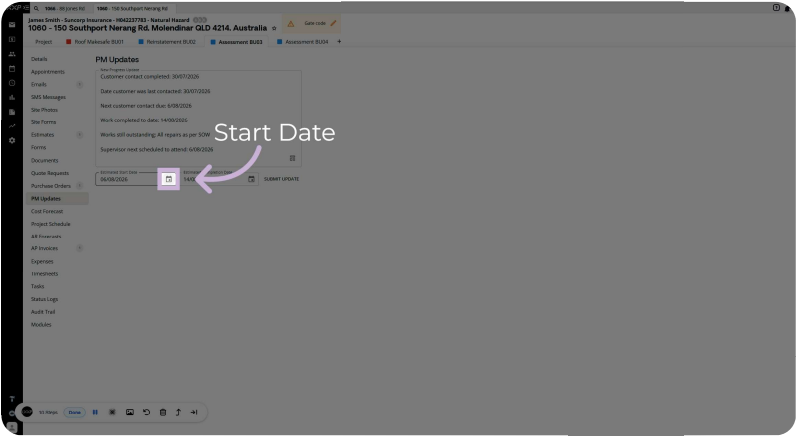
Details:
- A calendar opens for the month, and you click the day of the month
- The selected date fills the field in day, month, year format
- The date fields show in red until they are filled in
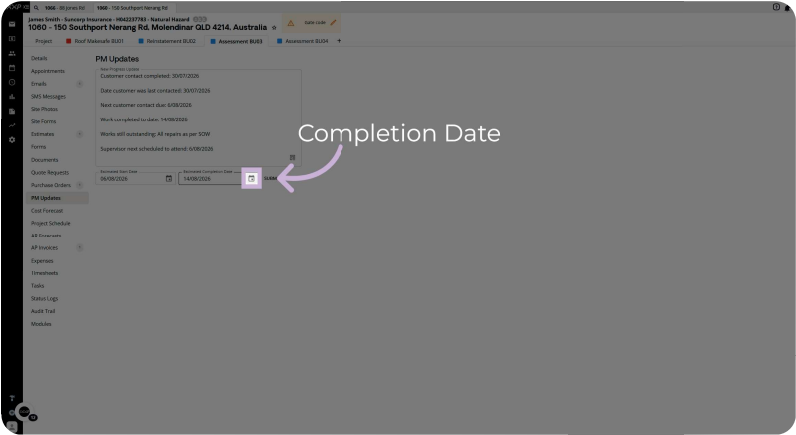
Step 6: Set the Completion Date
Click the calendar icon next to the Completion Date field and select the date.
Details:
- The same date picker opens for the completion date
- This date reports into the analytics dashboards for forecasting, so keep it current when timing changes
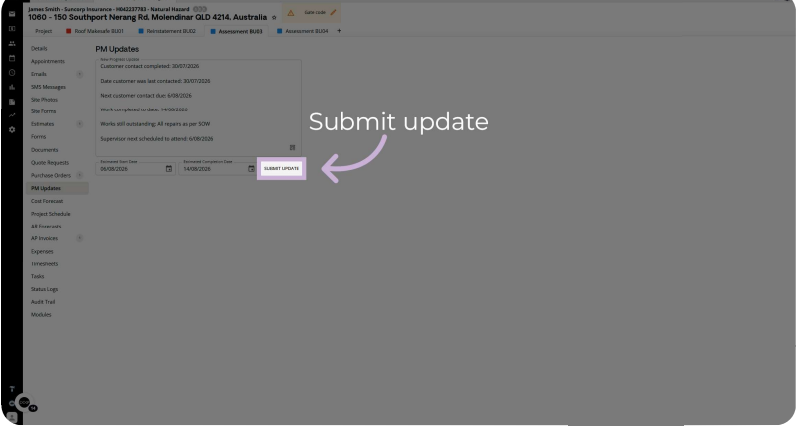
Step 7: Submit the Update
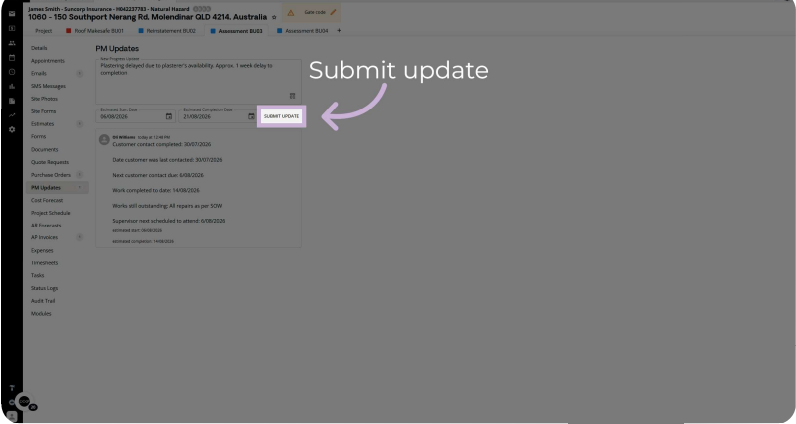
Click Submit Update to save and submit the progress update.
Details:
- The button sits to the right of the two date fields
- The update is saved on the job and appears below the box with the author and date
- Depending on the admin settings, the Case Manager or Project Manager is notified at the time of the update
Step 8: Record a Delay
When timing changes, enter the reason for the delay in the update box, for example "Plastering delayed due to plasterer's availability, approximately one week delay to completion."
Details:
- PM Updates are also how you keep everyone informed of changes such as delays
- The submitted update from Step 7 stays listed below the box, so the history of updates is visible on the job
- Include the expected impact on completion, and update the completion date if it has changed
Step 9: Submit the Delay Update
Click Submit Update again to finalise and save the latest progress update.
Details:
- The new update is added to the list on the job
- Everyone on the job can see it, so only include what you are comfortable with everyone reading
Summary
Key PM Update Steps:
Starting the update:
- Open the job module and click PM Updates in the left menu
- Click in the update box
Setting It Up:
- Fill in the prompt lines, or use a template if one is available
- Set the Start Date and Completion Date from the calendar icons
Sending It / Finishing:
- Click Submit Update to save the update to the job
- Add a delay reason and submit again when timing changes
Key Points to Remember:
- Everyone on the job can see PM Updates
- You can copy and paste the update text into insurer portals
- The completion date reports into the analytics dashboards for forecasting
- Who is notified depends on your admin settings
👇Recap
- You've learned how to open PM Updates and enter a progress update
- You've set the start and completion dates
- You've submitted the update and recorded a delay with its reason
🙅♂️Common mistakes to avoid: Writing anything you would not be comfortable with everyone on the job reading, or leaving the completion date out of date when timing changes.
🏆What good looks like: A clear, accurate and professional update with every prompt line filled in and the completion date current.
FAQ
Who can see a PM Update? Everyone on the job can see it, so keep it professional.
Who is notified when I submit? Depending on the admin settings, the Case Manager or Project Manager is notified at the time of the update.
Why does the completion date matter? It reports into the analytics dashboards for forecasting.
Need Help?
If you have questions or need assistance, use the chat box in the bottom-right corner to contact the Loop Logics support team or email support@looplogics.com
👉 Continue your learning, next step is to move onto Module 5: Project Supervisor -How to use the Delivery Budget to continue.