
Module 4: Supervisor - Upload and Manage Photos
💡This article covers how to upload site photos to a job, enable and label them, and generate a PDF photo schedule. It keeps every job image in one place so it is ready for forms and reports.
Step 1: Select Your Job Module
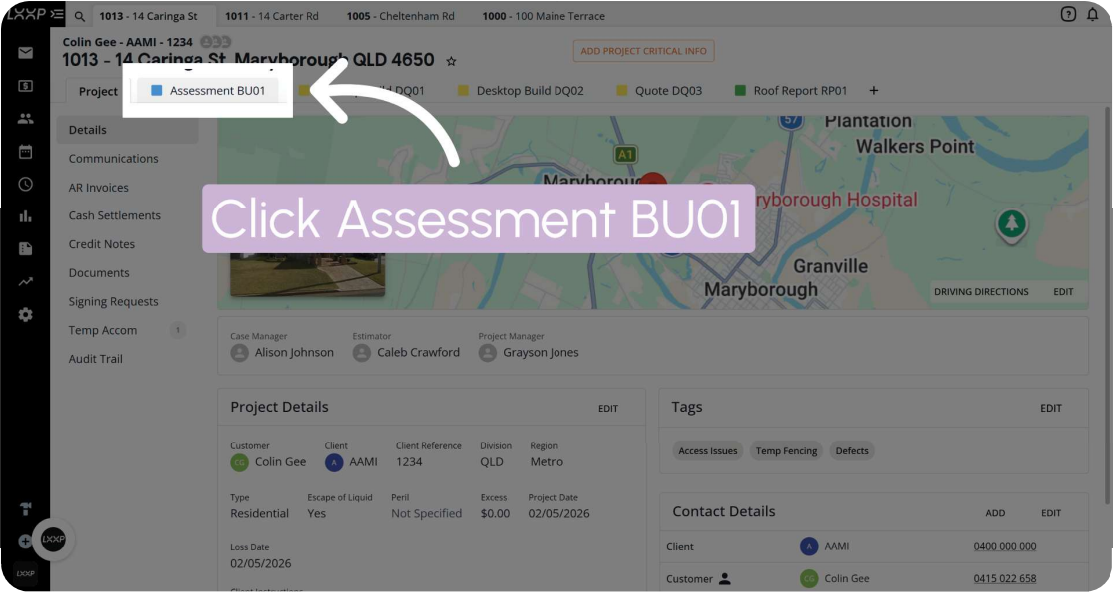
From the job, click the module tab you want to open, for example Assessment BU01.
Details:
- The job opens on the Details screen with its map, Project Details, Tags and Contact Details
- The module tabs sit along the top of the job, next to Project
Step 2: Open Site Photos and Click Upload Site Photos
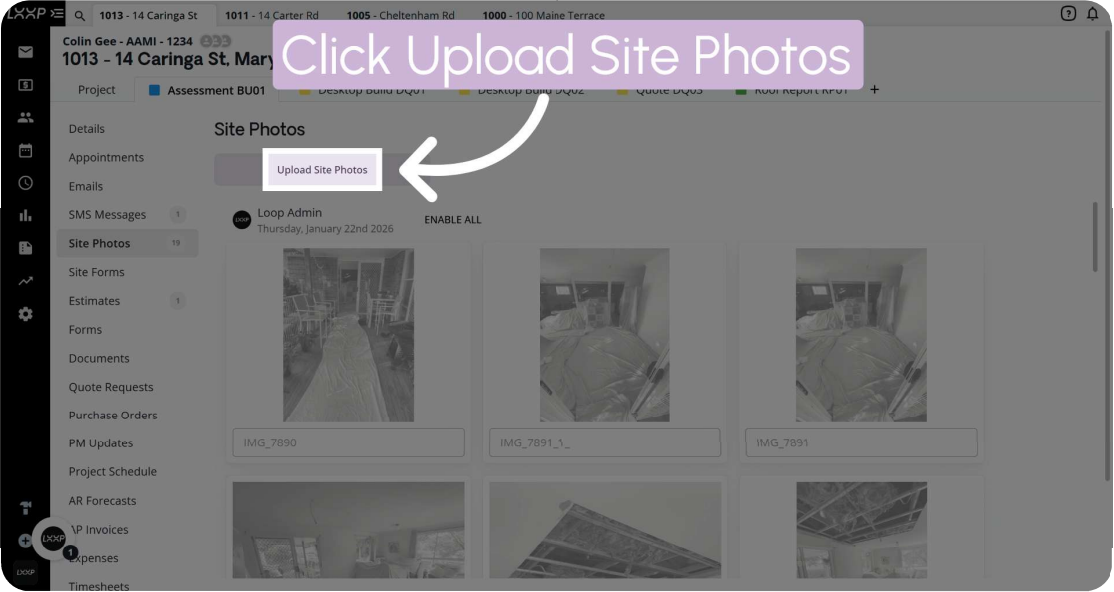
Click Site Photos in the side bar, then click Upload Site Photos.
Details:
- Previously uploaded photos display in a gallery, each with a label field underneath
- Each upload batch shows who added it (for example Loop Admin) and the date
- An Enable All button sits next to the batch details
Step 3: Add Your Photos
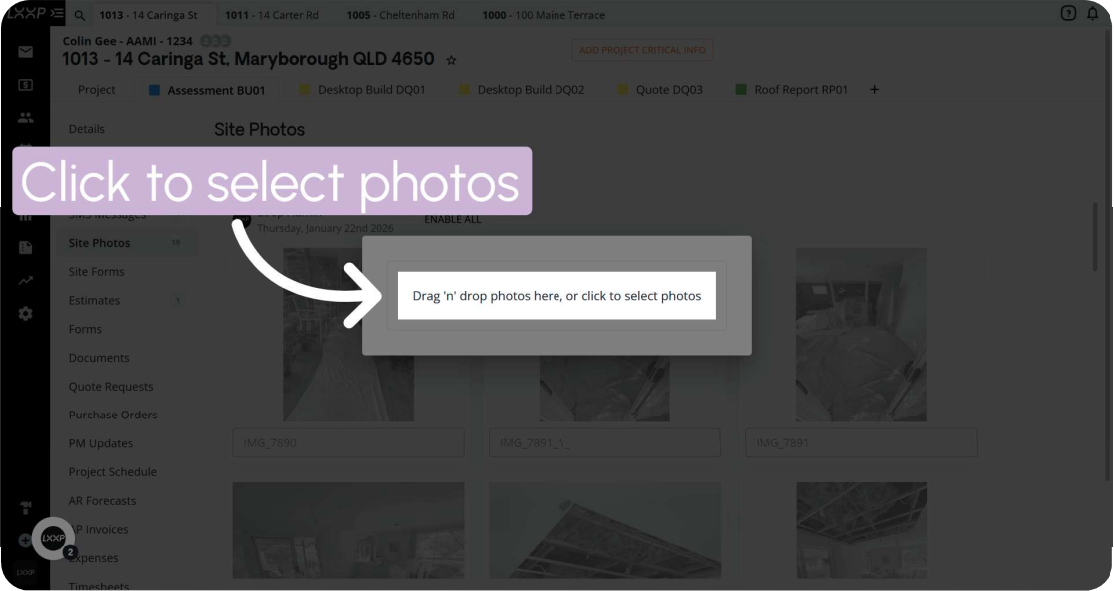
Click Drag 'n' drop photos here, or click to select photos to choose images from your device.
Details:
- Drag photo files into the upload area, or click it to open the file browser
- The upload area appears over the Site Photos gallery
Step 4: Enable All Photos
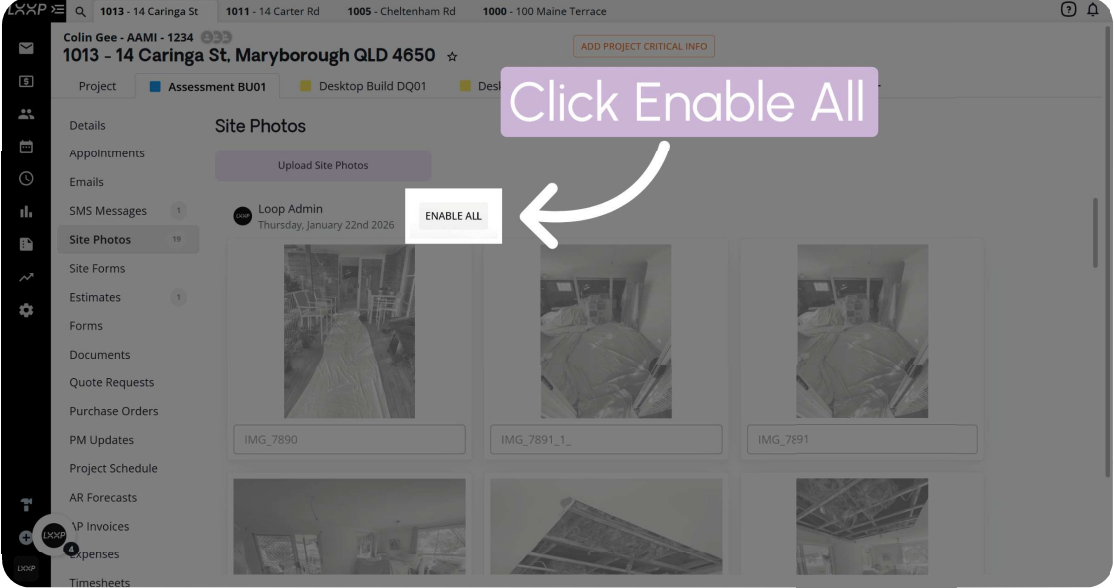
Click Enable All to activate all uploaded photos for use on your job, then click Save.
Details:
- Images appear greyed out until they are enabled
- After enabling, the button changes to Disable All
- Save and Clear Changes sit at the bottom right of the screen
Step 5: Enable Individual Photos
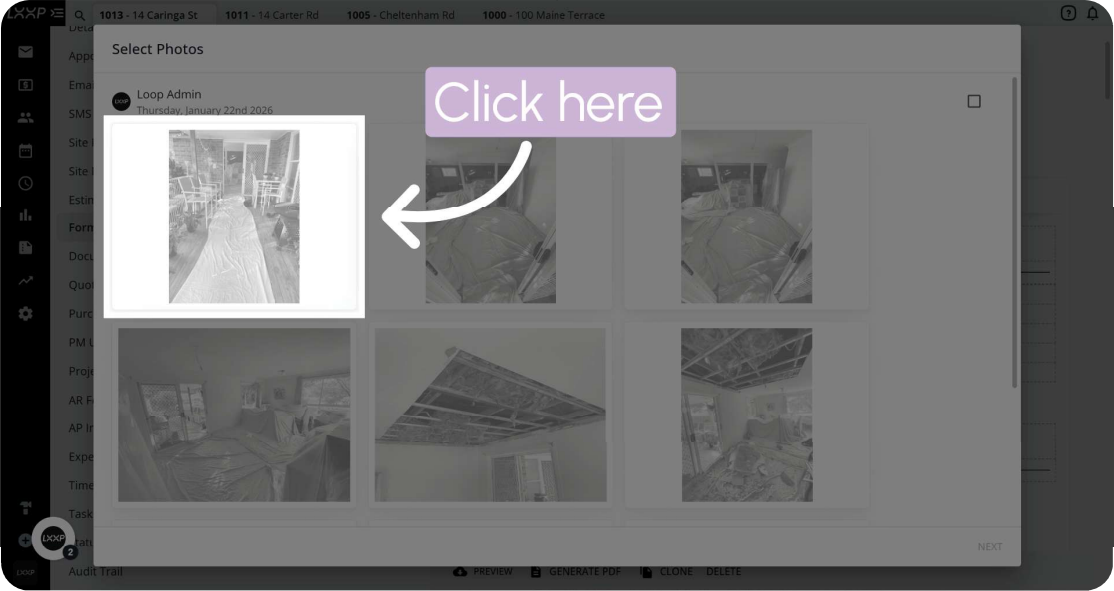
To enable photos one at a time, click the image and it will display in colour.
Details:
- This is shown in the Select Photos window, where the photos are shown as thumbnails
- Greyed out images are the ones not yet selected
Step 6: Label an Image
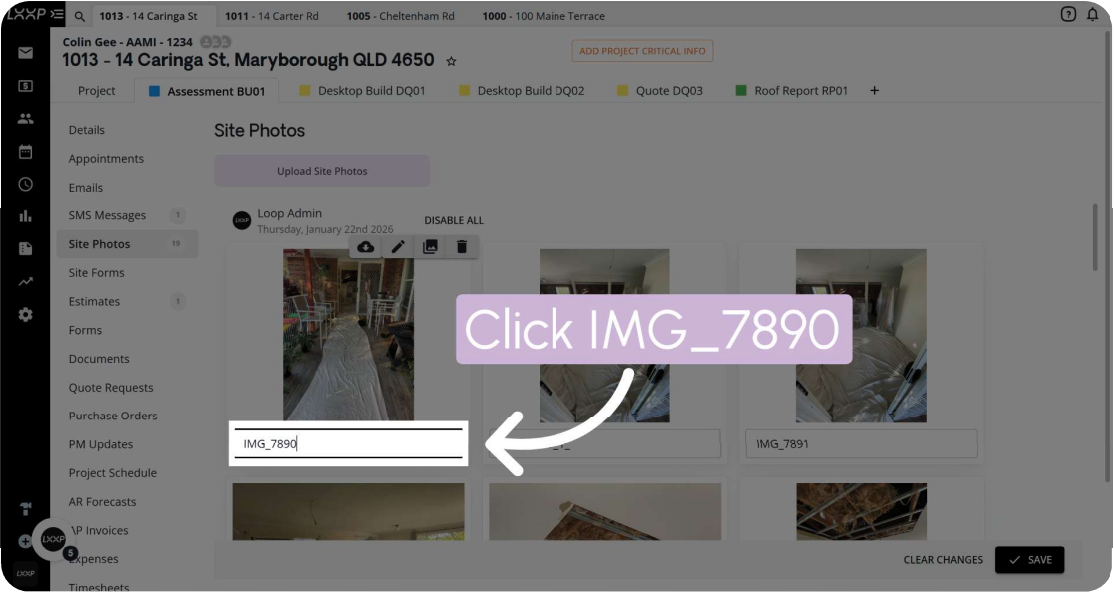
Click the label field under the image you want to label or edit, and type your label.
Details:
- Each image has a label field under it, which shows the file name until you change it
- Hovering over an image shows small icons above it for editing options
- A label can be typed straight into the field
Step 7: Confirm the Label
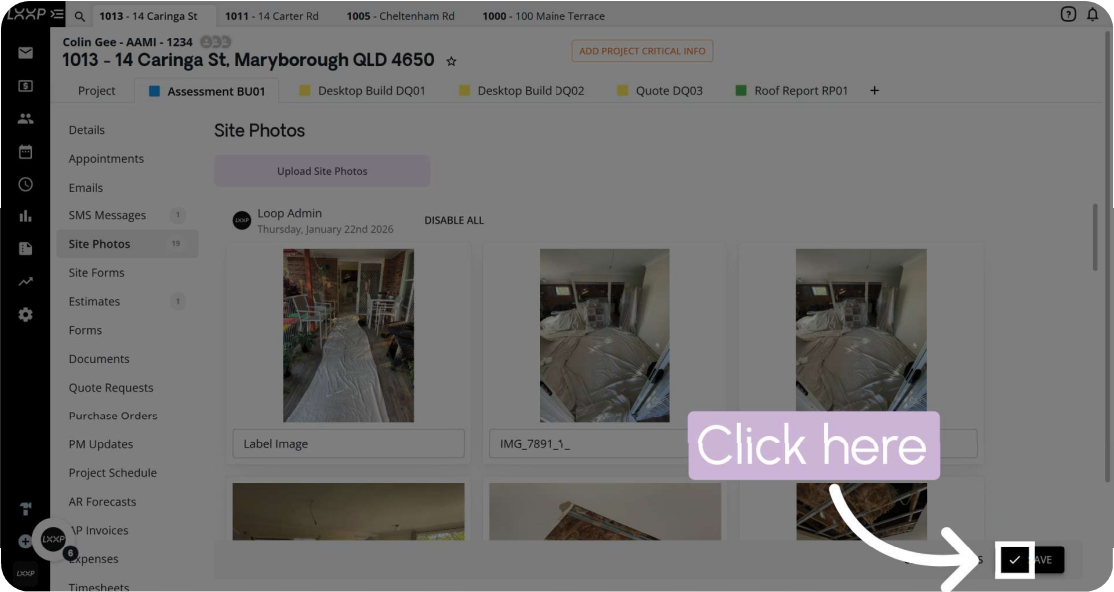
Click Save at the bottom right to confirm the label you entered.
Details:
- The new label displays under the image once saved
- Clear Changes sits beside Save if you want to undo your edits
Step 8: Open Forms
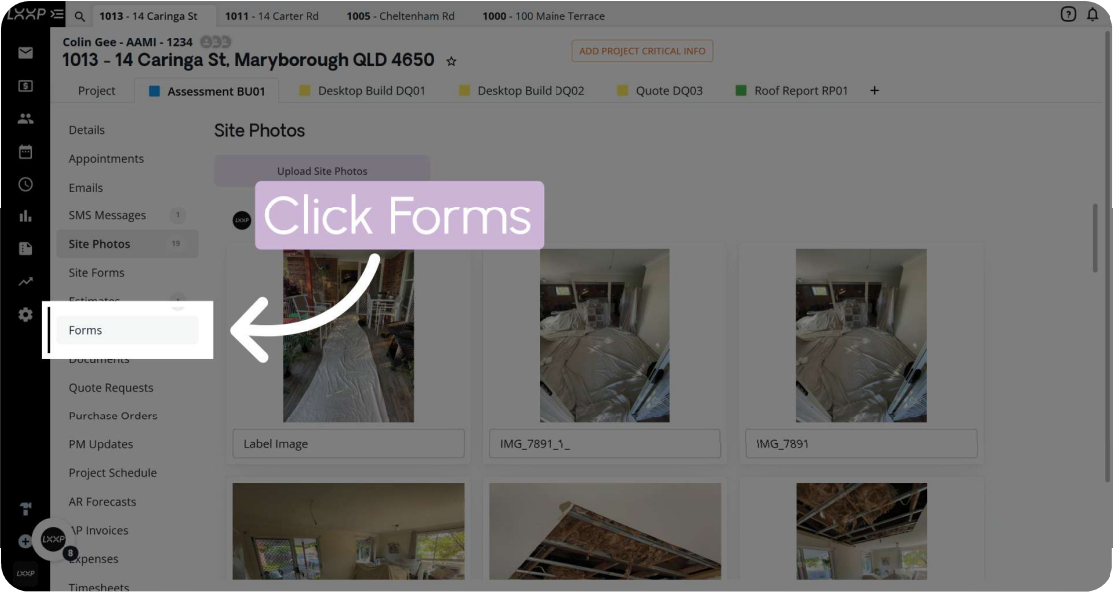
Click Forms in the side bar to open the forms area within the job.
Details:
- The Forms entry sits in the side bar below Site Photos
- Site Photos stays selected until you move to Forms
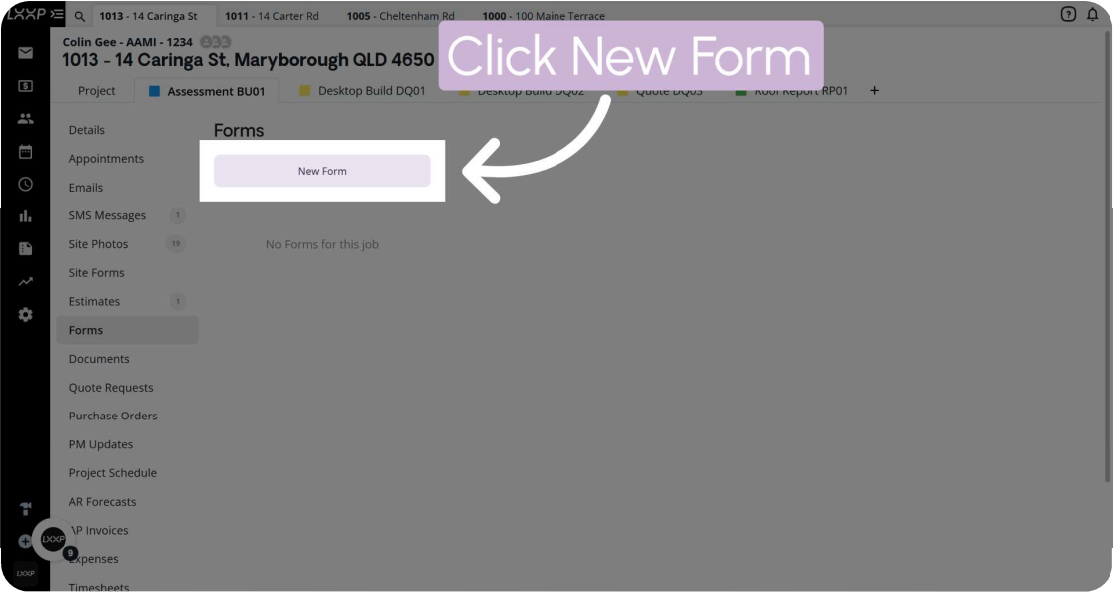
Step 9: Create a New Form
Click New Form to start building a form for your job.
Details:
- The Forms screen shows "No forms for this job" if none have been created yet
- New Form sits at the top of the screen
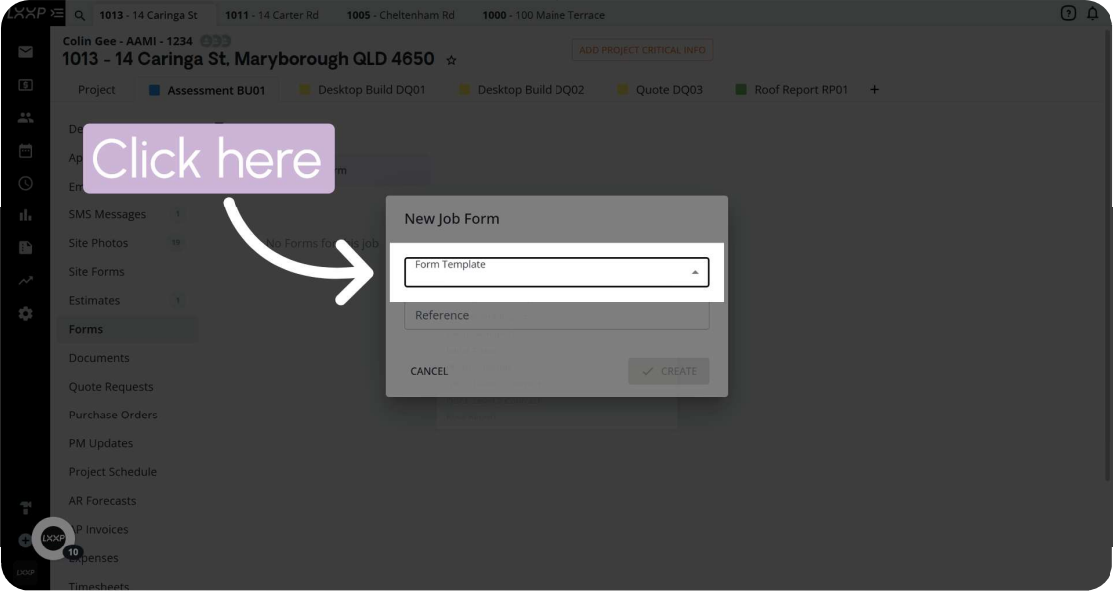
Step 10: Open Form Template
Click the Form Template field in the New Job Form window.
Details:
- The window also has a Reference field and Cancel and Submit buttons
- The template field opens a drop-down list
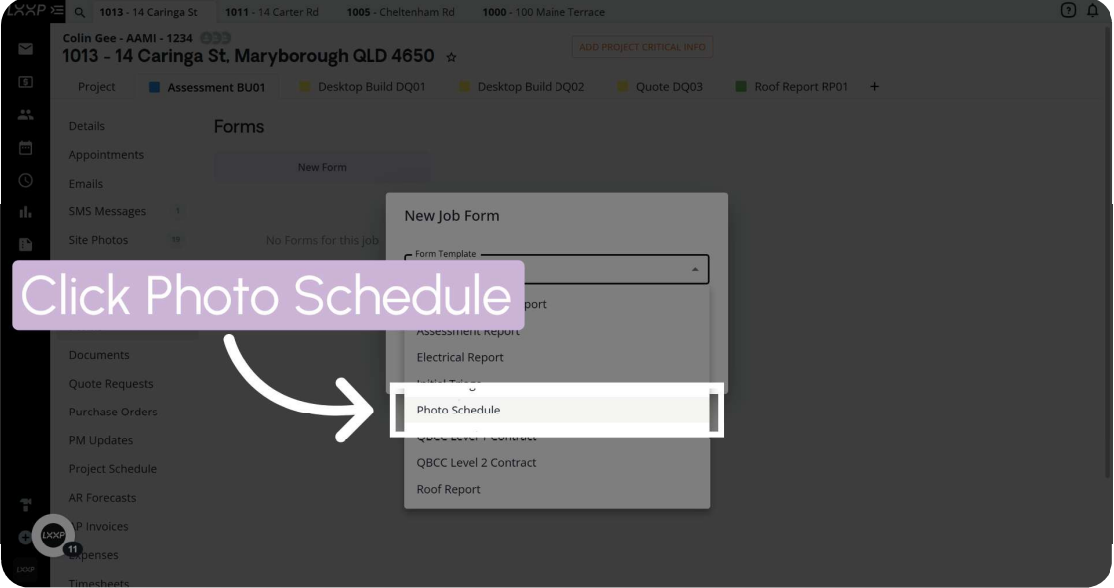
Step 11: Select Photo Schedule
Click Photo Schedule to create a PDF photo schedule.
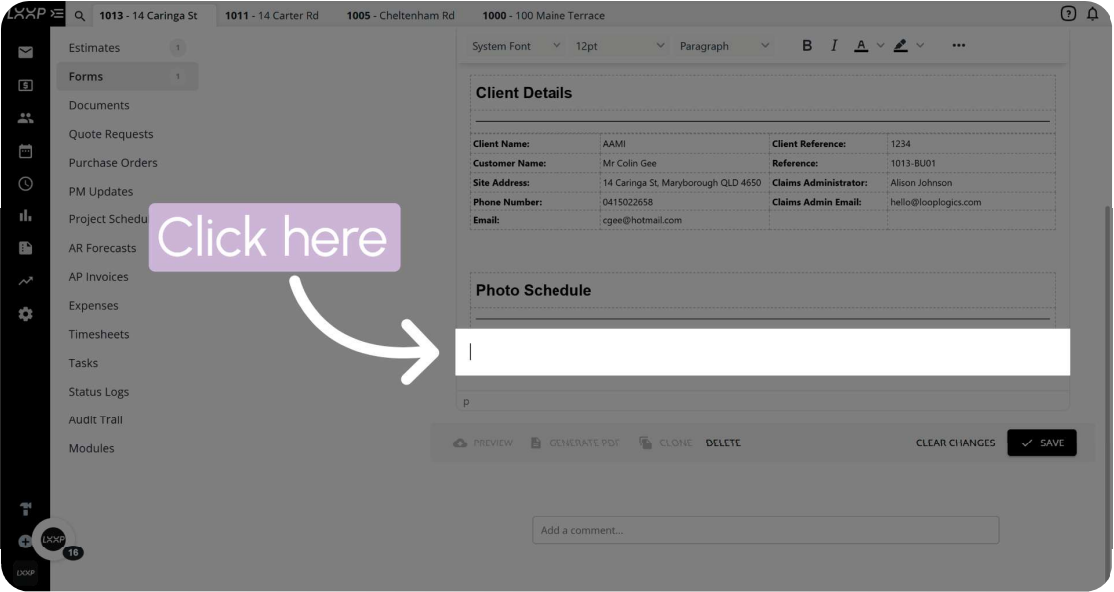
Details:
- The list shows templates such as Electrical Report, QBCC Level 2 Contract, Roof Report and Photo Schedule
- The form opens with a Client Details table and a Photo Schedule heading ready for photos
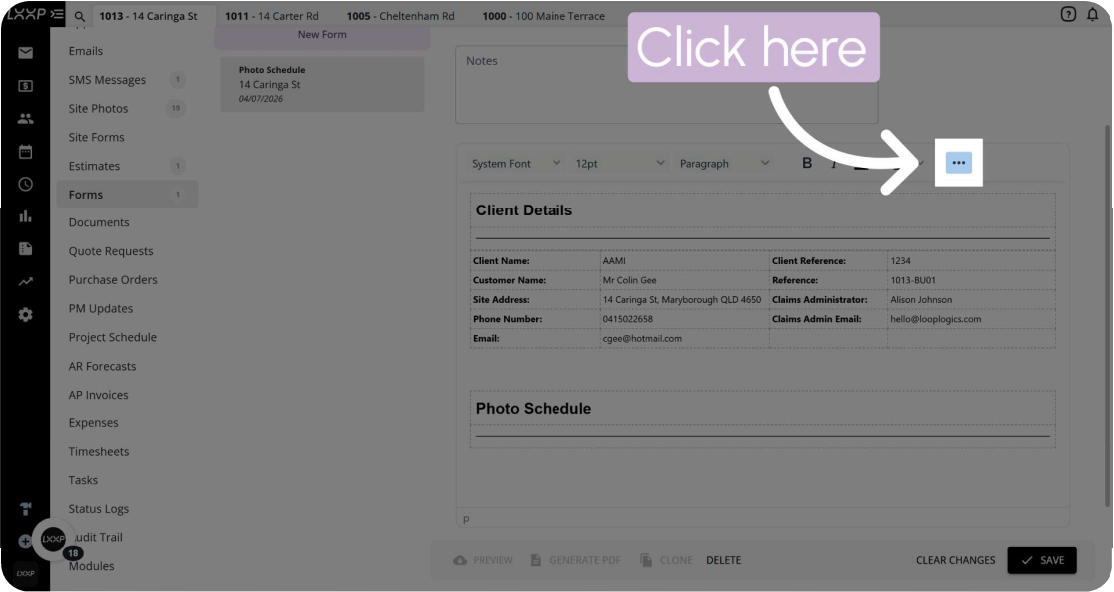
Step 12: Open the Additional Options Menu
Click the menu icon (three dots) in the toolbar to open additional options.
Details:
- The menu icon sits on the right of the editing toolbar
- The form also has Notes and Preview, Generate PDF, Clone and Delete options at the bottom
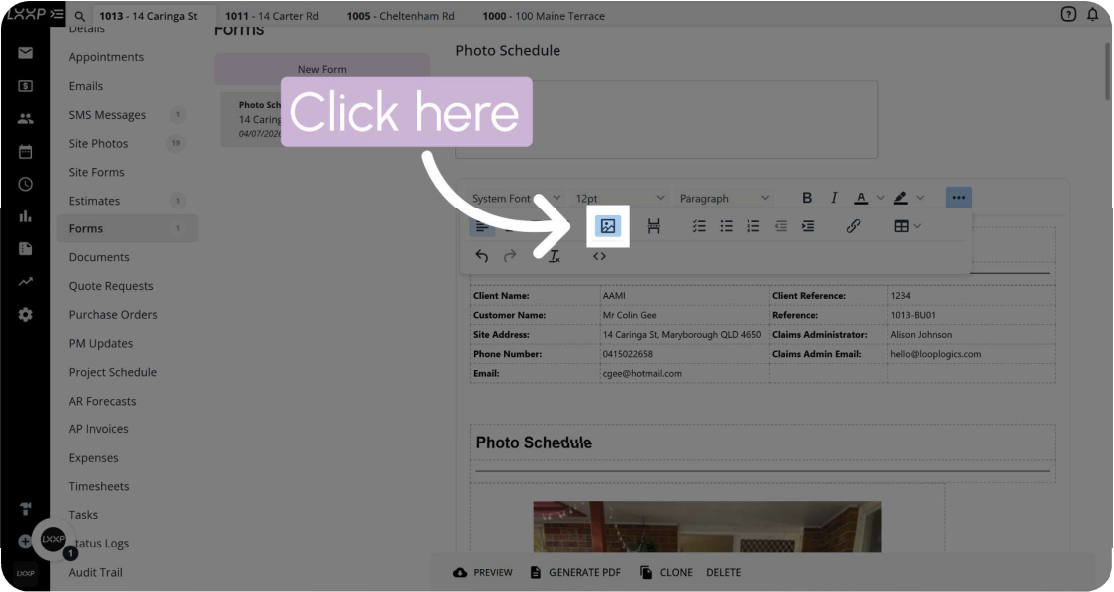
Step 13: Click the Photo Icon
Click the photo icon to open the site photos saved on this job.
Details:
- The photo icon sits in the expanded toolbar menu
- It opens the Select Photos window
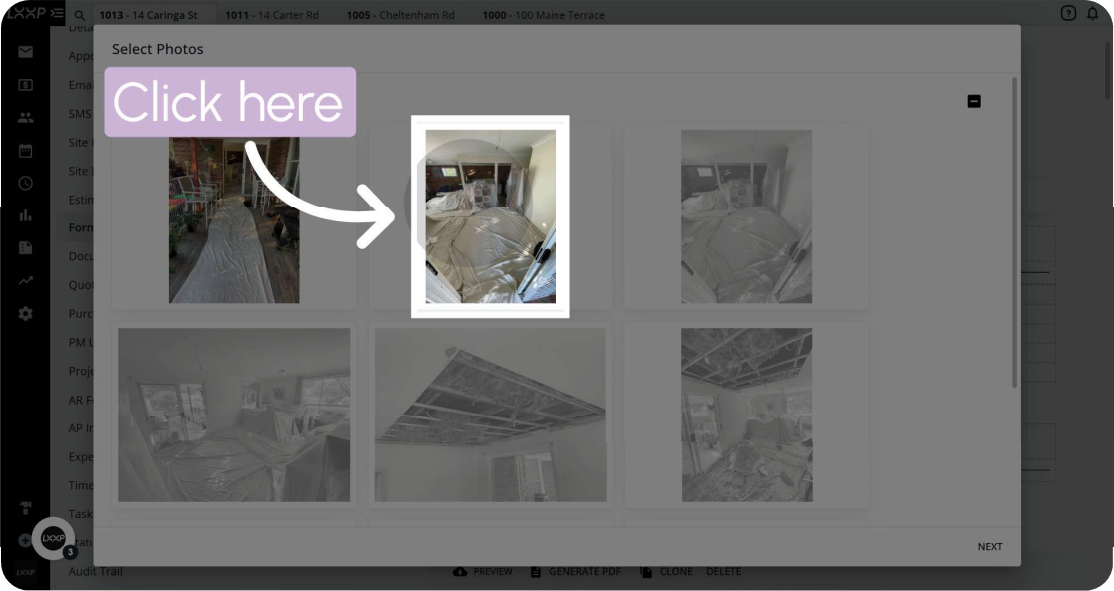
Step 14: Select Images and Click Next
Click each image you want to show on your form, then click Next.
Details:
- The Select Photos window shows the job's photos as thumbnails
- Selected images display in colour
- Next sits at the bottom right of the window
Step 15: Select Size
Click Normal or Small to set the photo size.
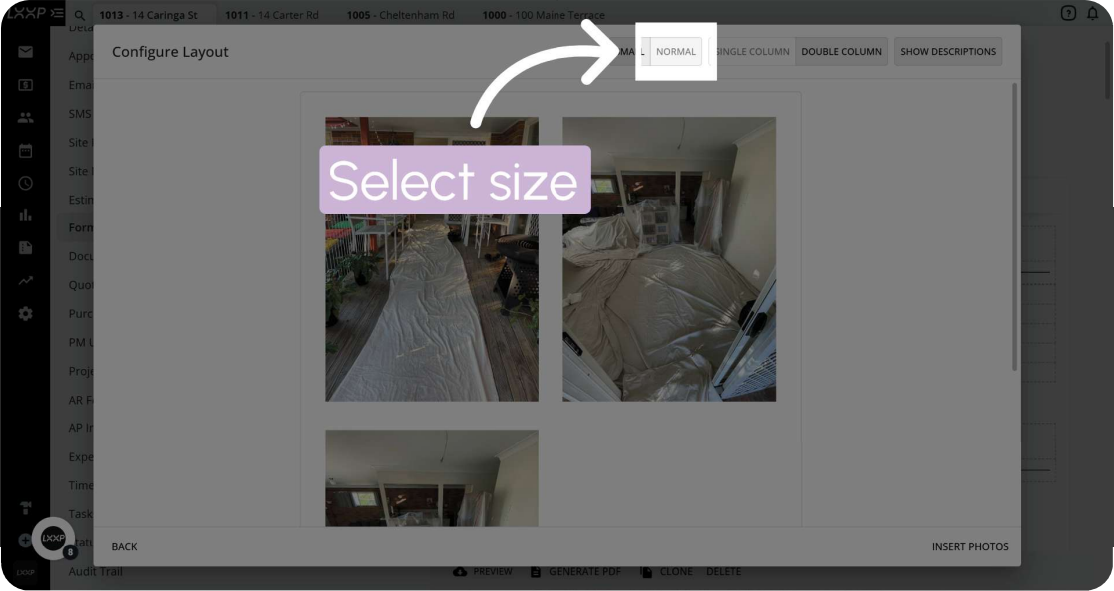
Details:
- The Configure Layout window shows a preview of your selected photos
- The size options sit at the top right of the window
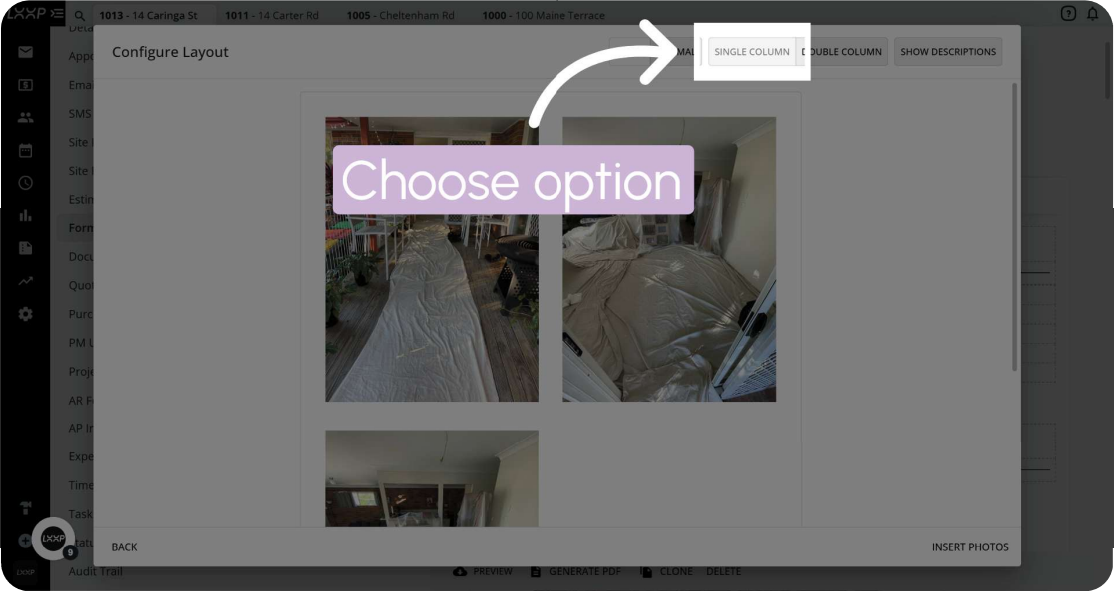
Step 16: Select Column Layout
Click Single Column or Double Column to choose the layout, and use Show Descriptions if you want descriptions with the photos.
Details:
- The preview updates to show the photos in the chosen layout
- Show Descriptions sits beside the column options
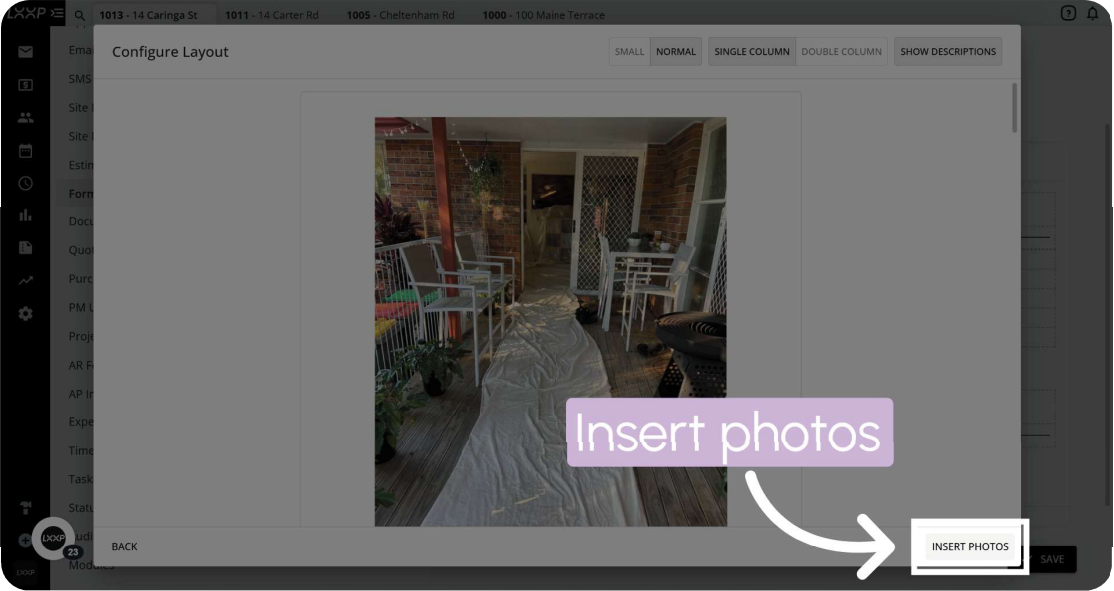
Step 17: Insert Photos into the Form
Click Insert Photos to add the images to the form.
Details:
- Insert Photos sits at the bottom right of the Configure Layout window, with Back at the bottom left
- The preview shows the photo as it will appear
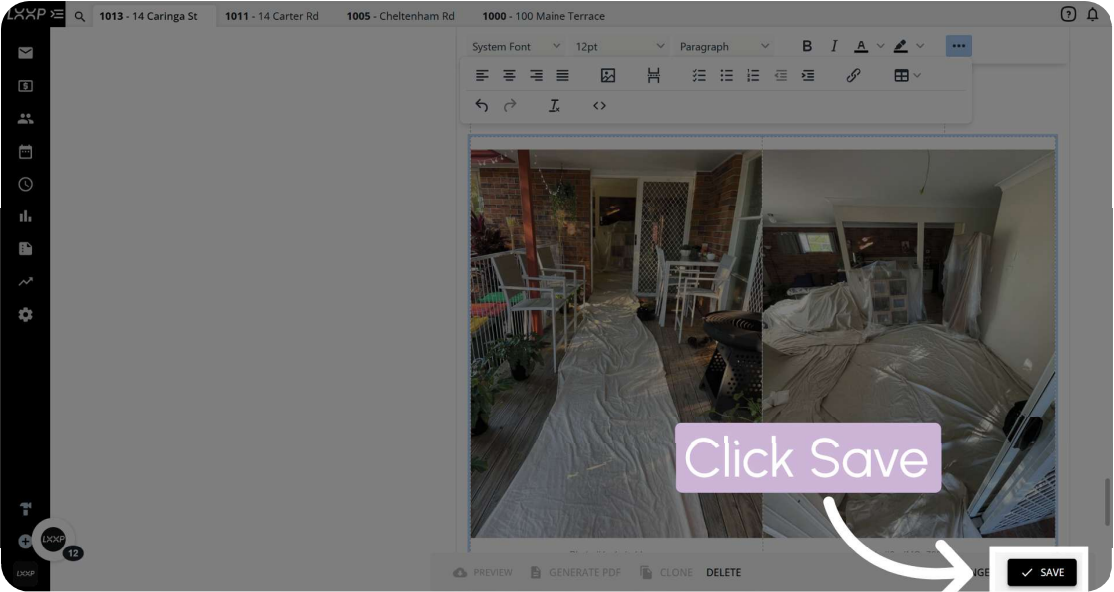
Step 18: Save the Form
Click Save to save your changes to the form.
Details:
- The photos now appear in the form under Photo Schedule
- Save sits at the bottom right of the screen
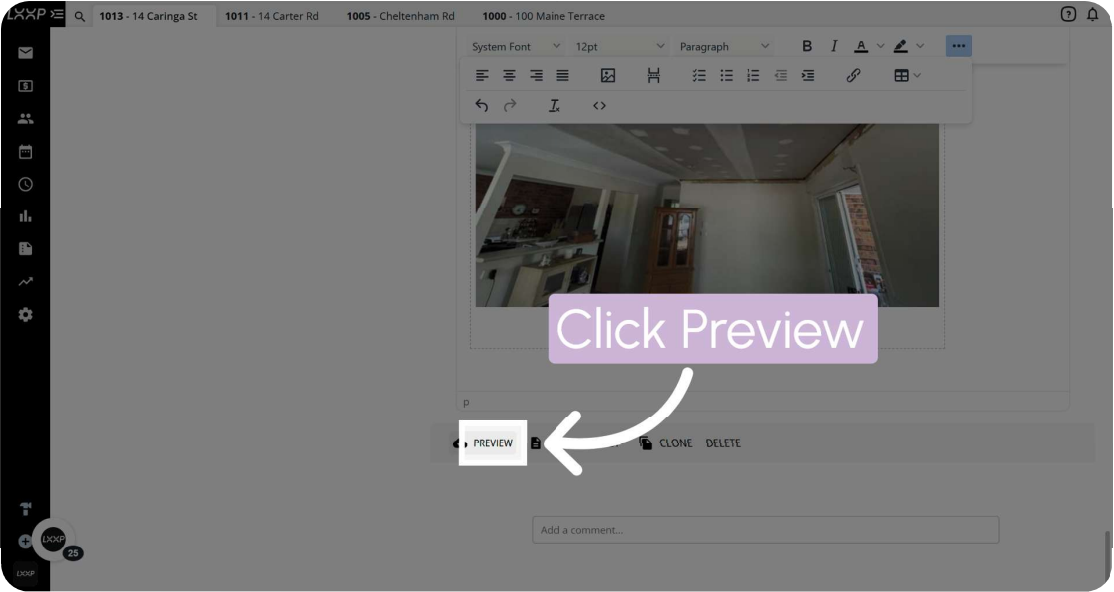
Step 19: Preview the Form
Click Preview to review the form before finalising.
Details:
- Preview is the first option in the bar at the bottom of the form
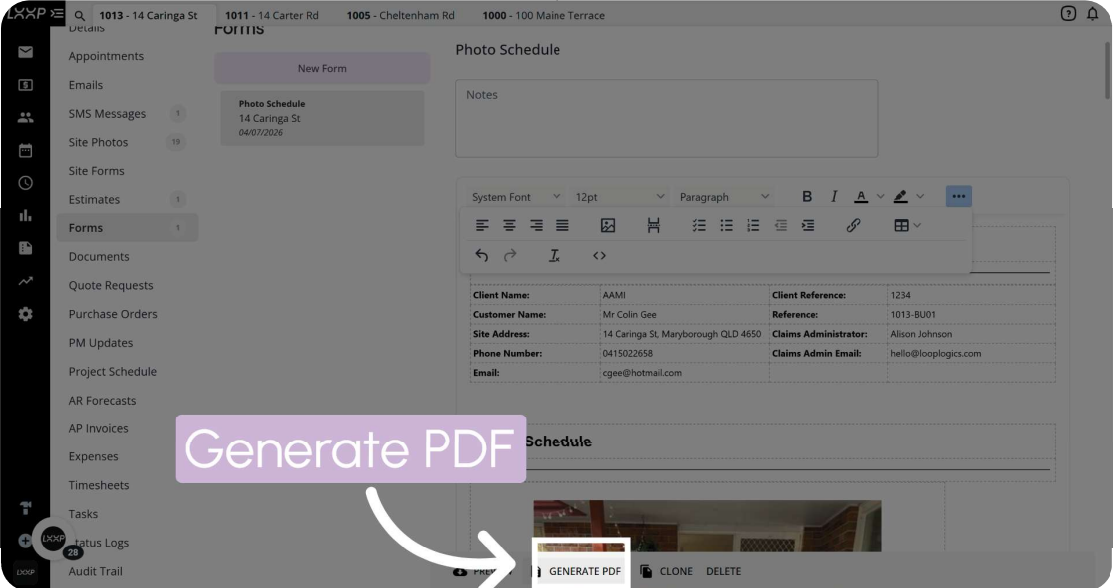
Step 20: Generate the PDF
Click Generate PDF to create the completed photo schedule.
Details:
- The photo schedule is now available in your Documents folder
Summary
Key Site Photos Steps:
Uploading Photos:
- Open the job module, then click Site Photos and Upload Site Photos
- Drag and drop photos, or click to select them from your device
Enabling and Labelling:
- Click Enable All and Save, or click individual images to enable them
- Type a label in the field under each image, then click Save
Creating the Photo Schedule:
- Open Forms, click New Form and select Photo Schedule
- Place your cursor, open the menu, click the photo icon and select your images
- Choose size and column layout, click Insert Photos and Save
Finishing:
- Click Preview, then Generate PDF
- Find the photo schedule in your Documents folder
Key Points to Remember:
- Photos appear greyed out until they are enabled
- Save after enabling and after labelling
- You can show descriptions with the photos in the layout step
👇Recap
- You've learned how to upload, enable and label site photos on a job
- You've learned how to build a Photo Schedule form and insert selected photos
- You've learned how to preview and generate the PDF, then find it in Documents
🙅♂️Common mistakes to avoid: Leaving photos greyed out because they were not enabled, or forgetting to click Save after enabling or labelling.
🏆What good looks like: Photos are enabled and labelled, and the finished photo schedule is sitting in the job's Documents folder.
FAQ
Why are my photos greyed out? The recording shows images appear greyed out until they are enabled, using Enable All or by selecting each image, then saving.
Can I choose which photos go in the schedule? Yes, in the Select Photos window you click each image you want to show, then click Next.
What layout options are there? You can choose Normal or Small for size, Single Column or Double Column for layout, and show descriptions.
Where is the finished photo schedule? It is available in the job's Documents folder after you click Generate PDF.
What do the icons that appear when hovering over an image do? This recording didn't explain them.
❓ Need Help?
If you have questions or need assistance, use the chat box in the bottom-right corner to contact the Loop Logics support team or email support@looplogics.com
👉 Continue your learning, next step is to move onto Module 5: Project Supervisor - Upload Documents to continue.