.png)
Module 4: Project Coordinator - Upload and Manage Site Photos
💡This article covers how to upload site photos to a job, enable and label them, and then generate a PDF photo schedule from a form template, so the right photos end up labelled and included in the right document.
Step 1: Open the Job Module
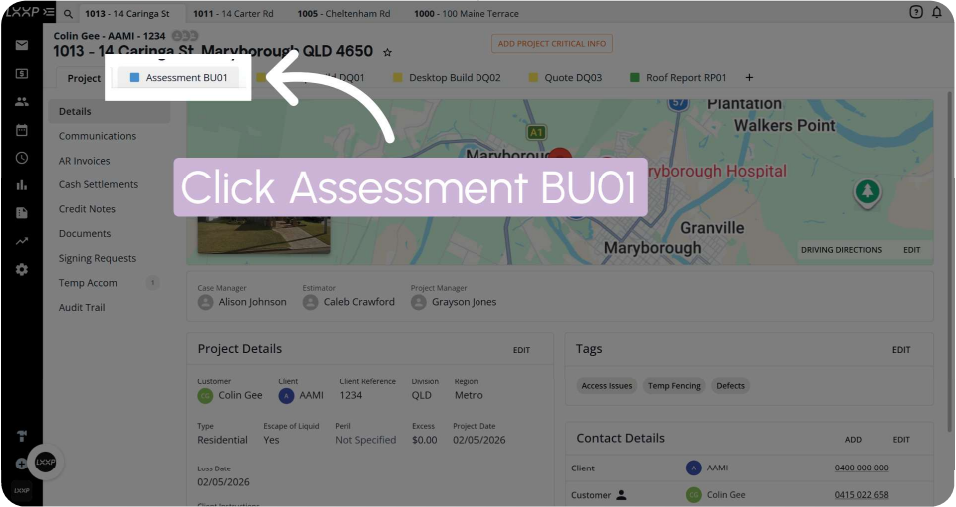
Click the module tab for the job you're working on (for example, Assessment BU01).
Details:
- A job can have several modules open at once, shown as tabs along the top
- Each module keeps its own set of Site Photos, Forms, and Documents
Step 2: Open Site Photos and Start an Upload
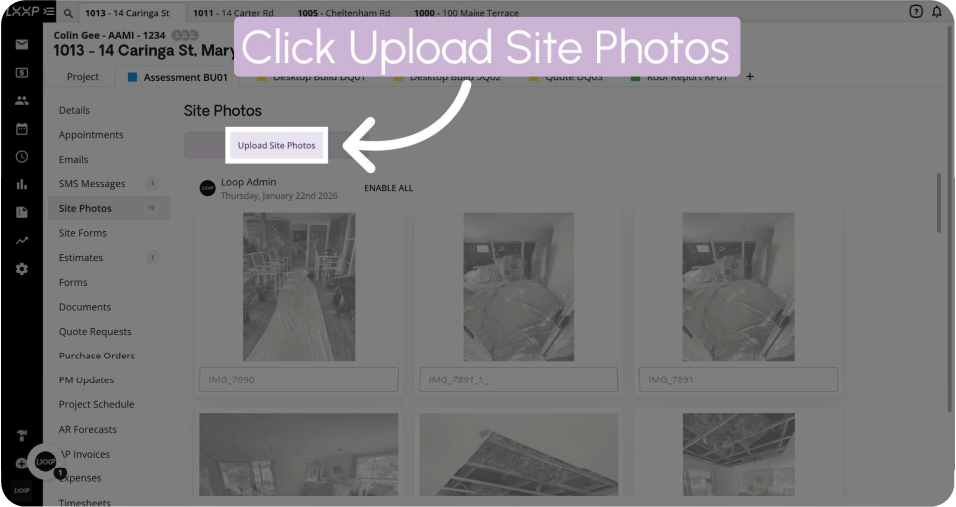
In the module's left-hand menu, click Site Photos, then click Upload Site Photos.
Details:
- Sits among the module's other sections, alongside Site Forms, Estimates, and Documents
- The number next to Site Photos in the menu reflects how many photos are already on the job
Step 3: Select Photos to Upload
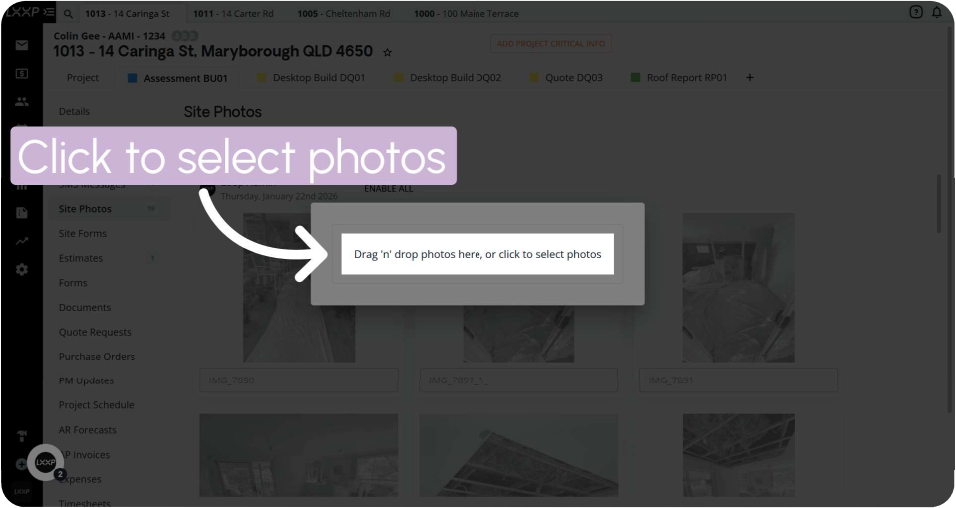
Click "Drag 'n' drop photos here, or click to select photos" and choose the images from your device.
Details:
- Newly uploaded photos appear greyed out until they're enabled
- Photos are grouped by the date and person who uploaded them (for example, "Loop Admin, Thursday, January 22nd 2026")
Step 4: Enable the Photos
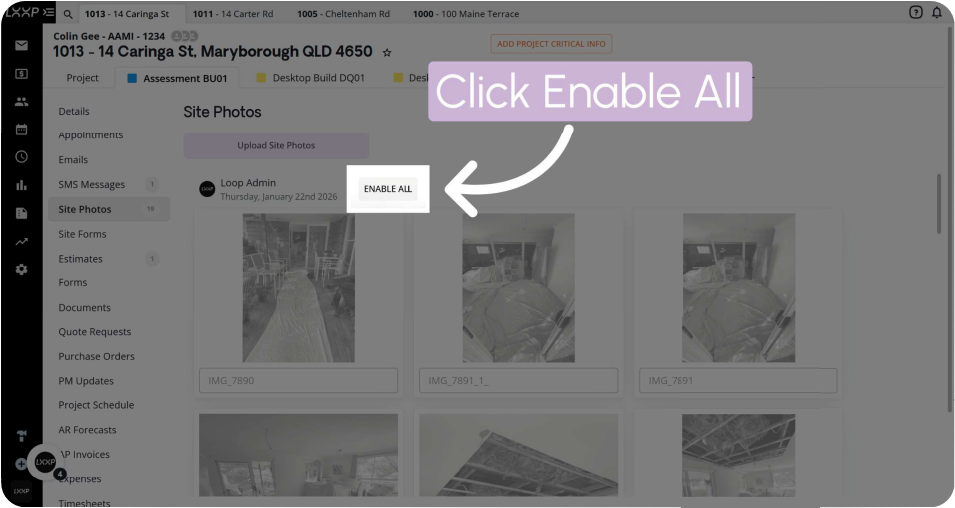
Click Enable All to activate every photo in the batch, then click Save.
Details:
- Enabled photos display in full colour; disabled ones stay greyed out
- Disable All appears in the same spot once photos are enabled, letting you reverse the action if needed
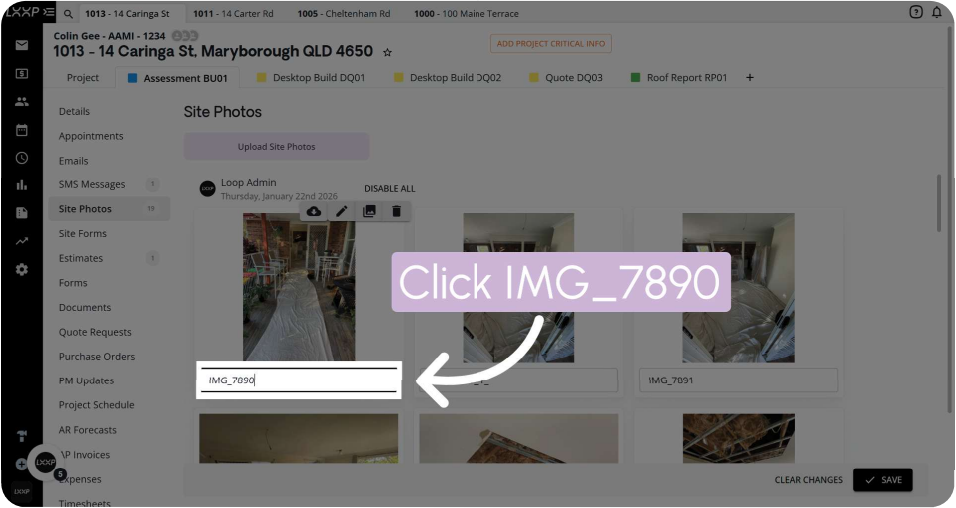
Step 5: Label Individual Photos
Click a photo to select it, then click its label field (shown as "Label Image" or the existing filename) and type a description.
Details:
- A selected photo displays in colour so you can see exactly which one you're labelling
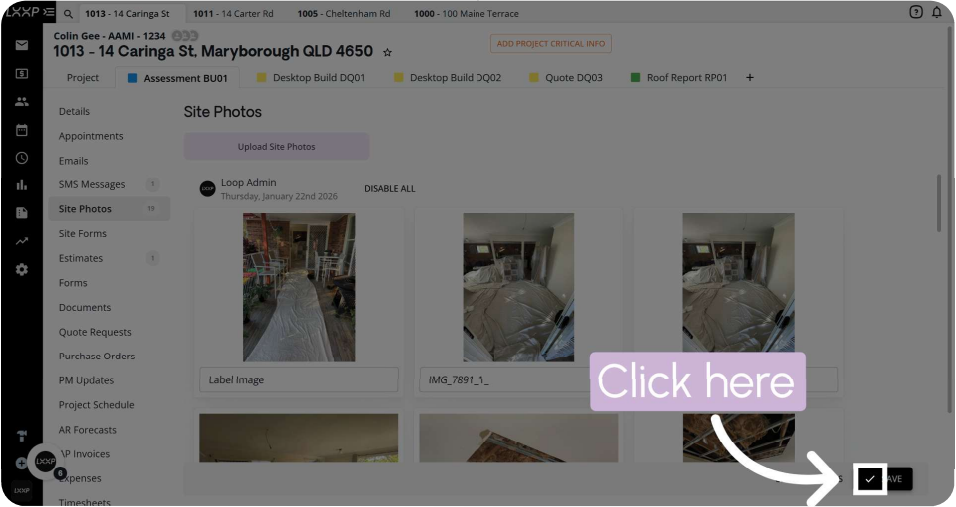
- Click the checkmark/save icon to confirm your changes
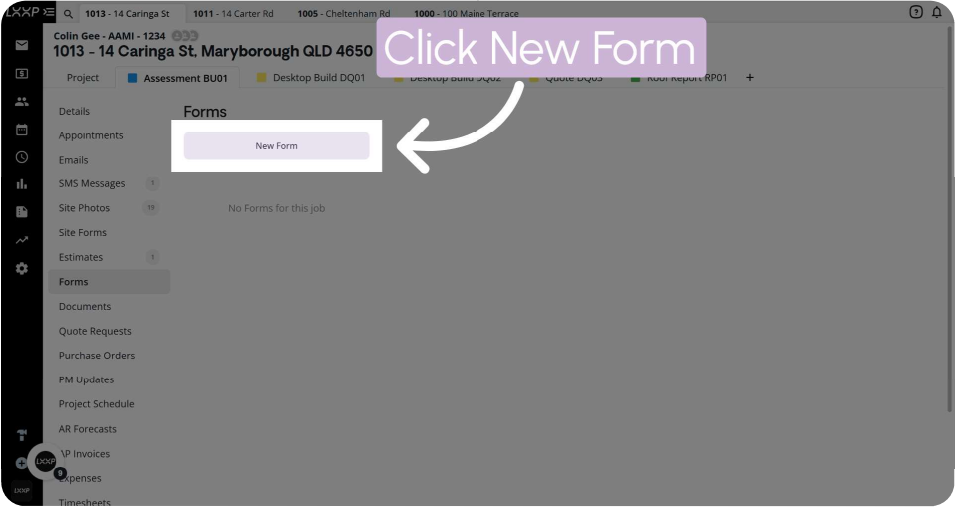
Step 6: Open Forms and Start a New Form
Click Forms in the left-hand menu, then click New Form.
Details:
- If no forms exist yet for the job, the screen shows "No Forms for this job"
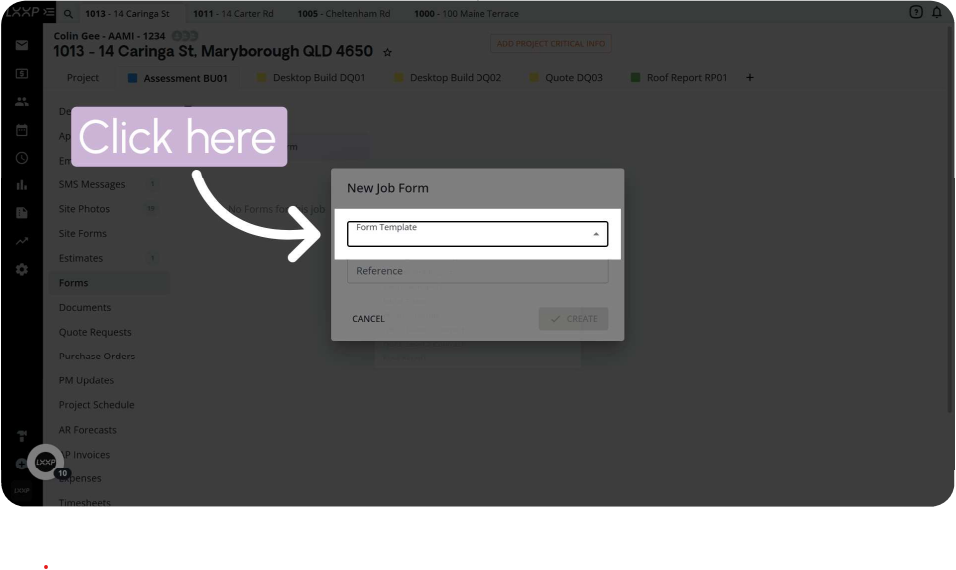
- Opens the New Job Form dialog with a Form Template field and a Reference field
Step 7: Select the Photo Schedule Template
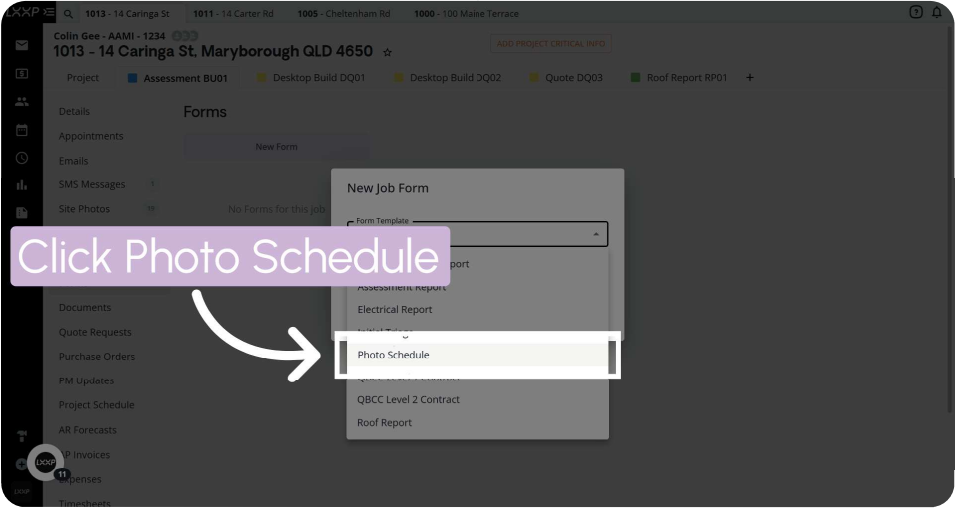
Click the Form Template field, then select Photo Schedule from the list.
Details:
- Other templates available in this list include Assessment Report, Electrical Report, Initial Triage, QBCC Level 1 Contract, QBCC Level 2 Contract, and Roof Report
- Click Create to generate the new form
Step 8: Add Images to the Form
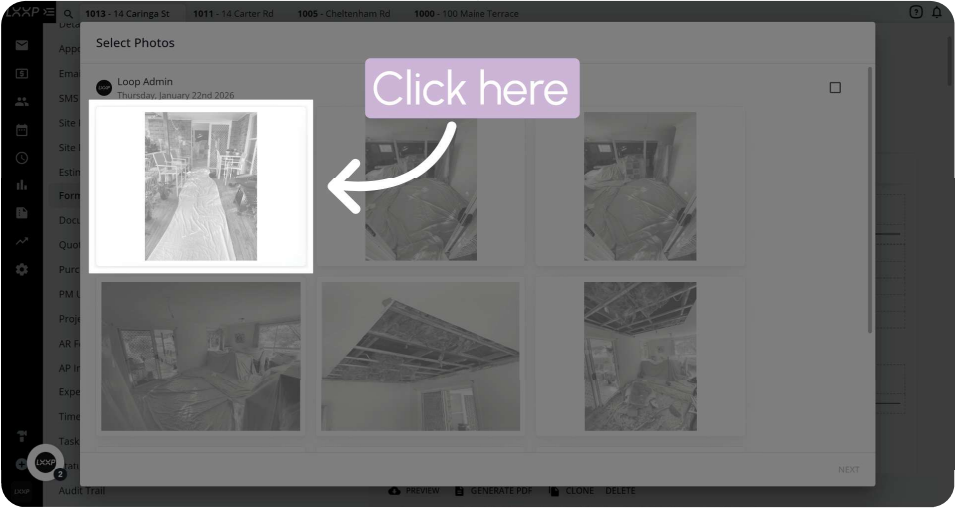
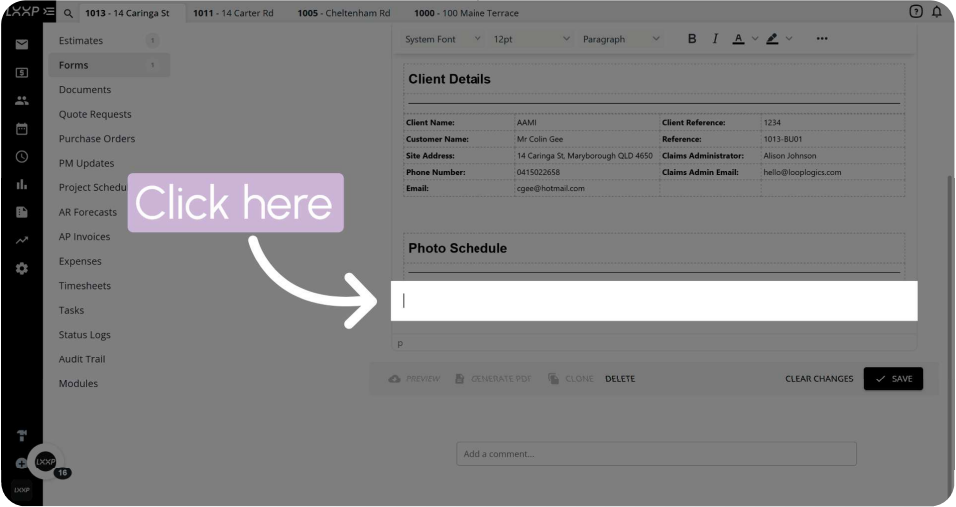
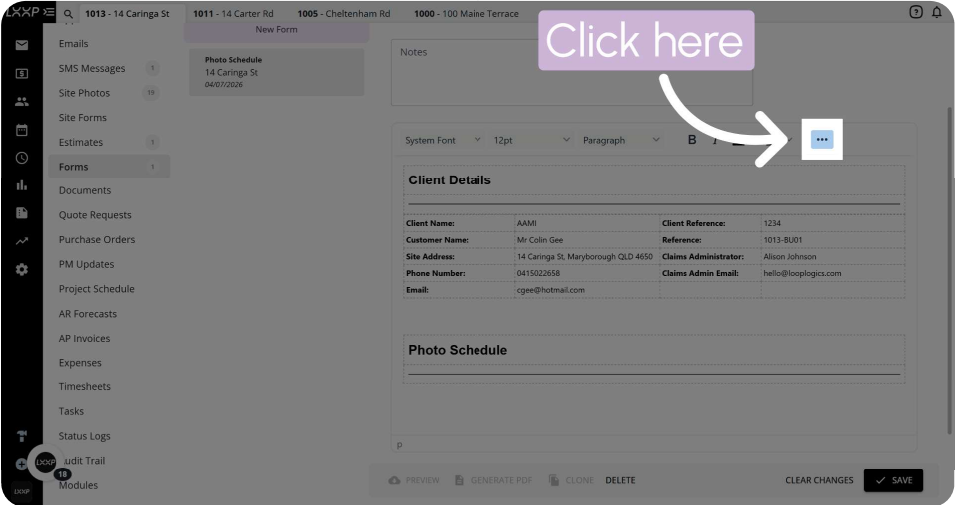
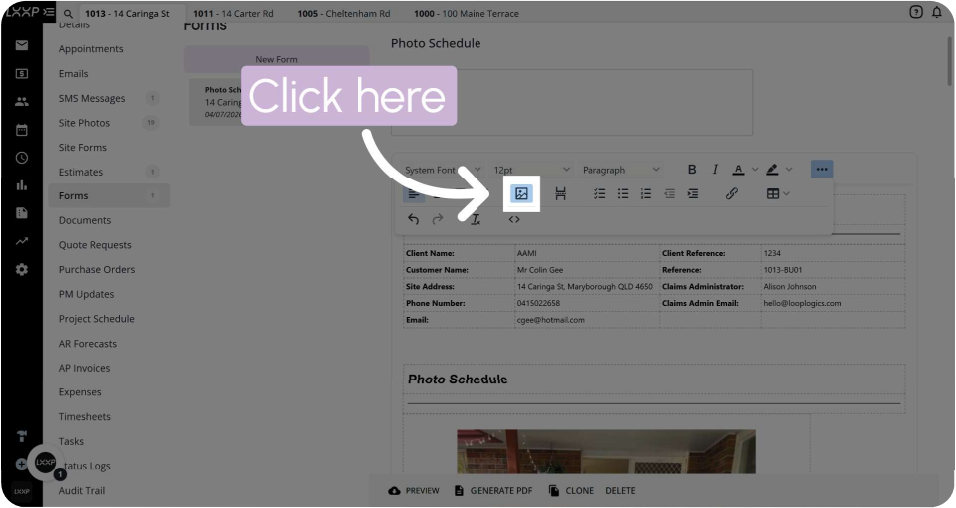
Position your cursor in the Photo Schedule section, click the image icon in the toolbar, then click the photo tab to link to the job's site photos.
Details:
- The image icon sits alongside text formatting options in the form's editing toolbar
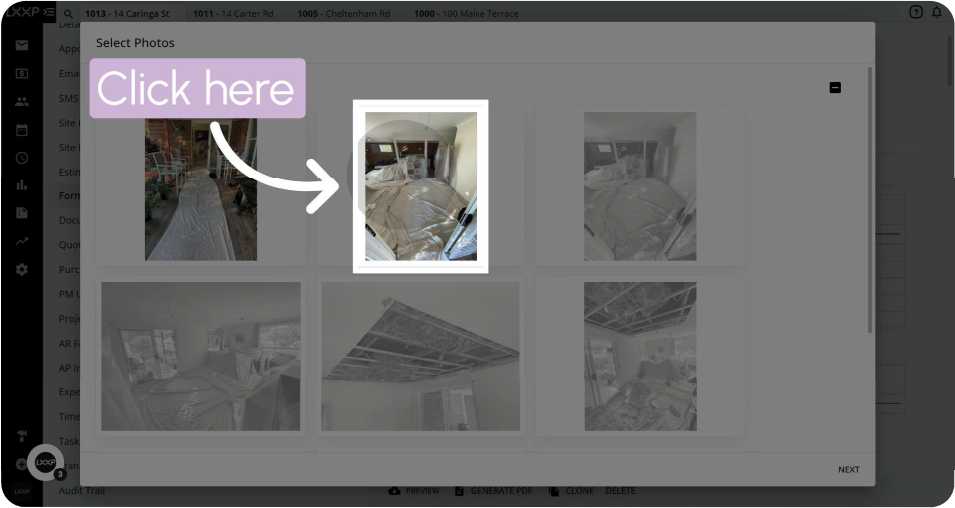
- Opens a selection screen listing the site photos already uploaded and enabled on the job
Step 9: Select Images and Configure the Layout
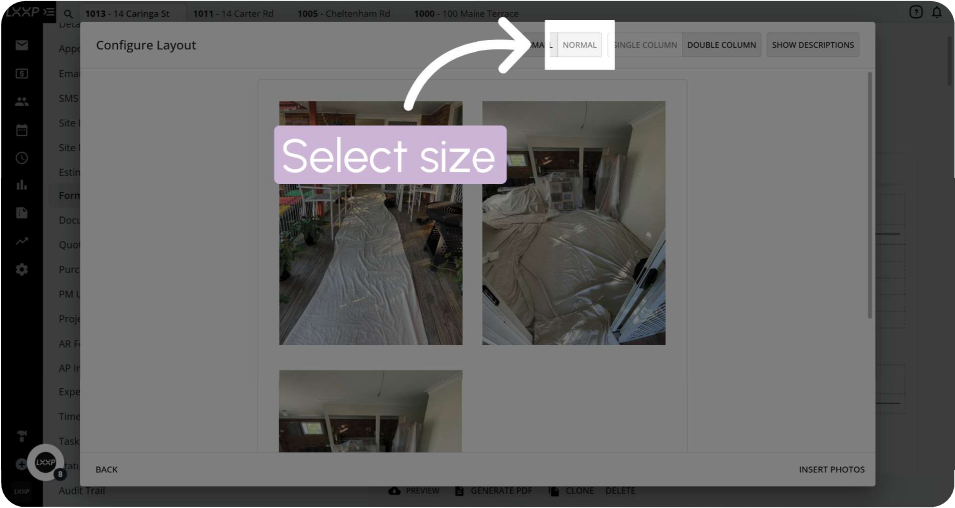
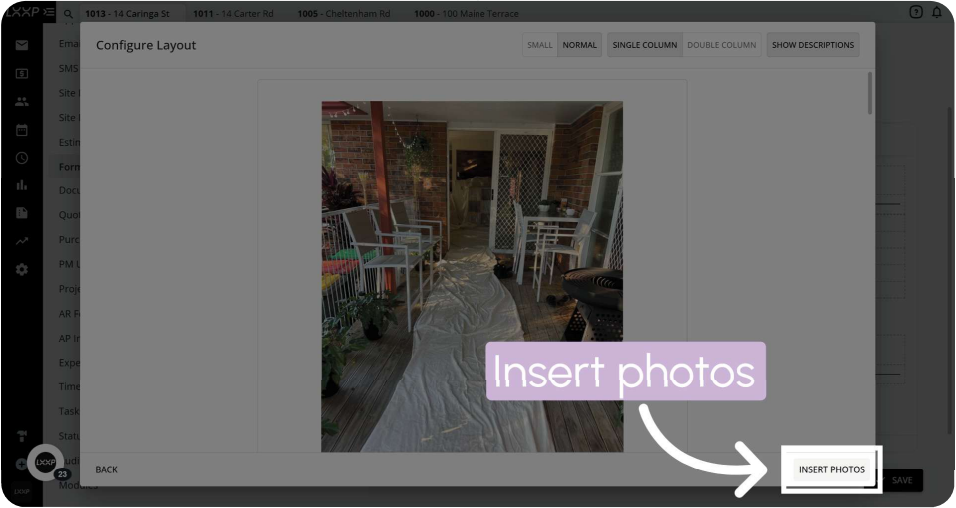
Tick the photos you want to include, then choose a size (Small or Normal) and column layout (Single Column or Double Column), with the option to Show Descriptions.
Details:
- Selected photos preview in the layout exactly as they'll appear in the final document
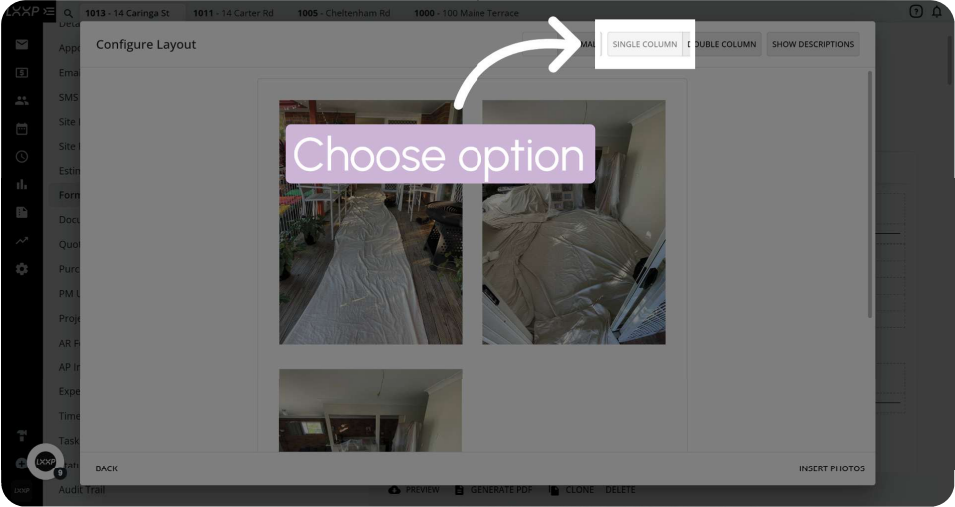
- Click Insert Photos once you're happy with the layout
Step 10: Save and Generate the PDF
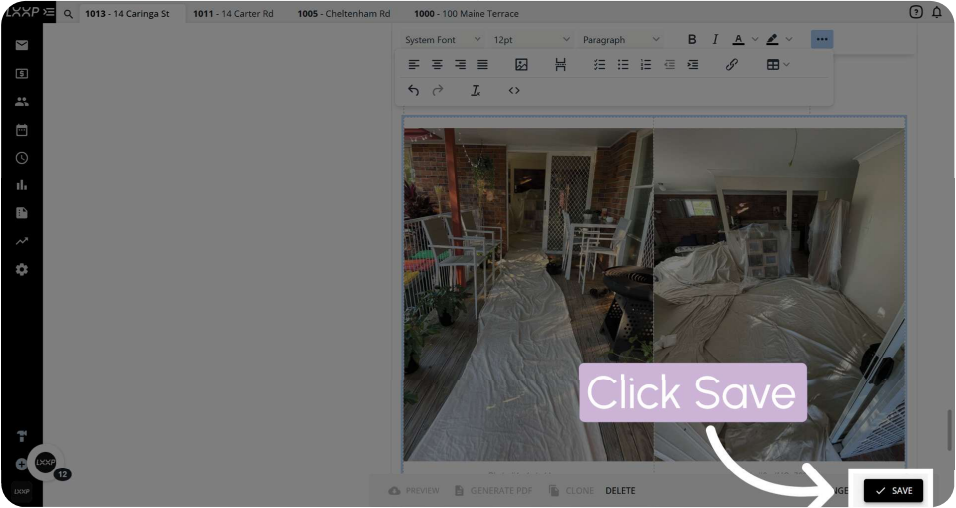
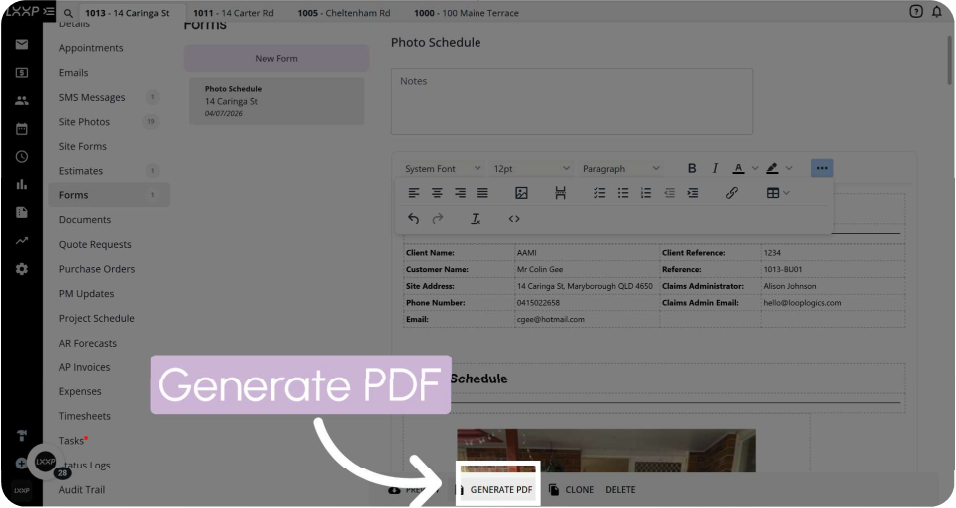
Click Save to confirm the form's changes, then click Generate PDF.
Details:
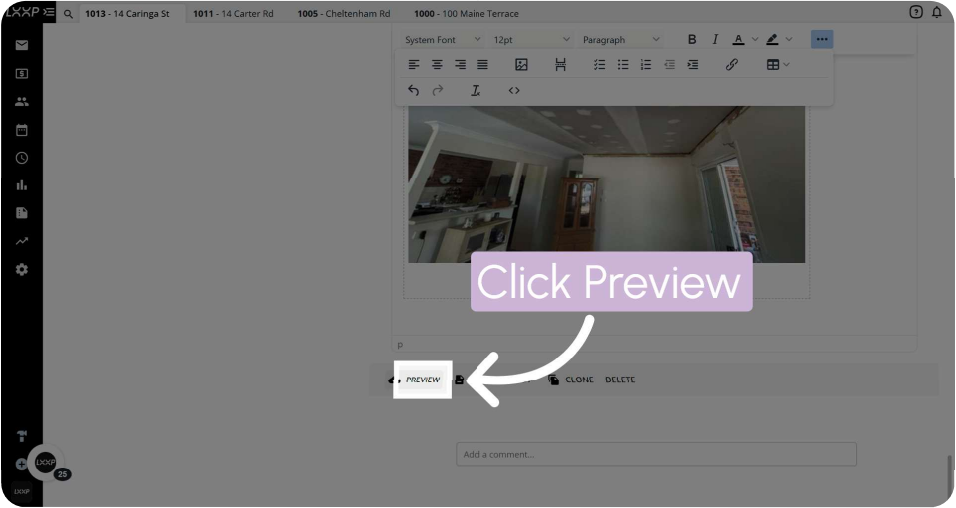
- Other options on the form's toolbar include Preview, Clone, and Delete
- The completed photo schedule becomes available in the job's Documents folder
Summary
Key Site Photos Steps:
Uploading and Enabling:
- Open Site Photos in the module, then Upload Site Photos and select your images
-
Click Enable All and Save to activate the uploaded batch
Labelling:
-
Click a photo to select it, then edit its label and save
Building the Photo Schedule:
- Open Forms, start a New Form, and choose the Photo Schedule template
- Add images, select them, configure the size and layout, and Insert Photos
-
Save the form, then Generate PDF
Key Points to Remember:
- Photos stay greyed out until enabled — Enable All and Save activates the whole batch at once
- The Photo Schedule template pulls directly from the job's enabled site photos, so labelling and enabling comes first
- Layout options like size, columns, and descriptions are all set before the photos are inserted into the form
👇Recap
- You've learned how to upload and enable a batch of site photos for a job.
- You've labelled individual photos and created a new Photo Schedule form.
- You've selected photos, configured the layout, and generated the completed PDF.
🙅♂️Common mistakes to avoid: uploading photos but forgetting to Enable All and Save, which leaves them greyed out and unavailable to insert into a form.
🏆 What good looks like: labelling photos clearly as soon as they're uploaded, so building the Photo Schedule later is just a matter of selecting the right ones.
FAQ
Where do I upload site photos for a job? Open the job's module, click Site Photos in the left-hand menu, then click Upload Site Photos.
Why are my newly uploaded photos greyed out? They need to be enabled first. Click Enable All, then Save, to activate them.
How do I get my site photos into a document? Create a New Form using the Photo Schedule template under Forms, insert the photos you want, then Generate PDF.
Can I choose how many photos appear per row in the Photo Schedule? Yes, the Configure Layout screen lets you choose Single Column or Double Column, along with Small or Normal sizing.
❓ Need Help?
If you have questions or need assistance, use the chat box in the bottom-right corner to contact the Loop Logics support team or email support@looplogics.com
👉 Continue your learning, next step is to move onto Module 5: Project Coordinator - Communication Management